I remember the day I finally unboxed my 85-inch TV, excited to transform my living room into a cinematic sanctuary. But as I looked at that massive screen, I realized something was missing—how to keep it hidden when not in use without sacrificing style or creating clutter. My first instinct was to throw a cover over it, but that just felt amateurish and clunky. I wanted sleek, seamless solutions that would make my entertainment setup look intentional, not thrown together.
Why Hiding Your Large TV Matters More Than Ever
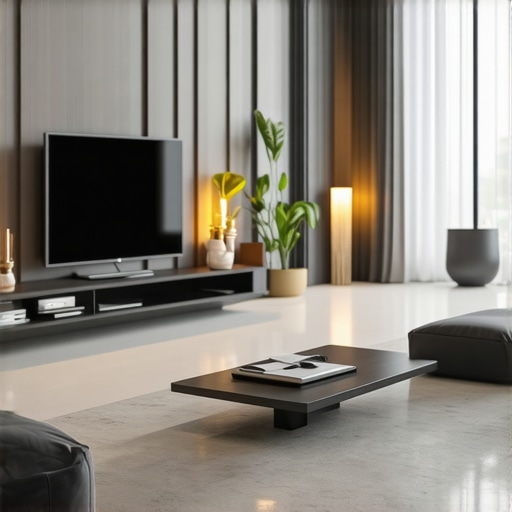
In today’s homes, space is at a premium, and aesthetics often take precedence. An expansive TV is a statement piece, but when left exposed, it can dominate the room or clash with your decor. A solution that allows you to hide your 85-inch screen effortlessly—yet access it when needed—can make a significant difference in your home’s ambiance.
Enter the revolutionary 2026 built-in slide systems. These seamless, sleek mechanisms transform your entertainment area by providing hidden compartments that retract or slide away smoothly. No more bulky cabinets or awkward covers; just pure elegance and function combined.
From my experience, investing in a bespoke built-in slide solution isn’t just about hiding the TV—it’s about elevating your space’s overall functionality. Such systems are designed to blend perfectly with your existing decor, giving your room a clean, uncluttered look while keeping everything accessible at the press of a button.
But I also learned that rushing into installation without proper planning can lead to mistakes. Early on, I overlooked the importance of proper wall reinforcement, which resulted in shaky slides and a less-than-perfect finish. Trust me, doing your homework is crucial before diving into a project like this. If you’re considering a similar upgrade, I recommend consulting detailed guides and expert advice to ensure your setup is both beautiful and durable.
Ready to Dive into Seamless TV Hiding Solutions?
If you’re tired of your enormous screen calling attention to itself and want a sophisticated way to conceal it, you’re in the right place. Over the next sections, I’ll share three tested methods to hide your 85-inch TV using 2026 built-in slides. These ideas are practical, stylish, and, best of all, achievable with some guidance. So, let’s explore how to turn your living room into a sleek, clutter-free haven, starting today.
Is Installing Seamless Built-in Slides Worth the Hassle?
One common worry I hear is whether these high-tech solutions are really worth the investment. Honestly, I made this mistake early on—assuming that a simple cover or a standard cabinet would do the trick. But the aesthetic and convenience of innovative storage solutions in 2026 are game-changers that justify the effort and cost. In the end, the seamless experience and the sophisticated look make it well worth it—once you plan carefully, of course. Ready to get started? Let’s dive into the best ways to keep your entertainment area spotless and stylish.
Prepare Your Space Before Installation
Clear the area around your existing setup and measure your wall carefully. When I did this in my living room, I used a tape measure and a level to mark the exact dimensions for the built-in frame. This initial step prevents misalignments and ensures a perfect fit. Remove any obstructions or fragile decor that might interfere with mounting. Use painter’s tape to outline the area, so you have a visual guide during assembly. This way, you can plan a clean installation without surprises.
Reinforce the Wall for Heavy Loads
Since 85-inch TVs and sliding mechanisms are heavy, wall reinforcement is crucial. I borrowed a stud finder and identified wall studs, then added steel brackets for extra support. This process is similar to installing a heavy mirror—you need a solid anchor to prevent wobbling or damage. For drywall-only spaces, consider installing a mounting board behind the drywall to distribute weight evenly. Investing time in reinforcement saves headaches later and contributes to a durable, seamless system.
Assemble the Built-In Slide Mechanism
Follow the manufacturer’s instructions meticulously. I laid out all components on the floor, sorted by size. Using a drill and screwdriver, I assembled the tracks and sliding panels step-by-step. Think of this like building a custom shelf—precision matters. Secure the tracks firmly to the reinforced wall, ensuring they’re level. During my first attempt, I missed a few screws, resulting in slight unevenness. Double-check all connections before proceeding, as this foundation affects the entire system’s smoothness.
Integrate the Cabinet or Panel System
Attach the cabinet face or panel to the sliding mechanism, ensuring it moves smoothly. I temporarily held the panel with clamps to test movement. If the panel drags or wobbles, adjust the track positioning or tighten screws. It’s similar to aligning sliding doors; perfect alignment guarantees effortless operation. I discovered that adding lubricants to the track helped reduce friction, making sliding seamless. Test multiple times, making minute adjustments for a flush, unobtrusive look.
Camouflage the Hiding System with Decor
Finally, hide the mechanism behind a decorative panel or wall overlay that matches your room’s decor. During my install, I painted the panel to blend with the wall color, creating an illusion of built-in furniture. This step transforms the mechanism from a technical feature into an aesthetic statement. To ensure safety and aesthetics, I sealed the edges with caulk and used magnetic catches for easy access. The goal is a space where the TV disappears effortlessly, and the hidden mechanism remains invisible to guests.
Test and Tweak for Perfect Operation
Run the system multiple times to confirm smooth slides and secure locking when closed. I tested opening and closing the panel throughout the day, making small adjustments to align everything perfectly. If the slide feels stiff, check for obstructions or loose screws; if it’s too loose, tighten the mechanisms. Proper testing prevents future damage and guarantees a sleek, professional finish. Remember, patience during this step pays off with a flawless hidden TV setup that feels like a bespoke piece of furniture.
By following these concrete steps, you’ll turn your large TV into a discreet part of your home, combining functionality with style. For more detailed guidance on custom-built solutions and innovative storage ideas, explore built-in storage ideas and creative built-ins. Proper planning, reinforcement, assembly, and finishing are the keys to a seamless, hidden entertainment area that elevates your home’s design.When it comes to incorporating storage solutions and built-in furniture into your home, many people believe that straightforward measurements and basic DIY skills are all that’s needed. However, as an expert in custom cabinetry and seamless integrations, I can tell you that underestimating the nuances often leads to costly mistakes and aesthetic compromises. For instance, a widespread myth is that a simple sketch and a trip to the hardware store are enough to create perfect built-ins. In reality, precision, planning, and understanding architectural subtleties can make or break your project.
What Do Most People Overlook When Planning Built-ins or Vanities?
One common oversight involves wall irregularities. Walls are rarely perfectly straight or level, yet many DIYers assume that standard measurements suffice. This leads to gaps, misalignments, and uneven finishes, especially in tight corners. Advanced homeowners who neglect to scribe their cabinetry to uneven surfaces risk creating glaring imperfections that ruin the overall look. Incorporating techniques like wall scribing, which I recommend learning from detailed guides, can save a project from looking amateurish and ensure a seamless fit.
Another overlooked detail is the load-bearing capacity of walls. Installing heavy built-ins or floating vanities without reinforcing the structure can lead to sagging, disconnects, or even damage over time. This is particularly true in older homes with compromised drywall or weak framing. Experts suggest using steel brackets, additional framing, or wall anchors designed for heavy loads. Recognizing and addressing these nuances early prevents future costly repairs and safety hazards.
Many assume that all storage solutions are created equal, but the choice of hardware and mechanisms significantly influences durability and ease of use. For example, soft-close hinges, steel braces, or concealed slides may seem like minor details but are critical for high-end, long-lasting installations. Overlooking these can lead to noisy, wobbly, or prematurely failing furniture. To avoid this, I advise investing in quality components and following expert installation guides.
In the realm of technical installation, understanding wall composition is crucial. Installing floating vanities on drywall alone, for instance, is a surefire way to invite instability. Upgrading to mounted steel supports, or embedding brackets within the wall studs, ensures maximum stability—especially for heavier materials like quartz or stone. Learning techniques such as steel mounting or wall reinforcement can be found in my detailed [vanity installation guides](https://customcabinetrypro.com/step-by-step-guide-to-vanity-installation-for-beginners).
Finally, patience and precision are often underestimated. Rushing through measurements or neglecting to double-check alignments can compound small errors into big problems. Advanced installers use laser levels, scribing tools, and detailed planning to execute flawless finishes. This is far from a trivial step; it’s the secret to high-end, seamless integration that elevates your entire space.
Would you like to learn more about mastering these technical nuances? Check out my comprehensive guide on [custom-built-in cabinets](https://customcabinetrypro.com/built-in-storage-ideas-to-declutter-and-enhance-your-home) and ensure your next project hits perfection. Remember, it’s these details that distinguish a professional finish from a DIY misstep. Have you ever fallen into this trap? Let me know in the comments.
To ensure your built-ins, vanities, and sliding mechanisms continue performing flawlessly, regular maintenance and using the right tools are essential. My preferred approach is employing high-quality, specialized tools and staying proactive. For instance, I always keep a set of precision screwdrivers, a magnetic level, and a lightweight cordless drill on hand. These tools allow me to make quick adjustments, tighten loose components, and verify alignments without disrupting the aesthetic. Additionally, I rely on lubricants like silicone spray for sliding parts, which prevents squeaking and ensures smooth operation over the years.
When it comes to software, I utilize design programs like SketchUp to simulate modifications before physically adjusting anything. This step is invaluable for planning updates or scaling projects, especially when considering future expansions. Visualization helps avoid costly rework and ensures compatibility with existing structures. In the future, I believe AI-powered diagnostic tools might assist homeowners in identifying wear and tear early, prompting timely intervention.
How do I maintain installed vanities and built-ins over time?
Performing periodic inspections is the cornerstone. Every six months, I check for loose screws—tightening soft-close hinges or slide rails as needed. I also examine seals, especially around vanities, to prevent water damage, and touch up paint or finishes to keep everything looking pristine. For sliding mechanisms, removing debris with a gentle brush coupled with lubricants can extend their lifespan significantly. Incorporating these simple routines into your maintenance schedule will help your solutions stay sleek and functional for years.
For more complex fixes or scaling your storage, consider consulting resources like built-in storage ideas that guide you through upgrading or expanding your systems efficiently. Remember, a little proactive care—paired with quality tools—goes a long way in preserving the elegance and functionality of your investment. Don’t hesitate to try out one of these maintenance techniques today; it’s the best way to enjoy your personalized space long-term.
The Hidden Costs of Overconfidence in DIY Built-ins
I learned early that assuming precision isn’t necessary often leads to costly mistakes. Underestimating wall irregularities and rushing measurements caused misalignments in my first projects, forcing rework and frustration. Patience, detailed planning, and measuring multiple times proved essential to achieving that sleek, seamless look I aimed for. Trust me, taking time on foundational steps saves double the effort later.
Less Is More When Concealing Large Technology
Initially, I thought elaborate mechanisms or bulky cabinetry were the only ways to hide an 85-inch TV. But I discovered that minimalist, well-integrated solutions—like tailored built-in slides—are far more elegant and space-efficient. Prioritizing clean lines and matching finishes transforms a practical necessity into a feature that elevates your entire room’s aesthetic. The key is thoughtful design, not clunky solutions.
Let Real Experts Guide Your Custom Creations
Throughout my journey, consulting authoritative resources and experienced craftsmen made a world of difference. Tools like step-by-step guides and reputable suppliers ensured my projects were not just beautiful but durable. When in doubt, leaning on expert knowledge prevents costly errors and ensures your built-ins stand the test of time. Remember, investing in quality advice is an investment in peace of mind.
Unearthing Surprising Space-Saving Ideas
One of the most rewarding discoveries was how small tweaks—like hidden compartments behind decorative panels or clever corner integrations—maximize storage without cluttering the room. Thinking outside traditional configurations allowed me to create truly personalized solutions, turning awkward spaces into functional showpieces. These unexpected touches make all the difference in transforming a space into a seamless home upgrade.
Seize the Moment to Make Home Better
Now that you’ve glimpsed the potential of hidden storage and sleek built-ins, it’s your turn to act. Embrace the challenge with confidence—start small, plan meticulously, and don’t shy away from seeking expert guidance. Every successful project not only improves your space but also boosts your confidence in tackling future upgrades. Remember, the secret to a clutter-free home lies in thoughtful design and a proactive mindset. Ready to embark on your own transformation? Share your plans or questions below—let’s build beautiful, functional spaces together.
Related Posts

7 Stealth Vents for 2026 Integrated Living Room Tech Cabinets
Have you ever installed a sleek living room cabinet only…
4 Tech-Ready Hacks for Living Room Built-ins in 2026
Have you ever stood in your living room, surrounded by…

Revamp Your Home with Expert Built-ins & Storage Solutions in 2025
It was a typical Sunday afternoon when I realized my…