

I remember the gut-sinking feeling of seeing my favorite media console—the centerpiece of my living room—slowly bowing in the middle like a tired old bridge. My 75-inch television was essentially turning my high-end furniture into a topographical map of a valley. I made a huge mistake early on by simply trying to drive longer screws into the back panel, thinking tension alone would fix it. It didn’t. It just stripped the wood and left me with a bigger mess. Today, I’m going to show you exactly how to use four specific steel brackets to provide the structural backbone your furniture desperately needs. Whether you are dealing with custom built-in solutions or a standalone piece, these fixes are permanent.
Is adding steel hardware actually worth the trouble?
I get it; you’re worried about ruining the finish or spending a Saturday on a ‘maybe’ fix. But consider this: wood doesn’t just spring back on its own. According to the USDA Forest Products Laboratory, long-term loading leads to ‘creep,’ where wood fibers permanently deform. Without a rigid intervention, that sag will eventually lead to a total structural failure. These brackets aren’t just a band-aid; they are an architectural upgrade for your furniture.
Stop the Middle-Age Spread of Your Media Console
The primary culprit for a drooping unit is almost always an unsupported span. When the distance between the legs is too great, gravity becomes a relentless foe. I’ve seen this countless times where particle board shelves sag because they lack the internal fiber strength to resist bending. If your cabinet doors have started to rub at the top or your drawers feel like they are dragging, the frame itself is likely out of square due to the weight. Have you noticed a slight dip in your console that’s making your electronics sit at an awkward angle? Before you look into a hidden support beam for massive living room units, let’s talk about the specific steel reinforcements that act like a corset for your cabinetry, much like the structural fix for floor-to-ceiling library units professionals use.
Empty the Unit to Let the Wood Relax
Before you even touch a screwdriver, you have to get the weight off. Think of your console like a person with a heavy backpack; you cannot fix their posture until they take the load off. I once tried to ‘jack up’ a console while the 75-inch screen was still on top, and I nearly cracked the veneer when the pressure shifted. Unload everything—the receiver, the books, and the TV. If the sag is severe, you might even need to flip the unit upside down for a few days to let gravity help reverse the ‘creep.’ This is a common requirement when you want to stop particle board shelves from sagging permanently and return the fibers to their original state.
Why Steel C-Channels Beat Wooden Cleats Every Time
The secret weapon in my kit is the steel C-channel. Unlike a wooden cleat, which can eventually bow itself under the weight of a heavy marble top or massive media gear, a C-channel is essentially unbendable. You are going to bolt these directly to the underside of the main span. This is the same principle behind why bench tops warp and the steel c-channel fix is so effective in high-end woodworking. It acts like a rigid spine, forcing the wood to stay flat regardless of the load. If you have an extra-wide unit, you might even consider the steel gusset fix for large built-in desks to reinforce the vertical-to-horizontal joints that usually pull apart first.
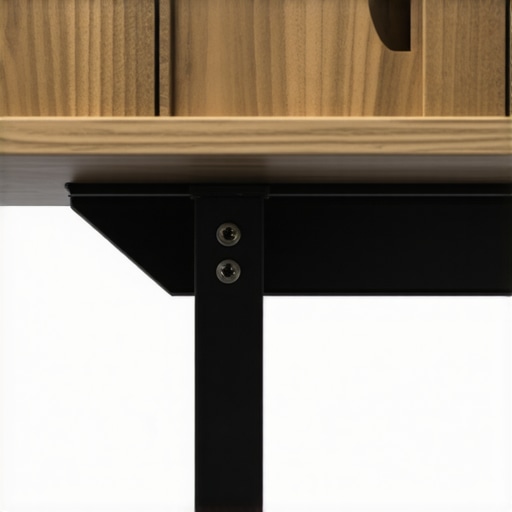
Secure Your Mounting Points into Solid Meat
When I was fixing a massive oak media wall last summer, I made the mistake of using screws that were too short because I was terrified of poking through the top surface. Halfway through the job, I realized the brackets weren’t actually pulling the wood flat; they were just hanging there as decoration. You need to use the thickest part of the frame, usually the side gables or the internal dividers. If your unit is flimsy, you may need to add the hidden support beam for massive living room units inside the base where it won’t be seen. Use a depth stop on your drill bit—this is non-negotiable. If you’re working on a kitchen-adjacent area, remember that 4 steel stiffeners for long span kitchen islands provide the same industrial-grade stability you are looking for here.
Add Internal Braces for Extra-Wide Spans
If your media console spans more than five feet without a center leg, the top is destined to fail again without internal help. I like to install vertical dividers or heavy-duty steel stiffeners inside the carcass. This is very similar to the internal brace move for extra-wide pantry shelves used to prevent long runs from bowing. By transferring the weight of the TV directly down to the floor through an internal ‘pillar,’ you take the stress off the horizontal top board. This ensures your creative built-ins for seamless storage remain functional and visually sharp for years.
Level the Base Before Tightening Everything
A sag often starts at the floor, not the furniture. If your floor isn’t level, the middle of the console will naturally hunt for the lowest point, creating that dreaded dip. I always use a hidden sub-base for leveling heavy media walls on carpet if the unit is sitting on a thick pile. By getting the base perfectly level first, the steel brackets you install won’t be fighting an uphill battle. It is much like the floor bolt hack for stable island cabinetry; if the foundation is moving, the top will eventually fail. Use shims to take the tension out of the frame before you drive your final lag bolts through those steel reinforcements.
I see it in DIY forums every day: the advice to ‘just use thicker wood’ or ‘add more screws.’ But here is the contrarian truth most people hate to hear: bulkier materials often make the problem worse. When you double up on particle board to stop a sag, you are significantly increasing the dead load—the constant weight the structure has to carry even without your TV or books on it. In my experience, engineering the support is far superior to simply overbuilding the frame. I’ve watched many well-meaning homeowners accidentally pull their cabinets off the wall because they didn’t account for the shear force of the added weight. If you are struggling with a similar issue, you might want to check out why particle board shelves sag and the plywood replacement strategy that actually works.
Can you actually over-stiffen a piece of furniture?
It sounds counterintuitive, but if you make a piece too rigid without allowing for natural seasonal movement, the wood will eventually split or the fasteners will fail. According to the Architectural Woodwork Institute (AWI) standards, structural integrity is a balance of span-to-depth ratios and mechanical fastening. If you over-constrain a wide span, the wood has nowhere to go when humidity changes. This is the ‘Oops’ factor most people miss—they anchor a piece so tightly that the seasonal expansion literally shears the screw heads off. This is why I always recommend expert guide to flawless vanity installation tricks tips that allow for a bit of ‘breathing room’ in the hardware. Have you ever fallen into this trap of over-tightening everything until it snaps? Let me know in the comments.
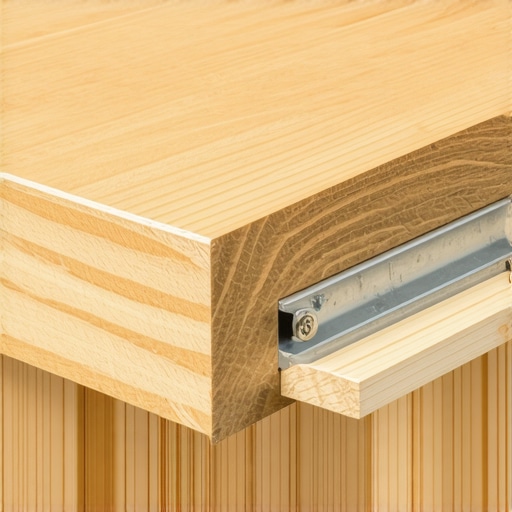
The Trap of Misplaced Fasteners in Particle Board
One of the most common mistakes is trying to use high-torque screws in low-density materials like MDF or particle board. I once spent three days repairing a built-in where the client had used lag bolts directly into the edge grain of particle board. It didn’t provide support; it acted like a wedge and split the entire gable. You have to understand why pocket screws fail in particle board and the better move, which usually involves through-bolts or specialized barrel nuts. If you are dealing with heavy stone tops, you need the internal support move for heavy stone vanities to transfer that weight directly to the floor. Without this, even the best steel brackets are just putting a band-aid on a structural hemorrhage. For those working in tighter quarters, maximizing space innovative built-in solutions for small rooms requires a blend of this heavy-duty engineering and clever design to ensure the piece doesn’t just look good, but stays level for decades. Whether you are aiming for creative built-ins for seamless storage or a simple media fix, the nuance is always in how you manage the load-bearing points.
The Precision Tools That Save My Reputation
I have learned the hard way that a standard tape measure and a ‘good enough’ spirit lead to lopsided built-ins. When I am installing heavy-duty reinforcements, I rely heavily on a self-leveling cross-line laser. It allows me to see exactly where a floor dips or a wall bows before I even start drilling. If you are aiming for an expert guide to flawless vanity installation tricks tips, precision is your best friend. I also swear by digital calipers to measure the exact thickness of a panel before choosing my screw length. A 1/16th of an inch difference is the gap between a secure fit and a ruined veneer. For those deeper projects, like when I’m trying to level mudroom benches on tile, a high-quality impact driver with a sensitive clutch is essential to avoid stripping the wood fibers in your support frame.
How can I ensure these reinforcements hold up for the next decade?
Maintenance isn’t just about dusting; it’s about monitoring the mechanical tension of your fix. Every six months, I do a ‘stress check’ on my larger pieces. I look for any new light gaps between the wall and the unit, which usually signals that a fastener is backing out. This is particularly vital if you had to stop cabinet doors from warping in humid bathrooms, as the seasonal shift in moisture can loosen even the best steel brackets. According to technical documentation from the American Wood Council (AWC) regarding span tables and deflection, wood under constant load requires periodic inspection to ensure the ‘creep’ hasn’t exceeded the structural limits of the fasteners. If you feel a shelf starting to give, don’t wait—tighten the lag bolts or add a secondary brace immediately.
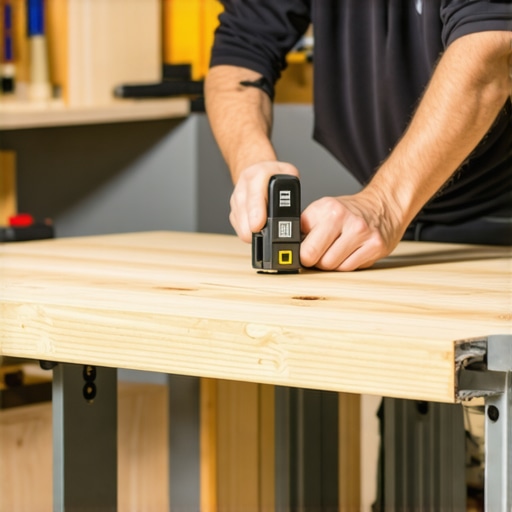
Scaling Up to Heavy Vanities and Mudrooms
Once you master the steel C-channel fix for a media console, you can apply those same principles to much larger installations. I recently used a modified version of this technique for a master bathroom renovation. When dealing with heavy countertops, you absolutely need the internal support move for heavy stone vanities to keep the cabinet from pancaking over time. It’s about creating a skeleton within the skin of the furniture. This approach also works for creative built-ins for seamless storage where you might be spanning a wide gap over a radiator or a low window. In the future, I suspect we will see more integrated ‘smart’ support kits that use tension sensors to alert homeowners when a structure is beginning to sag, but for now, your eyes and a level are the best tools you have. If you’re ready to take your DIY skills to the professional level, I challenge you to try the C-channel reinforcement on your next wide-span project—it will change the way you look at furniture longevity forever.
Lessons Bought with Striped Screws and Cracked Veneer
Looking back at my first few attempts to rescue sagging furniture, I realized that I was often treating the symptoms rather than the disease. One of the biggest myths is that you can simply ‘over-tighten’ your way out of a structural dip. In reality, force without a rigid plane just creates internal stress that eventually splits the wood. I’ve also learned that if you’re moving from a simple console to a larger project, you should definitely check out a step-by-step guide to vanity installation for beginners because the weight distribution principles are nearly identical. Another lightbulb moment came when I stopped using wood screws in particle board; instead, I started using the heavy-duty dowel strategy for wide drawer bases or through-bolts to ensure the hardware wouldn’t just pull the fibers out. Remember, steel is only as strong as its connection to the carcass.
#IMAGE_PLACEHOLDER_E#
The Tool Kit That Ensures My Braces Actually Work
I don’t leave my shop without a few specific items that make these structural fixes foolproof. First, a high-quality digital caliper is essential—I use it to measure the exact depth I can drill before I punch through the top of a $2,000 unit. Second, I rely on a laser level to ensure the unit isn’t being pulled into a twist as I tighten the brackets. If you’re working on something more complex, like the scribing trick for built-in cabinets against uneven brick, you’ll find that a good laser saves you hours of frustration. Finally, I always recommend keeping a set of steel shims on hand. They are much more reliable than cedar for taking up the slack in a heavy media wall. Using these tools ensures you achieve effortless storage solutions for a tidy stylish home that don’t just look good on day one but remain perfectly flat for a decade.
Give Your Media Console a Second Life
It is incredibly satisfying to watch a bowed, tired piece of furniture snap back into its original factory lines. By taking the time to install proper steel hardware, you aren’t just fixing a piece of wood; you’re preserving the centerpiece of your home’s social space. Don’t let a little bit of ‘creep’ convince you to throw away a perfectly good unit. Whether you’re reinforcing a shelf or building out creative built-ins for seamless storage, the logic remains the same: support the span, level the base, and trust the steel. Have you noticed a dip in your media console that’s been bothering you, or have you already tried a different reinforcement method? Let me know in the comments below.