

I’ll never forget the sound of thirty cans of organic chickpeas hitting the linoleum at two in the morning. It wasn’t just a mess; it was a personal failure. I had spent the previous weekend setting up what I thought were effortless storage solutions, only to find my ‘sturdy’ pantry shelves face-down on the floor because I trusted the wrong hardware. My biggest mistake early on? Thinking those little plastic conical anchors that come in the box were actually meant to hold weight. Spoiler: they aren’t. If you’re tired of seeing your shelves tilt or hearing that ominous ‘pop’ of drywall crumbling, I’ve got you. We’re going to dive into the heavy-duty tactics that keep your spices and flour sacks exactly where they belong.
When Your Drywall Just Can’t Handle the Pressure
Most modern homes use 1/2-inch or even thinner 3/8-inch drywall, which is basically just compressed chalk and paper. According to the Gypsum Association (which sets the standards for these materials in ASTM C1396), standard drywall is primarily a surface material, not a structural one, meaning it cannot support significant shear loads without proper anchoring. This is why your heavy pantry shelves might shake or pull away the moment you add a second bag of rice. It’s a frustrating reality for anyone trying to maximize a small kitchen or even those working on decluttering their vanity spaces. We often assume a wall is a wall, but thin drywall is more like a fragile canvas. Have you ever walked into your kitchen and noticed a tiny gap starting to form at the top of your shelving unit?
Are these anchors really worth the extra five bucks?
I know what you’re thinking—why spend more on fancy toggle bolts or specialized hardware when the shelf came with ‘perfectly good’ screws? I asked myself the same thing until I had to patch a three-inch hole in my wall. These hidden tactics aren’t just about strength; they’re about peace of mind. We are going to look at how to distribute weight across the surface area so you never have to play ‘pantry Tetris’ with your heavy appliances again.
Hit the Wood or Prepare for a Mess
Everything changes the moment you stop treating your wall like a solid block and start seeing it as a hollow shell. To get those shelves to stay put, you need to anchor into the skeleton of the house—the studs. I learned this the hard way during my first kitchen remodel when I tried to hang a heavy spice rack using only friction anchors. Three days later, I was sweeping up shattered glass and cumin. If you can’t find a stud exactly where you need it, you have to transition to mechanical leverage. If you’re working in a garage or workshop, the logic remains the same for anchoring tool cabinets to wood stud walls, but in a kitchen pantry, we have to balance that strength with a clean finish. Use a high-quality magnet to find the drywall screws; they will lead you directly to the center of your studs every single time.
Leverage the Wall with Toggle Bolts
When a stud isn’t an option, stop reaching for those plastic ribbed anchors. They are designed for pictures, not pasta. Instead, use a zinc-plated toggle bolt. Think of a toggle bolt like a mechanical hand that reaches through the wall and grips the back surface. For items like medicine cabinets, I always rely on the toggle bolt strategy for hanging heavy bathroom mirrors because it creates a sandwich effect, squeezing the drywall between the bracket and the metal wing. This distribution of weight is the only thing standing between your shelving and a total structural collapse.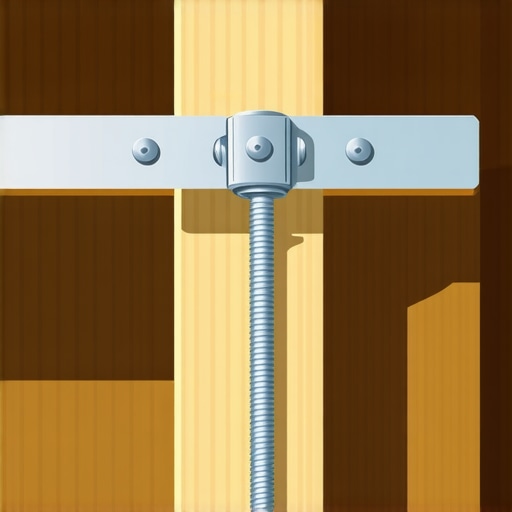
Why the Winged Anchor Beats the Plastic Plug
The science is simple: a plastic plug relies on friction against a material (gypsum) that naturally crumbles. A toggle bolt relies on the surface area of the backside of the drywall. When you tighten that bolt, you are pulling against several square inches of wall rather than a few millimeters. I’ve seen people try to bypass this by using more small anchors, but that just turns your wall into Swiss cheese. Using steel bracket fixes for heavy pantry shelves in conjunction with toggles ensures that the bracket itself doesn’t flex under the weight of your cast iron pots.
Create a Continuous Support Line
My secret weapon for any heavy-duty installation is the ledger board or ‘cleat’ method. Instead of letting the shelf hover, you install a thin strip of wood or metal along the back wall, screwed directly into every stud it crosses. This acts as a permanent ledge. I once utilized a hidden cleat move for a custom bedroom project, and it worked so well I started applying it to pantries. The cleat converts the pulling force on your screws into a downward shear force, which the wall can handle much more effectively.
Combat the Sag in Extra Wide Shelving
If your pantry shelves are wider than 30 inches, they will eventually ‘smile’—that sagging curve in the middle that makes all your cans roll toward the center. To prevent this, you need internal reinforcement. For massive library-style runs, many pros use internal steel stiffeners hidden inside the wood. If you prefer a more traditional look, a heavy duty plywood gusset tucked under the shelf can provide the vertical support needed to keep the span perfectly level even when loaded with fifty pounds of flour.
Stop Chasing Solid Wood for Every Project
Everyone tells you that ‘real wood’ is the ultimate mark of quality, but in my experience, that obsession is exactly how you end up with sticking drawers and warped cabinet faces. If you are aiming to maximize your space with custom vanities, you have to respect the science of hygroscopy. According to the Forest Products Laboratory’s Wood Handbook, solid wood can expand or contract significantly across the grain as humidity fluctuates, sometimes as much as 10% in extreme conditions. This is why for any painted built-in or high-moisture environment, I advocate for furniture-grade MDF or high-quality plywood. It’s more stable, stays flatter, and won’t lead to the heartbreak of a high-end project literally cracking apart during the first humid summer.
Don’t Let Condensation Rot Your Hard Work
A massive mistake DIYers (and even some pros) make is pushing cabinets directly against a cold exterior wall without a thermal break. This is the ‘oops’ factor that leads to hidden mold and structural rot. I always recommend using the moisture barrier trick for vanities against cold walls to prevent that temperature differential from creating a dew point inside your cabinetry. If you ignore this, you’re just building a giant petri dish behind your beautiful new storage. Have you ever pulled back an old cabinet only to find the drywall black with mold? That’s why these tiny nuances matter. 
Why does my built-in look crooked even though it is perfectly level?
This is the question that separates the amateurs from the veterans. You can spend three hours with a laser level, but if your house has settled—and they all do—a perfectly level cabinet will look ‘wrong’ against a slanted ceiling or a bowed wall. This is where expert guide to flawless vanity installation tricks come into play. You don’t just screw the box to the wall; you use ‘scribing.’ By using a compass to trace the wall’s wonkiness onto a filler piece, you create the illusion of a perfect fit. I’ve even used the scribing move for flawless cabinet gaps on natural stone to make built-ins look like they grew right out of a fireplace.
The Weight Trap You Never Saw Coming
Finally, let’s talk about the ‘hinge pop.’ When people design wide doors for creative built-ins for seamless storage, they often forget about leverage. A door that is too wide puts immense stress on the screws holding the hinge plate to the cabinet carcass. If you’re seeing your doors droop, check why cabinet doors sag and the three-hinge solution before you try to just tighten the screws for the tenth time. Have you ever fallen into this trap or had a ‘perfect’ measurement fail because the wall was bowed? Let me know in the comments.
The honeymoon phase of a new installation usually lasts about six months. That is when the house settles, the seasons change, and your perfectly aligned doors start to look like a puzzle that doesn’t quite fit. If you want your hard work to stay looking like a professional expert guide to flawless vanity installation, you have to plan for the inevitable movement of your home. I’ve seen stunning creative built-ins for seamless storage become a nightmare simply because the builder didn’t leave room for the wood to breathe or the floor to shift. If you aren’t checking your hardware annually, you’re setting yourself up for a structural headache.
How do I keep my custom built-ins looking new for years?
Maintenance isn’t just about dusting; it’s about mechanical integrity. Every spring and autumn, I grab a Pozi-drive screwdriver and check my hinges. According to the Kitchen Cabinet Manufacturers Association (KCMA) in their ANSI/KCMA A161.1 standards, cabinets must withstand specific load tests, but those tests assume the hardware is properly seated. Over time, the vibration of daily use can loosen the screws holding your heavy-duty slides. If you ignore a slight rubbing sound, you’ll eventually find why your drawer slides bind and the simple realignment becomes a full replacement project. I personally use a drop of non-permanent thread locker on mounting screws for any unit that holds more than fifty pounds. It’s a tiny step that prevents the dreaded ‘drawer sag’ five years down the line.
Invest in These Tools for Professional Results
Stop trying to eyeball your measurements or using a cheap plastic level you found in a junk drawer. If you are serious about maximizing your space with custom vanities, you need a self-leveling cross-line laser. This tool projects a perfectly level and plumb grid across your entire room, allowing you to see exactly how much your floor slopes before you ever set a cabinet base. For those tricky spots where the wall isn’t flat, an Accu-Scribe tool is non-negotiable. It allows you to transfer the exact profile of a stone wall or uneven drywall onto your wood trim. I used this exact method when figuring out the scribing move for flawless cabinet gaps on natural stone, and it turned a ‘good’ job into a ‘how did they do that?’ masterpiece.
The Future of Integrated Storage is Modular
Looking ahead to 2025 and beyond, we are seeing a massive shift toward ‘active’ built-ins. We aren’t just building boxes anymore; we are building systems. This means integrating wireless charging pads directly under the wood surface and using 6 steel plate tactics for reinforcing large wardrobe rails to support the heavier motorized components we’re seeing in smart homes. The trend is moving away from static shelves and toward high-performance hardware that can be reconfigured as your life changes. I predict that the next big ‘must-have’ will be moisture-sensing liners in every vanity to catch leaks before they destroy the base. Don’t just build for today; build for the tech you’ll want in three years. My challenge to you: on your next project, try the scribing technique instead of using caulk to hide a gap. It’s a steep learning curve, but the results are what separate the DIYers from the craftsmen.
Why I Stopped Trusting the ‘Included Hardware’ Forever
After decades of bracing and repairing, I’ve realized that the most expensive part of a project is the five-cent screw that fails. If I could go back to my first remodel, I’d tell myself to stop looking for shortcuts. High-load projects demand a shift in mindset: you aren’t just hanging a shelf; you are integrating a structure into your home’s skeleton. When you are choosing the perfect vanity style for your bedroom or bath, don’t just look at the finish—look at how the back rail is reinforced. I’ve learned that a 10% increase in hardware cost usually results in a 100% increase in longevity. Another epiphany? Always shim the bottom, even if the floor looks flat. Gravity is a patient enemy, and it will find the weakest point in your installation over time.
The Structural Arsenal I Never Head to a Job Without
If you want results that look like a magazine spread, you need the right reinforcements. I personally vouch for these three essentials. First, a heavy-duty stud finder that detects both wood and metal is non-negotiable. Second, keep a box of 1/4-inch toggle bolts in your kit for those ‘no stud’ emergencies. Third, always have a dedicated scribing tool to ensure your creative built-ins for seamless storage and home aesthetics flush perfectly against the wall. For those taking on a full bathroom renovation, I highly recommend following an expert guide to flawless vanity installation tricks to avoid the common pitfalls of plumbing alignment and weight distribution.
Build Something That Outlasts Your Mortgage
There is a profound sense of pride that comes from loading a shelf with sixty pounds of equipment and not seeing it move a single millimeter. You have the tools and the tactics now to move past basic DIY and into the realm of true craftsmanship. Whether you are aiming to maximize your space with custom vanities or simply want effortless storage solutions that don’t rattle, the secret is in the prep work. Take the extra hour. Measure three times. Buy the better bolt. Your future self—the one who isn’t cleaning up spilled chickpeas at 2 AM—will thank you. Have you ever had a shelf or cabinet fail at the worst possible moment? Let me know what happened in the comments below.