

I’ll never forget the morning I discovered my guest bathroom vanity was essentially acting as a giant, expensive sponge. It was a Tuesday, and I’d just finished my second cup of coffee when I noticed a strange, fuzzy texture creeping up from the floor line. My beautiful ‘solid wood’ vanity—which I’d spent a small fortune on—was wicking up moisture from a tiny, slow leak behind the toilet that I hadn’t even noticed. The bottom three inches of the side panel were soft enough to dent with my fingernail. I felt like a total amateur. I’d spent so much time following a step-by-step guide to vanity installation for beginners, but I completely ignored the one thing that actually matters in a wet room: the base. That failure cost me an entire weekend of demolition and a few hundred dollars in replacements. Today, I’m going to make sure you don’t repeat my mistakes by showing you exactly how to isolate your cabinetry from the inevitable puddles of a busy bathroom. [IMAGE_PLACEHOLDER]
Build a Barrier Before the Rot Starts
Most people think a simple bead of silicone caulk around the bottom of the cabinet is enough to keep the water out. I used to be one of them. Spoiler alert: it isn’t. Water is incredibly persistent. According to the Institute of Inspection Cleaning and Restoration Certification (IICRC), moisture can travel vertically through porous materials like wood or MDF much faster than it can evaporate, often leading to structural rot or mold in as little as 48 hours. If your bathroom sees heavy use, or if you have kids who think the floor is part of the bathtub, you need more than just a squirt of sealant. You need a physical break between the floor and the wood. When I first started doing this, I tried to skip the specialized bases and just painted the bottom edges. It failed. Now, I always recommend using the moisture-proof base tactic for basement built-ins even for upstairs bathrooms. Whether it’s using PVC toe kicks, plastic leveling legs, or a raised pressure-treated frame, the goal is the same: keep the thirsty wood away from the standing water. Have you ever pulled back a kickplate only to find a dark, damp science experiment growing underneath?
Are these extra materials actually worth the extra effort?
Some of you are probably thinking that adding a moisture-proof base sounds like a lot of extra work for a problem that ‘might’ happen. I get it. We all want to finish the job quickly. But think of it as insurance. You wouldn’t build a house without a foundation, right? If you’ve already checked out an expert guide to flawless vanity installation tricks tips, you know that the details make the difference between a vanity that lasts five years and one that lasts thirty. Using a non-porous base doesn’t just prevent rot; it also helps you stop cabinet doors from warping in humid bathrooms by reducing the overall moisture load the furniture has to handle. Trust me, the extra hour you spend today will save you a week of regret three years from now when your floor inevitably gets a little wet.
Build a Platform That Defies Gravity and Grime
To start, you need to think of your vanity like a beach house on stilts. You don’t want the structural walls sitting in the sand where the tide hits. First, construct a ‘sub-base’ using pressure-treated lumber or, better yet, cellular PVC boards. I prefer PVC because it’s 100% waterproof and will never rot, regardless of how much water sits against it. You’ll want to rip these boards to about 3 or 4 inches in height—essentially creating a hidden pedestal that the cabinet sits on. When I did this for a client last summer, we used the moisture-proof base tactic for basement built-ins, and it was a lifesaver when their water heater leaked two months later. The vanity didn’t absorb a drop while the surrounding drywall was soaked.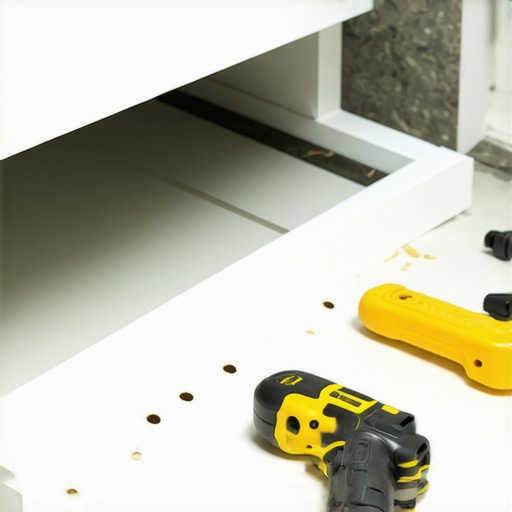
Why Plastic Feet Beat Plywood Every Time
If you aren’t building a custom base, you should definitely upgrade to adjustable plastic leveling legs. Most stock vanities come with a flimsy wood toe-kick that acts like a straw for moisture. By swapping that out for heavy-duty plastic legs, you create a 4-inch air gap. You can then clip a decorative toe-kick to the legs using plastic clips. This setup is one of my favorite vanity installation hacks that save time and money because it makes leveling a breeze on those notoriously sloped bathroom floors. I remember fighting a marble-topped beast in a 1920s bungalow where the floor dropped nearly an inch from left to right. Without using the leveling leg strategy for sloped garage floors—a technique that translates perfectly to heavy bathroom units—I would have been shimming wood scraps for hours and compromising the cabinet’s stability.
Stop Fighting Your Plumbing and Start Modifying Your Cabinet
Next, let’s talk about the back of the cabinet. Very rarely does a vanity’s pre-cut hole align perfectly with your wall’s plumbing. Instead of hacking a giant, jagged hole in your new furniture, use a hole saw for a clean look. If you find yourself in a bind with pipes that are several inches off-center, you need to know how to fit a vanity over off-center plumbing pipes without compromising the structural integrity of the back panel. A clean cut keeps the interior looking professional and makes it much easier to organize with smart storage solutions to optimize small bathroom spaces later on. I once watched a buddy try to force a pipe through a hole that was an inch off; he ended up cracking the PVC joint behind the wall. Don’t be that guy. Take the five minutes to measure twice and cut once. Finally, before you slide everything into place, apply a thin bead of silicone to the very bottom edge of your PVC base or legs. This isn’t just for water; it’s for stability. It prevents the vanity from shifting over time, which can eventually crack the grout or the silicone seal at the countertop. Following an expert guide to flawless vanity installation tricks tips means doing the boring stuff—the leveling and the sealing—with more focus than the aesthetic finish.People often tell me that if a vanity isn’t ‘100% solid wood,’ it’s basically disposable junk. I used to shout that from the rooftops too, but it’s the biggest myth in the cabinetry world. In reality, solid wood planks are living, breathing things that react violently to the 80% humidity of a morning shower. I’ve seen thousand-dollar solid cherry vanities split right down the grain because the owner didn’t understand wood movement. In my professional experience, a high-quality furniture-grade plywood box is almost always better for a bathroom than solid lumber. Plywood’s cross-laminated layers provide the dimensional stability needed to survive steam and splashes without warping the frame. If you’re still skeptical about the materials, just look at why particle board shelves sag and the plywood solution; the same logic applies to the structural integrity of your vanity walls. According to the Forest Products Laboratory (FPL), solid wood can expand up to 10% across the grain depending on moisture content, whereas engineered panels like plywood are much more stable.
Is it time to rethink your mounting hardware?
Most DIYers—and even some contractors—rely solely on the standard wood screws that come in the box. That’s a recipe for a sagging unit, especially with today’s heavy quartz and marble tops. You need to consider the internal support move for heavy stone vanities to prevent the cabinet box from racking or pulling away from the wall under the weight. Another massive ‘oops’ I see is the over-tightening of the sink drain and mounting bolts. People crank them down so hard they create a permanent stress point on the vanity top, which can lead to mysterious hairline fractures months later. It’s about finding that balance between a watertight seal and structural health. For those looking to go beyond the basics, checking out creative storage solutions for vanities to declutter in style will show you how to maximize the interior once the bones are solid. Have you ever fallen into this trap of prioritizing material ‘purity’ over actual durability? Let me know in the comments below. If you’re dealing with a project that needs to look high-end, don’t skip the creative built-ins for seamless storage and home aesthetics that can bridge the gap between your vanity and the surrounding walls. Finally, remember that even the best materials fail if the installation isn’t square. If you’re fighting an uneven alcove, you need to know how to fit built-ins into out of square alcoves before you ever reach for the caulk gun. Re-reading an expert guide to flawless vanity installation tricks tips can be the difference between a drawer that clicks shut perfectly and one that’s always a quarter-inch off. Let’s make sure your next build isn’t just pretty, but structurally invincible.
Stop Guessing with a Bubble Level
If you are still relying on a four-foot spirit level to set your cabinets, you are working harder than you need to. I personally never walk onto a job site without my self-leveling cross-line laser. It’s the only way to ensure your vanity is perfectly horizontal across the entire span while simultaneously checking that the face frame is plumb. When you’re trying to integrate smart storage solutions to optimize small bathroom spaces, even a sixteenth of an inch out of square can cause those tight-clearance pull-out trays to bind against the door. I use a Bosch or DeWalt green-beam laser because the visibility is far superior to red in brightly lit bathrooms. Another tool that’s saved my skin is the oscillating multi-tool. It allows for surgical precision when you need to undercut baseboards or trim a notch for a pipe. Without it, you’re stuck using a hammer and chisel, which is a one-way ticket to cracked wood and frustration. Using these professional-grade tools is one of the most effective vanity installation hacks that save time and money because it eliminates the ‘redo’ phase of the project. 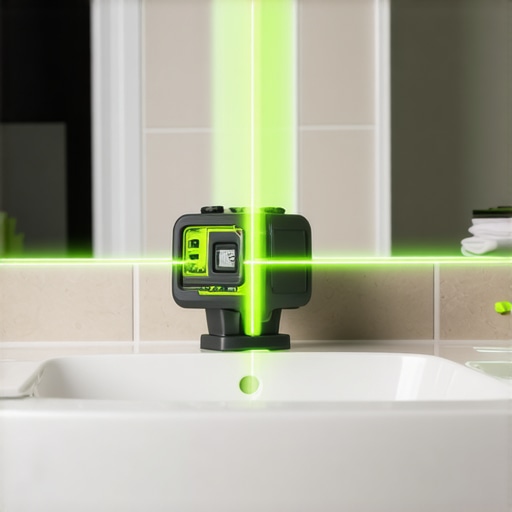
How do I maintain my vanity installation over time?
Maintaining your vanity isn’t just about wiping the counters; it’s about managing the invisible environment. According to the Architectural Woodwork Institute (AWI) Quality Standards, cabinetry performs best when relative humidity is kept between 25% and 55%. If your bathroom routinely turns into a sauna, your exhaust fan isn’t doing its job, and no amount of high-end joinery will save your wood from eventually moving. Every six months, I recommend a ‘hinge and seal’ check. Crawl under there and ensure the mounting screws are still tight—vibration from drawers closing can loosen them over time. Check the silicone bead where the vanity meets the wall; if it’s peeling, you’re inviting moisture to seep behind the unit. This proactive approach is essential when you’ve invested in innovative storage solutions to transform your bathroom, as it protects the mechanical components like soft-close slides from corroding in the damp air.
The Shift Toward Smart and Integrated Storage
Looking ahead, I see bathroom cabinetry moving toward full technological integration. We are already seeing the top trends in vanity designs you need to know in 2025 focusing on built-in charging stations and internal LED lighting that triggers via motion sensors. This isn’t just about ‘gadgets’ anymore; it’s about making the space work for a modern lifestyle. If you’re building or installing today, leave yourself a path for electrical. Even if you don’t install a ‘smart’ vanity now, having an outlet inside the cabinet box is a game-changer for keeping hair dryers and electric toothbrushes off the counter. I strongly suggest you try this advanced tip: replace your standard zinc-plated hinge screws with stainless steel versions. Zinc screws are prone to ‘bleeding’ black rust streaks in humid bathrooms, whereas stainless will stay clean for decades. It’s a five-minute swap that separates a DIY job from a professional-grade installation.
Hard Truths I Learned While Mopping Up Bathroom Floods
After years of fixing my own and my clients’ mishaps, I’ve realized that the most expensive mistakes happen when we treat a bathroom like a dry bedroom. First, never assume your floor is flat; if you skip the leveling leg strategy, your countertop will eventually crack under the stress. Second, the ‘solid wood’ label is often a trap in high-steam environments. I now prioritize high-grade plywood to stop cabinet doors from warping in humid bathrooms because dimensional stability beats tradition every time in a damp room. Finally, if you aren’t using the moisture-proof base tactic for basement built-ins even on your second floor, you’re essentially inviting rot to take root in your cabinetry’s foundation the moment a toddler splashes too much water.
Tools That Make You Look Like a Master Carpenter
You don’t need a truck full of equipment, but these four items are non-negotiable for me. I swear by my self-leveling green-line laser because bubbles in a spirit level can lie, but light doesn’t. I always keep an oscillating multi-tool handy for those surgical cuts when you need to know how to fit a vanity over off-center plumbing pipes without destroying the structural integrity of the frame. I also recommend checking out an expert guide to flawless vanity installation tricks tips to learn why specific stainless steel fasteners outperform the hardware store’s cheap zinc screws. These tools aren’t just about speed; they’re about the precision that prevents future leaks and settling.
Stop Overthinking and Secure That Vanity
Installation might feel like a daunting mountain of plumbing and heavy lifting, but remember that every pro started with a wobbly cabinet and a leaky pipe. By focusing on a solid base and proactive moisture protection, you aren’t just installing furniture—you’re creating a permanent, functional piece of art that defines your space. Whether you are following a step-by-step guide to vanity installation for beginners or trying some advanced vanity installation hacks that save time and money, the confidence comes from doing the invisible steps right. Your future self will thank you for the dry floors and the perfectly aligned drawers every single morning. What’s the biggest hurdle you’ve faced while trying to get a cabinet perfectly level? Let’s swap stories in the comments below!