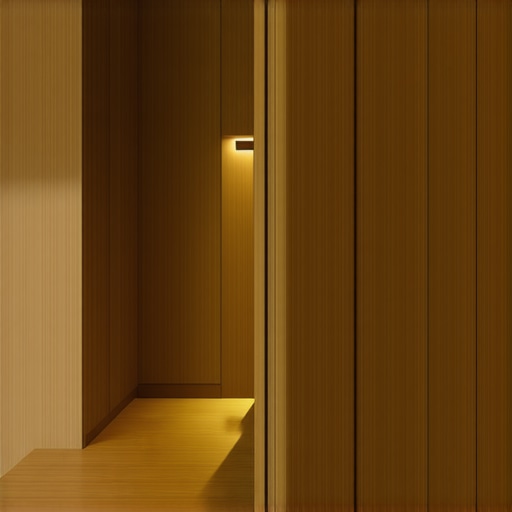
I remember the exact moment I realized my living room nook was more of a hindrance than a cozy spot. It was a rainy Sunday, and I was trying to find space for my ever-growing book collection. Instead of a snug corner, it felt like an awkward gap that just took up valuable room. That lightbulb moment pushed me to dive into custom solutions—ones that transform awkward nooks into functional, stylish parts of my home.
If you’ve ever faced a tiny, awkward space in your living room that stubbornly refuses to serve its purpose, you’re not alone. Those corners, crannies, or odd-shaped alcoves can feel like a design afterthought—more trouble than they’re worth. But here’s the truth: with the right built-in hacks, even the oddest nooks can become your favorite spots in the house.
Today, I want to share with you seven expert-backed hacks that will turn your awkward living room corners into seamless storage solutions or cozy retreats. These aren’t just theoretical ideas—they’re hands-on, practical strategies I’ve tested in my own home, and trust me, the results are game-changing.
But before we unfold these tips, let me address a common skepticism that many folks have.
Why Bother with Custom Built-in Solutions for Odd Spaces?
You might be thinking, “Isn’t hiring a pro or trying to customize my nook just too complicated or expensive?” Believe me, I thought the same initially. I made the mistake early on of underestimating the potential of space-saving built-ins, assuming they’d break the bank or require months of renovation. Turns out, simple custom modifications can be surprisingly budget-friendly and quick to implement, especially when you focus on clever design and efficient installation.
In fact, well-designed built-ins can boost your home’s value and make daily life easier—saving you time, reducing clutter, and even creating extra seating or display areas. Plus, organizations experts agree that smart storage solutions can significantly improve your quality of life. For example, a recent study highlighted how optimized storage reduces stress and enhances mental clarity.
If this idea resonates with you—if you’ve ever looked at an awkward corner and thought, “There must be a better way,”—then you’re in the right place. Over the next sections, I’ll walk you through some of the most effective built-in hacks to make that awkward nook work for you, not against you. Ready to transform your space? Let’s get started.
Select the Right Materials and Design for Your Nook
Begin by assessing the dimensions and shape of your niche. Measure precisely to ensure the built-in fits snugly without gaps. I once tackled a tricky corner that was roughly 3 feet wide and 2.5 feet deep. I opted for MDF panels because they’re budget-friendly and easy to paint. Think of this step like building a custom puzzle—every piece must fit perfectly to avoid gaps and uneven surfaces.
Plan Your Storage and Functionality
Decide what you want to store or display—books, decorative items, or electronics. Sketch a layout that includes shelves, cabinets, or drawers. I found that including a few cubbies for my garden tools kept clutter at bay while maintaining a sleek look. Remember, the goal is seamless integration—a built-in should feel like a natural extension of your wall, not an afterthought. For more inspiration, check out built-in storage ideas.
Prepare Your Workspace and Gather Tools
Clear the area, cover furniture, and gather essential tools: a saw, drill, level, measuring tape, and screws. Safety goggles and mask are a must. I once underestimated the dust from cutting MDF, resulting in a sneezing fit that delayed my project. Think of preparing your workspace as laying the groundwork for a smooth construction process.
Build the Frame for Stability
Create a robust frame that fits snugly within your measurements. Use 2×4 wooden studs for backing if necessary. Secure the frame to existing wall studs using a drill and long screws. I once anchored my frame into drywall alone—that was a mistake; it wobbled! Anchoring into wall studs ensures stability. Visualize it like setting the skeleton before dressing—your built-in needs a solid backbone for support. For detailed framing tips, visit expert framing strategies.
Attach Shelves, Cabinets, and Fill Gaps
Install shelves and cabinetry carefully, leveling each before securing. Use shims if walls are uneven—scribing your built-in to irregular surfaces is crucial. I once had a wobbly shelf caused by an uneven wall; shimming eliminated the sway. Imagine fitting a puzzle piece into a crooked wall—precision here makes all the difference. To perfect your finish, consider using caulk to seal gaps, creating a seamless appearance. For smoothing tips, explore fitting techniques.
Finish with Paint or Veneer for a Cohesive Look
Choose a paint color or veneer that matches your existing decor. A fresh coat transforms the raw build into a polished feature. I painted mine a crisp white, which brightened the room and made my books pop. Think of this final step as dressing your built-in—details like hardware or finish can elevate the whole project. When you’re ready, consider professional finishing for a high-end look—see creative design ideas.
Even seasoned DIY enthusiasts often assume that once they’ve installed a built-in or designed a storage solution, the job is done without hiccups. However, this overlooks nuanced pitfalls that can compromise both the functionality and longevity of your projects. Let’s dig deeper into common misconceptions and advanced mistakes many overlook, so you can avoid costly errors and achieve truly seamless results.
Why Most People Overlook the Impact of Wall Conditions on Built-ins
Many assume that walls are perfectly plumb and flat, but in reality, uneven walls are the rule rather than the exception. Rushing to install shelves or cabinets without properly scribing or shimming leads to gaps, crooked installations, and weak support. For example, a study by the National Association of Home Builders (NAHB) highlights that improper wall assessments are among the top reasons for install failures, leading to faster wear and even safety hazards. Always take the time to check for irregularities and use shims or scribing techniques—skipping this step is a surefire way to vectors of failure.
Common Myths About Storage Efficiency That Can Sabotage Your Space
One prevalent myth is that adding more shelves or drawers automatically increases storage capacity. In truth, overstuffing can make your space feel cluttered and harder to access. Optimization isn’t just about quantity but strategic placement—think deep vs. shallow shelving, adjustable heights, and compartmentalization. A better approach is to focus on smart storage solutions, such as incorporating hidden compartments or corner units. You might discover this in detailed guides on smart storage hacks that maximize every inch effectively.
Installation Techniques That Often Do More Harm Than Good
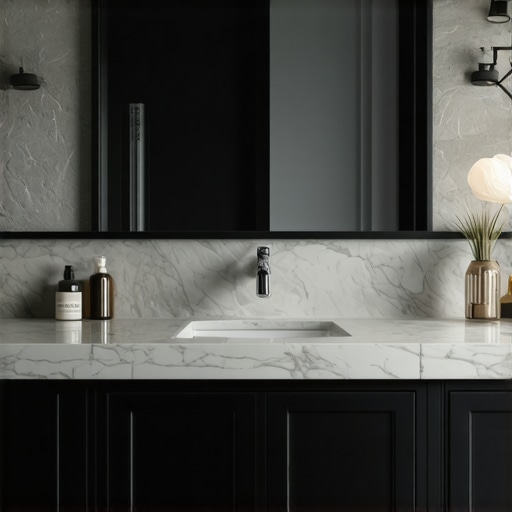
Many DIYers assume that anchoring into drywall alone suffices, but this can result in wobbling or even catastrophic failure, especially with heavy vanities or shelving. For heavier installations, securing directly into wall studs or using toggle bolts designed for heavy loads is essential. Moreover, using the wrong fasteners for your material—like nails or poor-quality screws—poses risks. An expert tip is to always locate wall studs accurately, using a reliable stud finder, and to pre-drill holes for secure anchoring. For detailed expert tips, visit installation guides to prevent these common traps.Maintaining your built-in storage and vanities over time requires the right tools and a systematic approach. I personally swear by a high-quality cordless drill with variable speed settings, such as the DeWalt DCD791D2, which offers precise control when securing shelves or attaching hardware. A stud finder like the Zircon StudSensor iD helps me locate wall studs accurately, preventing wobbly installations that can compromise stability, especially in older homes with irregular wall framing. For finishing touches, I use a silicone-based caulk like GE Supreme Quality to seal gaps seamlessly, preventing dust accumulation and moisture entry.
In addition to hardware tools, software planning can significantly extend the lifespan of your projects. I recommend SketchUp, a 3D modeling program that allows you to visualize storage solutions before cutting any material, reducing waste and ensuring everything fits perfectly. Regularly updating your measurements and plans in the app keeps your projects aligned with any changes in your space.
Predominantly, I find that routine inspections—checking for loose screws or shifting panels—prevent larger problems down the line. Scheduling a quarterly walkthrough with your tools and a checklist ensures that minor issues are caught early. A study by the National Association of Home Builders underscores that proactive maintenance extends the life of built-ins, saving money and effort over time.
Looking ahead, the trend toward smart home integrations means tools like Bluetooth-enabled levels and laser distance meters will soon become essential. These devices can connect to your smartphone, offering instant diagnostics and maintenance reminders, making upkeep less of a chore.
**How do I maintain my built-in storage and vanities over time?** Incorporate regular visual inspections and use specialized tools like a torque screwdriver for securing hardware properly. This prevents wear and loosening of fasteners, which is crucial in high-use areas. I also suggest updating finishes periodically—repainting or re-veneering—to keep your built-ins looking fresh and protected.
If you want to dive deeper into smart innovations, check out smart storage techniques. Don’t hesitate to try using a laser level for your next project—it’s a game-changer for achieving perfect alignment every time. Remember, the key to long-lasting built-ins is consistent care, the right tools, and staying ahead with new technologies.
Throughout this journey of reimagining awkward living room spaces, I uncovered that the real secret lies in embracing the imperfections of your walls and thinking beyond traditional solutions. The one lesson that truly transformed my approach was realizing that no space is too small or irregular to be functional or stylish—it’s all about smart design and patience. I learned to trust my instincts and measure twice before cutting, understanding that a slight miscalculation can impact the entire built-in. Additionally, I discovered that incorporating personal touches—like painted accents or unique hardware—turns a standard built-in into a statement piece, elevating the entire room. Finally, I realized that maintenance is key: periodic checks and updates keep your storage solutions looking fresh and functioning perfectly, ensuring your investments stand the test of time.
Related Posts
Revamp Your Space with Custom Built-in Cabinets & Storage Solutions
I remember the exact moment I realized my home’s lack…
Smart Built-in Cabinets & Vanities: Expert Installation & Storage Tips
I vividly remember the frustration of opening a bathroom cabinet…

How to Anchor Heavy 2026 Built-ins to Metal Wall Studs
I remember the first time I tried to install a…