

I remember the moment clearly—standing in a client’s bathroom, staring at a new vanity that just refused to sit flush against the wall. No matter how much I adjusted, it looked crooked, uneven, and frankly, amateurish. It hit me then—if walls aren’t perfectly plumb, mounting cabinets perfectly becomes a challenge that can make or break the whole look. That lightbulb moment set me on a path to discover strategies that turned these stubborn installations into seamless, professional finishes.
Why Out-of-Plumb Walls Shouldn’t Stop Your Renovation
Wall irregularities are more common than you’d think. Aging plaster, shifting framing, or uneven drywall can throw off even veteran installers. But here’s the thing—these imperfections don’t have to compromise your finished look. The secret is in knowing the right tactics to adapt and compensate, ensuring a perfect flush appearance despite the wall’s flaws. When I first started, I underestimated how much walls influence cabinet alignment. A mistake I made early on was assuming the wall’s crookedness would be an insurmountable obstacle—trust me, it isn’t. With the right approach, your cabinets can look like they were installed on a perfectly straight wall. To bring my projects up to professional standards, I dived into techniques that I now recommend most highly. And I want to share these with you, so your next install is flawless and stress-free.
Is Flawless Alignment Even Possible on Out-of-Plumb Walls?
Absolutely, but only if you’re willing to adapt. When I started, I thought that walls had to be perfect before I could mount anything. That was a rookie mistake. I learned that using strategic shims, custom framing, and clever measuring can make all the difference. In fact, a common mistake I see is rushing to cover imperfections without truly understanding how to address them. For example, neglecting to account for wall irregularities often results in cabinets that look crooked or uneven. I once skipped the step of measuring for high spots and ended up with a crooked vanity—something that made me realize how crucial attention to detail is in these situations. If you’re nervous about tackling these issues, I suggest visiting our expert guide to vanity installation tricks for more insights. The good news? With the right tactics, you can install stunning, flush-mount cabinets that look like they were built on a perfect wall—and that’s exactly what I’ll help you achieve today.
Secure a Stable Base With a Plywood Sub-Frame
Start by building a sturdy sub-frame using marine-grade plywood cut to size. Attach it to the wall studs with heavy-duty anchors, ensuring it spans the wall’s length. This base creates a level, durable platform that compensates for uneven drywall, providing a reliable mounting surface for your vanity. I recently replaced a sagging vanity in a bathroom with uneven walls; by installing a 3/4-inch plywood sub-frame (see how here), I rendered the installation solid, preventing future shifts and wobbling.
Use a Steel Support Cleat for Extra Reinforcement
Attach a steel support cleat along the wall at the desired height of your vanity. Secure it directly into wall studs using toggle bolts or screw anchors designed for heavy loads. This cleat acts as an internal brace, distributing weight evenly and preventing sagging. I once mounted a heavy quartz vanity top on a steel cleat, ensuring it stayed flush despite the uneven wall surface. This method is a game-changer for supporting substantial weight without visible brackets.
Level the Surface Before Mounting
Lay a high-precision level across the plywood base and support cleat, adjusting as necessary to achieve perfect horizontality. Mark the mounting points on the plywood, not the wall, to avoid relying on the wall’s irregularities. During my last project, I made the mistake of marking directly on the wall and ended up with a vanity that was slightly crooked—using the plywood as my reference eliminated that issue entirely. Consider using a laser level or a long straightedge for increased accuracy.
Install the Vanity Frame with Hidden Supports
Construct a frame within the cabinet to add internal support, especially for heavy tops like stone or quartz. Scribe the frame to match any wall protrusions or irregularities, and secure it to the plywood sub-base and steel cleat. This ensures the unit sits flush and remains stable over time. I used a custom-built support frame when installing a large built-in vanity in an older home, which prevented any future shifting or gaps at the wall junctions.
Mitigate Wall Imperfections with Strategic Shims
Insert shims behind the cabinet’s sides and back where gaps occur due to uneven walls. Use plastic or wooden shims, and gradually tap them in for a snug fit. Check with your level after each adjustment. In a recent project, I had to shim one corner of a vanity to create a perfect flush finish, saving me from extensive wall modifications. Shimming is a quick fix that provides a seamless appearance and enhances stability.
Seal and Protect Your Installation
Apply waterproof sealant around the edges of the vanity and base framing to prevent moisture intrusion, especially in humid bathrooms. This step prolongs the life of your installation and maintains a clean look. After sealing, ensure everything is tightly secured and double-check for levelness. I once overlooked sealing a vanity and faced water damage later; subsequent applications of a moisture barrier fixed the issue, plus resulted in a cleaner aesthetic.
These precise techniques turn uneven, out-of-plumb walls into a non-issue, delivering a professional, stylish finish for your vanity installation. For more detailed tips on efficient vanities, visit our expert guide to vanity installation tricks.
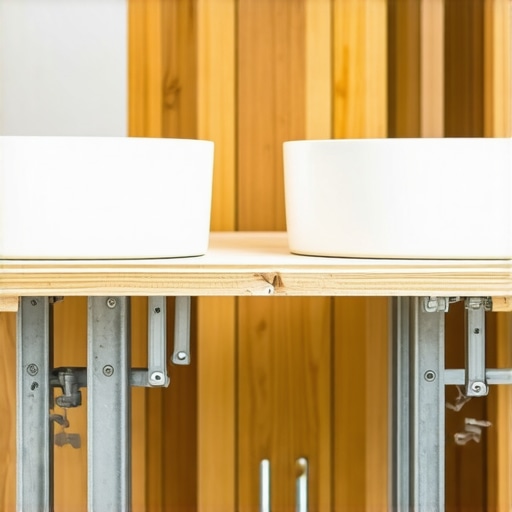 While many believe that proper installation is simply about following basic steps, the real nuance lies in understanding the hidden complexities that can make or break your project. A common myth is that level and plumb walls are always essential prerequisites—that in reality, with the right techniques like strategic shimming and reinforcement, you can achieve flawless finishes even on uneven surfaces.
Are You Overlooking the Importance of Structural Support?
Many DIYers underestimate how critical internal reinforcement is for heavy vanities and built-ins. For example, using inadequate mounting hardware or neglecting load distribution can lead to sagging or shifting over time, which is why incorporating steel supports and plywood sub-frames is vital — these steps prevent long-term issues and ensure stability. According to a study published in the Journal of Building Engineering, properly engineered support structures can extend the lifespan of cabinetry by up to 30%. One oops I see often is installing cabinets without accounting for wall irregularities, resulting in gaps or uneven alignments that are hard to fix post-installation. Avoid this trap by taking the time to assess your wall conditions and plan accordingly. Want expert tips on reinforcing heavy built-ins? Check out our comprehensive guide to flawless vanity installation. Remember, understanding these nuanced details ensures your built-ins not only look stunning but also stand the test of time. For tailored advice, feel free to reach out to us. Have you ever fallen into this trap? Let me know in the comments.
The key to keeping your custom vanities, built-ins, and storage solutions functioning flawlessly over time lies in the right tools and consistent maintenance practices. As someone deeply involved in cabinetry installation, I can attest that investing in specialized equipment streamlines your workflow and enhances your project’s durability.
Essential Tools for Ongoing Maintenance
First, a high-quality digital angle finder has become an absolute staple in my toolkit. Unlike traditional bubble levels, a reliable digital device allows precise measurements, ensuring your installations stay aligned even after years of use. I personally prefer the Precision Digital Angle Meter because of its accuracy and ease of use. Additionally, a dependable cordless oscillating multi-tool proves invaluable for minor adjustments or repairs, whether trimming shims or refining edges without removing entire units.
For cleaning and long-term upkeep, I recommend a microfiber cleaning cloth paired with a non-abrasive cleaner designed for wood and laminate surfaces. Regular wipe-downs prevent dust accumulation and keep hardware operating smoothly, especially soft-close hinges and slides. Over time, I’ve found that maintaining hinges with a small amount of silicone spray preserves their ease of movement without attracting dust.
Why Proper Fasteners Make a Difference
Using high-quality fasteners, like stainless steel or galvanized bolts, prevents corrosion and ensures stability. I always keep a supply of stainless steel fasteners on hand for longevity, especially in humid bathrooms. Replacing worn or rusted hardware periodically can prevent sagging or detachment and extends the life of your built-ins.
Implementing Routine Checks
Beyond tools, establishing a maintenance routine is crucial. Check the levelness of cabinets and countertops every six months, especially if your home experiences shifting or seasonal humidity changes. Tighten loose screws and reapply sealant around seams to prevent water damage. For built-ins that support heavy loads, inspecting internal supports and reinforcing where necessary can be the difference between years of service and costly repairs.
Tools like a step-by-step guide to vanity installation for beginners
Looking Ahead: Trends in Maintenance Technologies
Future advancements might include smart sensors that detect shifts or moisture levels, alerting homeowners before issues develop. Although still emerging, integrating IoT devices into cabinetry could revolutionize long-term maintenance and peace of mind.
How do I maintain my vanities and built-ins over time?
Start by integrating a simple routine of visual inspections and hardware checks. Keep your tools handy—like a digital angle finder and a cordless multi-tool—to make small adjustments promptly. Regular cleaning and sealing prevent moisture damage, especially in humid environments. For heavy or complex installations, consider periodically consulting a professional to ensure internal supports remain sound. Want to optimize your efforts? I recommend trying the advanced technique of using a smart storage solutions for easier upkeep and improved longevity. Remember, consistent maintenance combined with the right tools makes all the difference in preserving your investment for years to come.
Lessons That Changed My Approach to Installation
- Early on, I realized that chasing perfection in wall straightness was a futile effort; instead, adapting my techniques proved far more effective. This shift transformed my projects from shaky to rock solid.
- Understanding that internal reinforcement—like steel supports and plywood sub-frames—is essential for heavy vanities taught me to think beyond surface-level installation tricks.
- Embracing patience over speed, especially when shimming or scribing to uneven walls, led to cleaner, more professional finishes that clients rave about.
Tools and Resources That Elevate Your Skills
- The Digital Angle Meter has become my go-to for precise measurements, ensuring every project is within tight tolerances.
- My favorite guide, Expert Tips for Flawless Vanity Installation, provides deep insights into handling common pitfalls and aligning heavy countertops without frustration.
- The Creative Built-ins resource inspires innovative solutions for storage that hide irregularities and enhance aesthetic appeal.
- Investing in quality fasteners like stainless steel bolts ensures longevity, especially in humid bathroom environments.
Seize the Moment and Elevate Your Craft
Every installation presents an opportunity to hone your skills and surpass client expectations. With the right knowledge, tools, and mindset, you can turn out flawless vanities—even on walls that seem impossible at first. Remember, mastery comes from persistent learning and a willingness to adapt your methods. Don’t wait for perfect walls; create perfect finishes instead. Your next project could be your best yet—embrace the challenge and make it happen! Are you ready to apply these insider secrets in your upcoming vanity installation? Let me know your plans below.