

I remember the moment clearly—standing in my living room, surrounded by a towering, slightly wobbly bookcase that looked more like a leaning tower than a piece of sturdy furniture. I had just finished filling it with my favorite novels and treasured collectibles, only to realize the backing boards felt as fragile as tissue paper. A gentle nudge was enough to cause some shelves to wobble and rattle. Frustrating, isn’t it? That lightbulb moment got me thinking: why do some bookcases feel solid and secure, while others seem on the verge of collapse with the slightest touch?
Why Flimsy Backing Boards Can Sabotage Your Shelves’ Stability
The truth is, many off-the-shelf bookcases come with backing boards made of thin plywood or cardboard-like material. These are often intended to be decorative rather than supportive. Over time, or under the weight of heavy books, they can bow, warp, or even detach. This isn’t just an aesthetic issue; it can compromise the entire structure, leading to shelves tipping or even collapsing. According to a study by the American Institute of Architects, the stability of shelving units is directly linked to the integrity of their backing materials, especially when supporting heavy loads.
Early in my DIY journey, I made the mistake of merely tacking in a new backing without considering reinforcement. That led to more wobbling and, eventually, to replacing the entire unit. I share this so you can avoid similar pitfalls. The good news? There are multiple ways to give those flimsy backings the support they desperately need—techniques I’ve successfully employed to turn insecure shelving into a favorite feature of my home.
Ready to strengthen your bookcases once and for all? Let’s dive into the ways you can reinforce those backing boards and save your shelves from future sagging.
Add Internal Steel Supports for Heavy Shelves
When I encountered wobbly shelves after loading my bookcase with bulky tomes, I immediately grabbed a set of internal steel braces. I measured the length of the shelves and cut steel strips slightly shorter to fit snugly inside the sides of the unit. Using a drill, I screwed these braces into the back of each shelf, ensuring even distribution of support. This technique is like installing a spine within your shelves, preventing bowing and sagging over time. The result was immediate; the shelves became rock-solid, capable of supporting heavy loads without wobbles. Don’t overlook the power of internal reinforcement when dealing with heavy or long shelves.
Next, I focused on the corners. Using heavy-duty L-brackets, I secured each shelf’s front corners to the side panels. I positioned the brackets approximately 2 inches from the corners to maximize stability without compromising aesthetics. I pre-drilled holes into the panels to prevent splitting, then screwed in the brackets tightly. This method acts like braces on a bridge, distributing weight evenly and preventing the shelves from tilting or collapsing. This step is especially vital for larger, heavier bookcases or display units.
My most significant improvement came when I replaced the flimsy backing with a sturdy plywood sheet. Measuring and cutting a piece that fit snugly behind the entire unit, I secured it with nails or screws along the edges. To further enhance support, I added vertical metal brackets at intervals along the plywood, anchoring it to the side panels and ensuring it won’t warp or bow under weight. Think of this backing as the backbone of your bookcase, providing lateral support that keeps everything aligned and steady. This technique is particularly effective for leaning or freestanding units that endure consistent use and weight.
For extra safeguard, I installed external corner braces at the junctions of the sides and top. Using steel corner braces, I secured them with screws, making sure they sat flush against the surface for a clean finish. These braces prevent the frame from racking or shifting, especially if the unit is bumped or placed in a high-traffic area. This approach transforms a wobbly, unstable structure into a fortress of stability, ready to hold decades of heavy books and collectibles.
 Many assume that designing built-ins and storage solutions is straightforward—simply choose a style, measure, and install. However, this oversimplification often leads to costly mistakes and overlooked details. Let’s explore some misconceptions and advanced nuances that can make or break your project. First, it’s a common belief that standard precut components fit all spaces perfectly. In reality, natural walls and uneven surfaces demand meticulous preparation, including scribing techniques, to achieve a seamless finish. Skipping this step can result in gaps, rattling, and a compromised aesthetic, which can undermine the entire installation. When installing vanities or built-ins, many focus solely on aesthetics, neglecting structural support. For example, relying solely on drywall anchors for heavy cabinetry is a recipe for disaster. Expert advice suggests using steel core brackets and hidden supports to bear the load and prevent sagging over time. Check out our guide on reinforcement tactics for heavy fixtures to learn more. A prevalent myth is that all storage solutions are universally applicable. In truth, small bathrooms or bedrooms demand tailored approaches. Innovative storage, like floating shelves with internal steel stiffeners, can maximize space without sacrificing stability. For a comprehensive look at space-optimizing ideas, explore our post on smart storage solutions. An often-overlooked nuance involves climate and moisture control, especially for vanities and cabinets in humid areas. Proper waterproofing, such as using sealing foam and moisture barriers, extends the lifespan of your investments. For detailed tips, see our waterproofing and sealing strategies. Additionally, advanced users should pay attention to the hidden support systems, like steel cleats and sub-frame reinforcements, which provide extra stability for heavy or custom-built units. These are critical in ensuring longevity and safety, especially in high-traffic or heavily loaded environments. Remember, a successful installation marries aesthetic intent with functional support—neglecting either can lead to failure. By challenging popular misconceptions and mastering these nuanced techniques, your built-ins will stand the test of time. Ready to elevate your project? Dive into our related content on innovative built-in ideas and expert installation hacks. Have you ever fallen into this trap? Let me know in the comments.
Maintaining your built-ins and storage solutions ensures their longevity and continues to enhance your home’s functionality and style. Having the right tools on hand makes this task straightforward and effective. I personally rely on a few select pieces of equipment and software that have proven invaluable over the years, helping me address issues promptly and keep everything in top shape.
Invest in Quality Hand Tools for Precision Work
First and foremost, a reliable cordless drill, such as the DeWalt DCD791D2, is essential. Its variable speed and high torque enable me to tighten or loosen fasteners with control, reducing the risk of damage. Pair it with a set of Phillips and flat-head screwdriver bits, along with star drivers for Torx screws typically used in cabinetry. Why do I prefer cordless? The portability allows me to work anywhere, from tight corners to elevated shelves, without dealing with cords and outlets.
Use a Digital Level for Accurate Alignment
To keep built-ins perfectly level over time, I utilize the Bosch Digital Spirit Level. Its digital readout simplifies alignment checks, especially when installing floating vanities or wall-mounted cabinets. Accurate leveling prevents wobbling or tilting, which can cause long-term damage or aesthetic issues. As installations age, slight shifts can occur; the digital level ensures I catch and correct these before they turn into bigger problems.
Apply a High-Quality Sealant for Moisture Control
Moisture is the enemy of wood and particleboard. I always keep a waterproof sealant like the waterproof sealant rule for vanity-to-floor joints in my toolkit. Applying it at critical joints and edges prevents water ingress, which can lead to warping, rot, or mold. Remember, routine inspections after heavy use or spills can spot early signs of water damage, so maintaining these seals is crucial.
Regularly Clean and Lubricate Moving Parts
Smoother operation of hinges, drawer slides, and locks depends on regular maintenance. I recommend using a silicone-based lubricant, like Rubber & Plastic Grease, which won’t attract dust or dirt. Lubricating hinges on cabinets and vanity drawers keeps them from squeaking and prevents premature wear. This simple step can extend the lifespan of your fixtures significantly.
Utilize Smart Monitoring Tools
Looking ahead, the trend is shifting toward smart maintenance solutions. Devices like smart storage solutions that monitor humidity or detect movement are gaining popularity. Installing humidity sensors within cabinets helps maintain optimal conditions, especially in humid climates. These technologies notify you proactively, preventing damage before it happens.
How do I keep built-ins functioning smoothly over the years?
Developing a maintenance routine centered around these tools—regular inspections, precise adjustments with quality hardware, moisture control, and proactive monitoring—is key. Setting a quarterly schedule to check for loose screws, signs of water damage, or misalignments can prevent costly repairs down the line. Remember, investing in the right equipment makes maintenance easier, more effective, and ultimately saves you time and money in the long run.
For comprehensive guidance on protecting your vanity and storage investments, explore how to maximize your space with custom vanities and other expert strategies. Start with one tool or technique today—perhaps a digital level—to see immediate improvements in your craftsmanship and maintenance workflow.
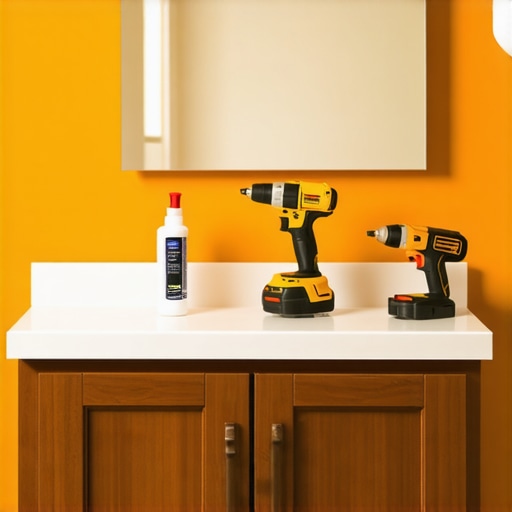
Image prompt: Close-up of a handmade vanity with detailed hardware, surrounded by a toolbox including a cordless drill, digital level, and silicone lubricant, illustrating essential maintenance tools for built-in furniture.
Three Surprising Lessons That Changed My Approach to Built-ins, Installation, and Storage
One of the biggest misconceptions I had early on was thinking that a perfect fit was all about precise measurements alone. I realized that even the smallest misalignment or overlooked support can lead to long-term wobbling or damage, emphasizing the importance of reinforcement strategies like steel supports and hidden cleats. Another lesson was understanding that aesthetic appeal should never overshadow structural integrity; a beautifully designed vanity is useless if it isn’t securely anchored. Lastly, I learned that staying proactive with maintenance—regular inspections, lubricant application, and moisture control—can dramatically extend the life of your built-ins, saving headaches and expenses down the line.
My Go-To Resources for Creating and Maintaining Stunning Storage Solutions
First, I swear by the comprehensive guides on maximizing space through custom vanities. They offer invaluable tips tailored to different home layouts, ensuring you make the most of your space. For hardware and reinforcement tips, installation hacks have been instrumental in saving time and reducing errors. When it comes to moisture and climate considerations, moisture-proofing strategies are my go-to, preventing rot and warping. Lastly, for ongoing maintenance, I recommend smart, easy-to-implement storage ideas that keep everything tidy and in top shape over the years.
Step Into Your Next Project Confidently
Building, installing, and maintaining built-ins and vanities might seem daunting at first, but with the right mindset and tools, you can achieve professional-quality results. Remember, every project is a learning opportunity—embrace the process, and don’t shy away from applying advanced reinforcement techniques like steel supports or moisture barriers. Your home deserves built-ins that aren’t just beautiful, but also built to last. Now’s the perfect moment to take the leap and transform your space—your future self will thank you. Are you ready to get started? Share your plans or worries below—I’d love to help you troubleshoot and succeed!