

I remember the exact moment I realized my vanity wasn’t sitting flush against the tiled wall. It was late at night, frustration boiling over, as I wrestled with a stubborn gap that just wouldn’t close. After hours of trying to shim, adjust, and caulk, I stumbled upon a simple trick that transformed the way I approached vanity installation against tile: the gap-free method. This lightbulb moment saved me time, headaches, and the dreaded future repairs.
Why a Gaps Between Vanity and Tile Are More Than Just An Eyesore
Everyone notices a visible gap—those awkward spaces that make a bathroom look unfinished. But beyond aesthetics, gaps can lead to water seepage, mold growth, and even structural damage over time. Properly sealing and installing vanities to tile isn’t just about looks; it’s about durability and peace of mind.
Now, I’ll be honest. My early attempts at installing vanities against tile were marred by mistakes. I used too much grout, didn’t prepare the surface adequately, and ignored the importance of sealing at the right moments. A particularly costly error was neglecting the support needed to keep the vanity snug against the wall, which caused shifting and gaps.
Through trial, error, and a lot of DIY forums scouring, I discovered that there’s a seamless way to install vanities without those pesky gaps. If you’ve encountered similar frustrations, you’re in luck. Today, I want to share the secrets I’ve learned, backed by expert insights, to help you achieve a professional look without breaking the bank.
For more comprehensive guidance on vanity installation basics, check out this [step-by-step guide for beginners](https://customcabinetrypro.com/step-by-step-guide-to-vanity-installation-for-beginners). It’s packed with practical tips that set a solid foundation for success. And if you’re eager to save time and money on hacks, I also recommend exploring [these vanity installation hacks](https://customcabinetrypro.com/vanity-installation-hacks-that-save-time-and-money). Mastering these techniques will elevate your DIY project from shaky to rock-solid.
As we dive into the practical steps, remember: addressing these gaps isn’t just about aesthetics—it’s about creating a space that’s functional, hygienic, and truly yours. Ready to reimagine your vanity installation? Let’s get to the core of sealing those gaps once and for all.
Secure a Level and Accurate Base
Begin by ensuring your countertop and vanity are perfectly level. Use a high-quality level tool and place shims underneath the vanity’s legs or base to correct any slant. During my recent project, I used thin wooden shims to elevate one corner due to uneven flooring, which prevented future tilting. Eliminating wobble at this stage is crucial for a seamless fit against the tile wall.
Prepare the Tile and Wall Surface
Remove any debris, dust, or old adhesive from the tile surface and the wall. Apply painter’s tape along the edges where the vanity will meet the tile to prevent cement or sealant from staining the tile. This preparation improves adhesion and makes cleanup easier. I found that thoroughly cleaning and taping prevented grout from marbling the tile surface during sealing.
Calculate and Mark the Vanity Placement
Measure the exact position where the vanity should sit, considering plumbing and wall contours. Use a chalk line or a pencil for marking the wall. During my setup, I marked the top edge of the vanity, ensuring consistent alignment along the wall’s imperfections. Precise marking saves time and prevents misalignment that could cause gaps later.
Apply Quality Sealant Around the Perimeter
Choose a waterproof, mold-resistant sealant suitable for bathroom environments. Apply a continuous bead around the entire perimeter of the vanity contact points, especially along the edges facing the tile. I recommend using a caulking gun for steady application. This step creates a flexible, waterproof bond that compensates for minor wall irregularities, reducing gaps.
Position the Vanity Carefully
Lower the vanity into position, aligning it with your markings. Maintain even pressure to press it firmly against the wall and tile. During my installation, I held the vanity in place for a few minutes to ensure the sealant bonded properly. It’s helpful to have a second person assist, especially with larger units, to prevent shifting and ensure proper placement.
Secure the Vanity with Supports
Use clamps, brackets, or shims as needed to hold the vanity in place during the sealant’s curing time. For added stability, screw through the vanity’s base into wall studs or using heavy-duty wall anchors if studs are unavailable. I employed steel L-brackets beneath the vanity, anchoring into the wall at strategic points, which provided instant support and kept the fixture snug against the tile. Check for level again before tightening fully.
Finalize Sealing and Trim
Once the vanity is in place and supported, smooth out the caulk for a clean finish. Wipe away excess with a damp cloth. Install any trim or toe kicks afterward to hide gaps and create a seamless look. My experience highlighted that waiting at least 24 hours before using the vanity allows the sealant to cure completely, preventing future gaps or leaks.
Integrating these precise steps transforms your vanity installation, preventing gaps while enhancing durability. For advanced techniques and expert tips, consider exploring this detailed guide or hacks that save time and money. Correctly sealing and positioning the vanity not only elevates the aesthetic but also safeguards your bathroom against water damage and mold.
Many homeowners and DIY enthusiasts assume that installing storage solutions, especially built-ins or vanities, is straightforward—simply measure, cut, and secure. However, this oversimplification often leads to costly mistakes and subpar results. Let’s dig deeper into some common misconceptions and nuanced pitfalls that even seasoned DIYers might overlook.
Myth: All Storage Systems Are Universally Compatible
A prevailing belief is that off-the-shelf shelving or cabinets will seamlessly fit any space. In reality, one size rarely fits all. Walls are rarely perfectly plumb or level, especially in older homes. Relying solely on standard solutions without accounting for uneven surfaces can result in gaps, tilts, and compromised stability. Advanced homeowners understand that customizing their storage, like incorporating internal steel braces or creating bespoke built-ins, ensures both durability and a polished look. For comprehensive guidance on customizing your storage, explore built-in storage ideas.
Quick Fixes Might Cost You More Long-Term
Another common mistake is opting for quick, superficial fixes—like cheap anchors or surface-mounted brackets—believing they are sufficient. The reality is that heavy or frequent-use storage needs robust reinforcement. For example, using standard drywall anchors without considering the wall material can cause sagging or even failure, especially in heavy-built-ins or significant vanities. Advanced techniques involve internal steel brackets or heavy-duty anchors, which provide long-lasting support. Don’t fall into the trap of temporary solutions; instead, learn hidden steel bracket strategies to prevent sagging and shifting.
Is Your Installation Truly Secure Against Movement and Damage?
Many overlook the necessity of proper substructure and anchoring methods, leading to wobbly or ever-shifting fixtures. Walls are often compromised by age, previous leaks, or poor framing, all of which can destabilize your installation. For precise reinforcement, expert advice recommends integrating internal steel ribs or steel plates that distribute weight evenly and prevent deformation or detachment over time. Taking these advanced steps can save you future headaches—your vanity or built-in won’t loosen or crack prematurely. For detailed reinforcement tactics, check out steel plate fixes.
Beware the Hidden Complexity of Alignment and Leveling
Leveling complex built-ins isn’t simply about spotting a bubble in a level. It requires meticulous checking across multiple axes, especially in rooms with sloped floors or uneven walls. Overlooking this can cause doors to bind or gaps to appear over time, reducing both function and aesthetic appeal. Advanced DIYers employ hidden shims, internal levelling systems, or adjustable brackets, which allow fine-tuning after installation. This level of precision ensures your storage solutions are both beautiful and sturdy. For tips on achieving perfect alignment, consider leveling heavy fixtures.
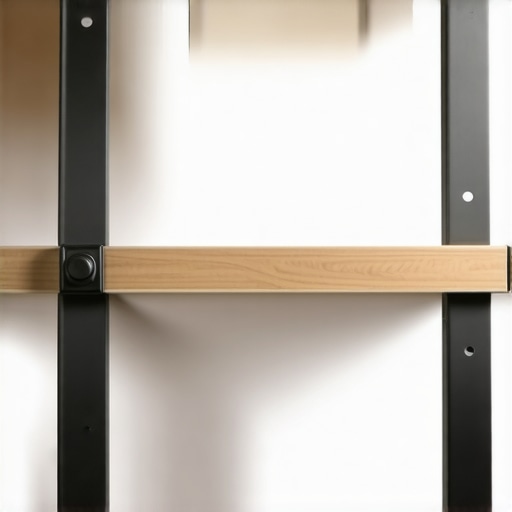
Effective storage installation involves more than just fitting parts together. It’s about anticipating weight distribution, wall integrity, and long-term stability. Failure to recognize these nuances can turn a promising DIY project into a costly repair or safety hazard.
Remember, “doing it right the first time” applies double when it comes to built-ins and storage. Advanced techniques like internal steel reinforcements, meticulous leveling, and customized supports make all the difference. Have you ever fallen into this trap? Let me know in the comments. And for a deeper dive into professional-grade solutions, explore creative built-ins for inspiring ideas to elevate your home.Maintaining your custom storage and built-ins over time requires the right tools and consistent care. Personally, I swear by a high-quality cordless drill with adjustable torque settings; it allows me to tighten or loosen fasteners precisely without damaging delicate surfaces. For measuring, I rely on a laser level—much more accurate and faster than traditional bubble levels, especially when dealing with multiple mounting points or uneven walls. I also use a digital stud finder with deep scanning capabilities to effortlessly locate internal supports behind drywall or plaster, ensuring anchors and brackets are secured into solid framing. Regular inspections of supporting brackets and seals are essential; I check for signs of rust, loosening screws, or gaps that may develop over months or years. Applying weather-resistant and mold-proof sealants periodically keeps water from seeping into joints, preventing long-term deterioration. When installing or adjusting vanities, I use a power sander with fine grit to smooth out surfaces and reapply sealants seamlessly, ensuring longevity. The trend of smart maintenance tools suggests that in the future, IoT-enabled sensors could monitor humidity and structural integrity, alerting homeowners before problems escalate. To get started on maintaining your storage long-term, try incorporating a laser level into your next project—it makes aligning fixtures effortless and ensures your installations stay pristine for years. Regularly check connections and seals, and don’t hesitate to retighten or reapply sealant as needed to keep everything secure and watertight.
Throughout my DIY journey, I’ve learned that achieving a flawless vanity installation isn’t just about following steps—it’s about embracing a mindset of precision and patience. One profound lesson was realizing that no matter how perfect your measurements are, unexpected wall irregularities can throw off the entire setup. Incorporating flexible sealants and internal reinforcement strategies has saved me from countless future headaches, and I encourage every enthusiast to prioritize these details over quick fixes.
The Hidden Power of Proper Substructure Support
I’ve discovered that seemingly minor supports, like steel braces or concealed mounting plates, make all the difference in long-term stability. Without them, even a meticulously aligned vanity can develop wobbles or gaps over time. Investing in these hidden reinforcements—something I once overlooked—transformed my installations into robust fixtures that stand the test of time. To see a collection of these game-changing techniques, check out these steel bracket solutions.
What Most People Fail to Consider When Sealing
Sealing isn’t just about applying caulk; it’s about choosing the right product and technique to compensate for wall imperfections. Early in my projects, I relied on generic sealants, only to realize that they cracked or peeled in damp environments. Switching to high-quality, mold-resistant sealants and learning proper application methods—including masking tape for clean lines—elevated my results dramatically. This attention to sealing details has prevented many future issues and is a vital insight I wish I knew sooner.
Turning Frustration Into a Blueprint for Success
If you’ve ever wrestled with tiles, uneven floors, or shifting fixtures, you’re not alone. My own missteps taught me that patience and the right tools—like laser levels and adjustable supports—are your best allies. There’s a unique satisfaction in transforming a chaotic space into a polished, functional area by applying these nuanced techniques. Remember, every challenge faced is an opportunity to refine your craft. Curious about the tools I swear by? Visit this resource for more insights.
Elevate Your Bathroom with Confidence and Creativity
Achieving a gap-free vanity isn’t just a technical feat—it’s a way to express personality and pride in your home. By integrating reinforced supports, precise measurements, and expert sealing techniques, you can create a bathroom that’s both stunning and durable. With patience and the right knowledge, you’ll soon be inspiring others with your DIY success stories. Ready to start your next vanity project? Remember, every great transformation begins with a single step—so take yours today.
What unexpected challenge did you encounter during your vanity installation, and how did you overcome it? Share your experiences below—I’d love to hear and learn from your journey!