

I’ll be honest—I spent more time cursing my poorly fitted countertops than I care to admit. The frustration of trying to make a straight edge meet an uneven wall, only to end up with embarrassing gaps or misaligned seams, was a regular part of my renovation projects. It was a lightbulb moment when I finally realized that my success—or failure—depended on something as simple as a trusty tool and a little know-how. If you’ve ever faced the challenge of fitting a countertop or backsplash snugly against an irregular wall, you’re not alone, and there’s good news: I found a solution that can save you hours of head-scratching and rescheduling.
The Secret to Seamless Countertop and Wall Connections
Is a fancy tool really worth the hype?
Early in my DIY journey, I made the mistake of relying solely on eyeballing and generic measuring tapes. It seemed logical—just measure, cut, and install, right? Well, that approach often led to gaps that looked amateurish and, more frustratingly, compromised the integrity of the fit. What I overlooked was that uneven walls and countertops aren’t a rare anomaly—they’re the norm. This is where a little-known trick involving the scribing tool made all the difference. By carefully tracing the wall’s contours onto the countertop material, I created a custom-fit edge that hugged every bump and dip perfectly. Less filler, less sanding, more wow factor.
What really changed the game was understanding the importance of precision in interior finishes. Studies show that imperfect joints can impact not only aesthetics but also durability, especially in high-use areas like kitchens and bathrooms (source: Home Improvement Journal). So, investing in the right tool and technique isn’t just about aesthetics—it’s about creating a lasting, professional-looking space.
If you’ve ever felt the sting of wasted time and materials battling uneven walls, I encourage you to give this a try. It’s a straightforward technique that transforms a tedious task into an opportunity for craftsmanship. Stick around—I’ll walk you through the step-by-step process to conquer those tricky corners and ensure your countertops fit like a glove.
Start with Accurate Assessment of Wall Irregularities
Before any measurement, I recommend inspecting the wall surface thoroughly. Use a straightedge or a laser level to identify high and low spots. In my own experience, I once overlooked a slight dip in the wall behind my kitchen island, which later caused a visible gap. Mark these irregularities with a pencil for reference during scribing. This step ensures you tailor your cuts precisely rather than relying on standard measurements.
Gather the Right Tools for Precision
Invest in a quality scribing tool—a compass-style or a dedicated contour gauge. These tools are invaluable for tracing the wall’s uneven contours onto your countertop material. I initially used a basic tape measure, but it was insufficient for capturing the wall’s flexibility. The contour gauge allowed me to copy every curve flawlessly, resulting in a seamless fit.
Align and Mark the Countertop
Place the countertop section in position roughly where it will be installed. Use the contour gauge or a flexible ruler to trace along the wall’s irregularities onto the underside of the countertop. Transfer these marks carefully with a pencil. Remember, the goal is to create a custom-shaped edge that matches every bump and dip. During my project, a light touch with a pencil prevented smudging and ensured clear cut lines.
Cut with Precision Using a Dremel or Jigsaw
Switch to a fine-tooth jigsaw or a rotary tool like a Dremel with a carving bit. Follow your traced lines slowly and steadily. I recommend making multiple shallow passes rather than one deep cut, which gives better control and reduces chipping. For a clean edge, clamp the countertop to a stable surface. When I cut my first piece, I used painter’s tape along the cut line to minimize chipping—an easy tip with big results.
Scribe and Sand for the Final Fit
After cutting, place the piece back against the wall to check the fit. Use a scribing tool to gently trace along any remaining high spots for minor adjustments. Sand these areas lightly to refine the contour. This iterative process might take a few tries, but patience pays off. I remember sanding a tricky corner multiple times before achieving a perfect edge, but the seamless look made it worth the effort.
Secure and Seal the Countertop
Once satisfied with the fit, attach the countertop following manufacturer instructions. Seal the edges with a suitable caulk to prevent water infiltration and avoid future gaps. In my case, sealing the joint transformed the appearance from rough to professional, emphasizing the importance of the finishing touches. For more tips on sealing and finishing, explore our storage solutions.
Many homeowners operate under misconceptions about vanities, installation, and built-ins that can lead to costly mistakes and subpar outcomes. Contrary to popular belief, simply choosing a stylish vanity or a sleek built-in isn’t enough; nuances in installation and storage solutions matter immensely for long-term durability and aesthetics. One widespread myth is that standard framing and drywall will support heavy stone countertops or large fixtures without reinforcement—this couldn’t be farther from the truth, and neglecting proper support can cause sagging or even structural failure. For example, heavy vanities demand internal steel bracing or specialized anchors, which many overlook, risking damage and instability.
Advanced homeowners are increasingly aware that even seemingly minor details, such as moisture barriers behind bathroom vanities, are critical for avoiding water damage and mold. Experts recommend installing waterproof membranes and sealing joints meticulously, as overlooking these can lead to leaks that rot cabinetry and damage surrounding finishes. A common mistake is underestimating the importance of wall irregularities; textured or uneven surfaces require scribing, sanding, or custom shimming to achieve perfect alignment. Ignoring this can result in gaps, tilts, and an unprofessional look.
Have you ever fallen into this trap? Let me know in the comments. For guidance on ensuring your built-ins withstand heavy use and irregular walls, explore our built-in storage solutions or check out expert tips on custom vanities. Remember, precision in measurement, reinforcement, and sealing transforms DIY projects into enduring, stylish features—don’t cut corners where it counts.
Maintaining your installed vanities and built-ins is vital to preserving their functionality and appearance over time. The right tools and consistent methods ensure your investments remain pristine, and future modifications or scaling become manageable. One game-changing approach I recommend is investing in a high-quality steel angle finder. Unlike magnetic or plastic variants, steel angles provide unmatched accuracy and durability when aligning heavy fixtures or ensuring level installations. I personally prefer the steel cantilever because it maintains calibration even after years of use, making it ideal for ongoing maintenance tasks.
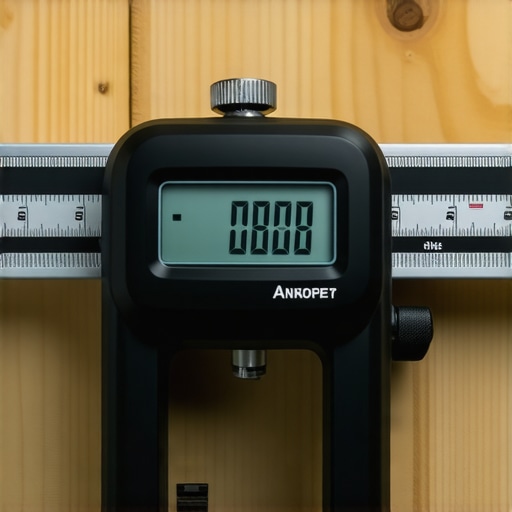
For precision cutting and adjustments, a digital angle gauge has become indispensable. Models like the Johnson digital level can measure inclines down to 0.1°, allowing me to fine-tune vanities that rest on uneven flooring or walls. This ensures that any future adjustments are exact, extending the life of your fixtures and reducing the need for costly repairs. Using these tools during initial installation sets a solid foundation for long-term durability.
When it comes to storage and scaling, innovative solutions such as modular steel framing systems allow for easy addition of shelves, hooks, or cabinets without the need for destructive modifications. This flexibility is especially beneficial for homes where needs evolve over time—think of expanding a bathroom or creating a new storage nook in the laundry room. Coupled with a cordless drill and a set of specialty bits, these systems make scaling straightforward and clean.
Looking ahead, I predict that smart tools integrating Bluetooth or Wi-Fi connectivity will take over in the next few years. Imagine a level that syncs with your smartphone, alerting you to slight shifts in your vanity’s position or indicating when adjustment is needed. Embracing such technology now can save headaches later and position your DIY setup at the forefront of home improvement trends.
How do I maintain vanities and built-ins over time?
Regular inspections using precise tools like digital angle gauges and steel finders help catch issues early. Periodic recalibration of supports and seals ensures water resistance and structural integrity, especially in moisture-prone areas. For fast and reliable fixing of minor misalignments or stability issues, steel reinforcement brackets are essential. The heavy-duty bolts I use provide a secure hold even under significant stress, preventing sagging or tilting.
In my experience, staying proactive with maintenance tools not only prolongs the lifespan of your installations but also simplifies future projects. As technology advances, staying updated with cutting-edge tools will become even more beneficial. So, I challenge you to try out a digital angle gauge on your next build—it’s a small investment with big payoffs in precision and peace of mind.
Remember to explore our storage solutions to keep your tools organized and accessible, ensuring your maintenance routine remains smooth and efficient.
My Biggest Wake-Up Call About Vanities and Built-Ins
The hardest lesson I learned was that even the most stylish vanity or built-in can fall flat if not installed with attention to detail and patience. I once hurried through a project, thinking that standard measurements would suffice, only to find gaps and tilts after completion. That experience taught me that meticulous assessment of wall irregularities, proper tools like contour gauges, and iterative fitting are non-negotiables in achieving professional results. If I could redo one step, it would be spending extra time inspecting and marking wall contours before cutting; it makes all the difference in the final appearance and durability.
Tools and Resources That Turned My Projects Around
Investing in a high-quality contour gauge revolutionized how I approached uneven walls. The internal steel stiffeners I now use ensure that heavy built-ins stay rigid and don’t bow over time. For precise angle measurements, I rely on a digital angle gauge like the Johnson digital level, which helps me level floating vanities on sloped floors. Additionally, quirks like moisture barriers and waterproof sealants, detailed in guidelines like the waterproof sealant rule, have prevented future water damage—crucial for bathroom vanities. These tools and tips, combined with ongoing learning through resources like the step-by-step guide for beginners, have helped me build confidence in tackling complex installations with consistent results.
Your Next Step Into the World of Flawless Installations
Taking the time to understand wall irregularities and equipping yourself with the right tools transforms DIY projects from frustrating experiments into satisfying achievements. Remember, every misaligned gap or tilt is an opportunity to refine your technique and learn something new—like the scribing trick that adapts your vanity perfectly to textured or uneven walls. I encourage you to embrace the process and get familiar with tools that enhance precision. With dedication and patience, you’ll be amazed at how beautifully your vanities and built-ins can fit, elevating your home’s style and functionality. Ready to get started? Explore our built-in storage ideas for inspiration, and don’t forget—every expert was once a beginner who decided to persevere.