

It was one of those mornings; I had just finished installing a custom vanity in my bathroom, only to realize that the edges didn’t sit flush against my oddly sloped wall. The gap was glaring, and no amount of sanding or adjusting could hide it. That lightbulb moment made me realize I’d been overlooking a crucial trick—one that could have saved me hours of frustration and imperfect finishes. If you’ve ever faced the challenge of fitting built-in cabinetry or shelves snugly against sloped or uneven walls, you’re not alone. Many DIY enthusiasts and even seasoned pros stumble here, wondering if there’s a way to make these installations flawless.
Today, I want to share with you the secret that transformed my approach to built-ins against slanted surfaces. It’s a technique rooted in precision and understanding of wall structures, and once mastered, it will turn uneven gaps and awkward edges into seamless, professional-looking finishes. We’re going to dive into this game-changing method that ensures your custom projects sit perfectly flush, no matter the wall’s angle.
The Hidden Key to Perfect Custom Fits on Sloped Walls
Fitting cabinetry or shelving into non-vertical walls has always been a tricky puzzle. The typical approach involves trying to cut and fit along the irregular surface, which often results in gaps, crooked edges, or the dreaded need for extensive filler and touch-up work. But early in my journey, I made a mistake that many beginners still repeat: I trusted straight-cut measurements without accounting for the wall’s actual slope or irregularities. That oversight led to misaligned edges and a lot of wasted time adjusting after the fact.
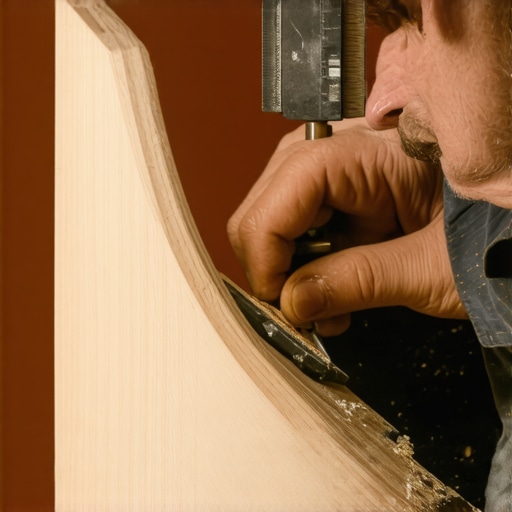
The solution? A strategic approach called the “scribing technique.” This method isn’t just about cutting to measure; it’s about shaping the edge of your cabinetry to match the wall’s exact contour. By carefully marking the wall’s profile and then subtly adjusting your cut lines to follow that profile, you create a tight, flush fit that looks professionally finished. Imagine no more gaps, no more awkward filler pieces—just clean lines and perfect contact. And surprisingly, this technique is accessible to DIYers, with just a few extra steps in your measuring and cutting process.
For those wondering whether this method is worth the effort, consider this: a study from the [National Association of Home Builders](https://nahb.org) highlights that precise fitting and finishing significantly elevate the perceived quality and lifespan of built-in features. A seamless fit doesn’t just look better; it prevents future issues like moisture intrusion, dust accumulation, and structural shifting.
If you’ve faced frustration with uneven walls in your projects, click here for my step-by-step guide to vanities and built-ins that perfect this skill. Trust me, once you get the hang of it, you’ll look at sloped walls as just another design feature to work with, not against.
Ready to tackle this challenge head-on? Let’s move beyond guesswork and get into the practical steps to master this technique, ensuring your built-ins sit flawlessly against any wall angle.
Marking the Wall Profile Precisely
Begin by securing your cabinetry in place against the wall without fully attaching it. Use a flexible profile or a long scrap piece of wood to trace the exact contour of the sloped surface. As I did when installing a narrow vanity in my bathroom, I gently press the profile along the wall’s irregular edge, ensuring it adheres to every curve and angle. Then, transfer this contour onto your cabinet, drawing an accurate line where you’ll make your cut. This step ensures your piece will sit flush against even the most uneven surfaces, drastically reducing gaps later on.
Cutting with a Custom Scribe Line
Next, set your saw to cut along the marked line. I prefer a jigsaw or a router with a flush trim bit for this task, as they allow for more nuanced control on curves. When I did this for my project, I clamped a straightedge as a guide to prevent deviations. Carefully follow your scribed line, making gentle cuts, and double-check your fit as you go. Remember, it’s easier to remove a little material than to fix a too-tight cut later. This custom scribing technique, much like a tailor adjusting a suit, ensures a perfect fit for your built-in against the wall’s unique shape.
Fine-Tuning the Fit
After the initial cut, temporarily position your cabinet against the wall to evaluate the contact. Mark any high spots or small gaps with a pencil. Use a file or sanding block to subtly bevel the edges where necessary, smoothing out irregularities. In my own experience, this iterative process of fitting, marking, and sanding took a couple of tries, but resulted in a seamless junction. For complex curves, a flexible sanding sponge can help shape the edge perfectly, crafting a snug fit that requires minimal filler or finishing work.
Securing the Cabinet in Place
Once the fit is tight, secure the cabinet to the wall using appropriate fasteners. For sloped or uneven surfaces, installing cleats or shimming underneath the cabinet can help maintain level positioning while ensuring flush contact along the contour. When I anchored my vanity, I used adjustable L-brackets fixed to the wall studs, complemented by shims for a stable and flush installation. This approach prevents gaps and ensures durability, even on challenging surfaces.
Applying Finish and Sealing Gaps
Finally, apply caulk along the gaps to seal and create a visually appealing, finished look. Use a high-quality sealant designed for bathroom environments to prevent water intrusion. In my project, I carefully smoothed out the caulk with a damp finger or a caulk tool, matching the wall’s texture as closely as possible. This step not only improves aesthetics but also adds moisture protection, extending the lifespan of your built-in.
 Many DIY enthusiasts believe that measuring, cutting, and mounting are straightforward steps, but in my experience, there’s a pervasive misconception that can lead to costly mistakes: the idea that all walls are perfectly plumb and level. This myth encourages installers to trust straightforward measurements without considering wall irregularities, leading to gaps, crooked finishes, and compromised structural integrity. The reality is, walls—especially older or textured ones—rarely conform to standard measurements, and overlooking this nuance can sabotage even the best-designed projects.
A frequent trap is assuming that shims and filler alone can correct uneven surfaces. While these are useful tools, relying solely on them without prior wall contour assessment often results in visible gaps or unstable fixtures. For example, many people skip contour profiling, leading to assemblies that look out of place and wear out faster. To avoid this, mastering the art of scribing—carefully tracing wall profiles and shaping cabinetry to match—is essential for a professional finish.
One advanced aspect often overlooked is the structural support needed for heavy built-ins. While it’s tempting to fasten directly to drywall, consistent errors occur when the substructure isn’t reinforced appropriately. For heavy vanities or shelves, installing steel supports or internal framing enhances stability and ensures the fixture stays flush against the wall, even as it bears weight over time. If you’re unsure about supporting your installation properly, check out [the structural fix for sagging vanities](https://customcabinetrypro.com/structural-fix-for-sagging-garage-ceiling-racks), which offers detailed insights into reinforcement techniques.
Have you ever fallen into this trap? Let me know in the comments.
What are the pitfalls of relying solely on traditional measuring methods for irregular walls?
Traditional measurement approaches—using only a tape measure and level—fail to account for complex wall contours. This oversight is especially problematic in spaces with textured or uneven surfaces, common in older homes. These methods might suggest a perfect fit on paper, but in reality, the cabinetry won’t sit flush, creating gaps or requiring excessive filler, which detracts from the aesthetic and longevity of the installation. Advanced techniques like wall profiling and scribing turn this common mistake into an opportunity for precision, ensuring seamless contact and a cleaner look.
Implementing these nuanced methods may seem daunting at first, but resources such as the [step-by-step guide to vanity installation](https://customcabinetrypro.com/step-by-step-guide-to-vanity-installation-for-beginners) can guide you through these subtleties. Remember, the goal is not just to complete the installation but to do so with mastery that rivals professional results, avoiding common pitfalls and ensuring durability. For broader storage and aesthetic enhancements, exploring solutions like [hidden built-in storage ideas](https://customcabinetrypro.com/built-in-storage-ideas-to-declutter-and-enhance-your-home) can complement these technical skills.
In summary, recognizing and adapting to wall irregularities transforms an ordinary project into a finely crafted piece of work. Don’t underestimate the importance of nuanced support and contouring—these details elevate your craftsmanship and save you time and frustration in the long run.Achieving durable, high-quality built-ins and vanities isn’t just about precise measurements and clever contouring. Maintaining these installations over time requires the right tools, methods, and ongoing care. Personally, I swear by a combination of specialized equipment and strategic workflows that streamline long-term success. One such tool I rely on heavily is a digital angle finder. Unlike traditional spirit levels, a digital angle finder provides exact readings even on the most irregular surfaces, ensuring that each piece remains correctly aligned over years of use. I use mine to double-check the pitch of sloped walls before final fastening, which prevents future sagging or misalignment.
When it comes to ensuring these installations stay flawless, adopting a regular maintenance routine is essential. I recommend inspecting your built-ins every six months, looking for signs of shifting, loosening, or gaps. A handy tool in this regard is an electronic stud finder with built-in laser level, which helps verify wall integrity and support points without invasive procedures. For sealing and finishing, high-quality caulks and sealants are non-negotiable. I prefer silicone-based products designed specifically for bathroom environments because they resist moisture and mold better than generic options. Properly applied, they keep gaps sealed tight, preventing water damage that can compromise your craftsmanship over time.
Looking ahead, the trend in maintenance tools is headed toward smart, app-connected devices. Imagine a future where your smartphone communicates directly with your fixtures, alerting you to shifts or humidity effects that could affect your built-ins. Some companies are already developing moisture sensors and structural monitors that sync with home automation systems—meaning proactive care instead of reactive fixes. Implementing such technology can significantly extend the lifespan of your installations and maintain their aesthetic appeal.
How can I keep my built-ins working flawlessly for many years?
Regular inspections are key. Check support structures, tighten loose fasteners, and replace sealants as needed. Additionally, using strain brackets or steel reinforcement, especially in areas prone to moisture or weight stress, adds stability and prevents sagging—a concept I explored in detail when reinforcing heavy vanities and wall-mounted shelves. If you’re interested in the specifics, consider reviewing the [steel core support systems for massive quartz vanities](https://customcabinetrypro.com/the-steel-core-support-for-massive-quartz-vanities). Remember, investing in quality tools and conducting routine maintenance can save you time and money, keeping your custom features looking pristine and functioning perfectly for years to come. Don’t forget to try out a digital angle finder on your next project; it might just revolutionize your precision approach!
The Hardest Lesson I Learned About installation, built-ins, vanities, storage solutions
One of my most valuable insights came from repeated mistakes—assuming all walls are perfectly straight. The moment I realized walls are often uneven, my entire approach to installing built-ins changed, leading to cleaner, more durable results. Trusting wall profiles over straight measurements is a game-changer and has made my projects look professional every time.
Three myths about installation, built-ins, vanities, storage solutions That Held Me Back
First, thinking shims and fillers can fix all irregularities. Second, believing that standard measurements suffice for uneven walls. Third, assuming heavy fixtures can’t be supported properly on textured surfaces. Breaking these misconceptions allowed me to innovate with techniques like wall contour scribing, ensuring perfect fits and longevity.
What experts won’t tell you about installation, built-ins, vanities, storage solutions
Many professionals skip the step of contour profiling, which seems minor but is crucial for seamless fitting. They also often overlook the importance of internal reinforcing supports, especially for heavy or wide fixtures. Learning to assess and adapt to wall irregularities early on conserves time and results in a finish that’s both attractive and enduring.
Curated Resources for Elevating Your Building Skills
My go-to guide is the step-by-step vanity installation guide—it walks you through contouring techniques in a relatable way. I also rely on a digital angle finder for precise measurements on uneven surfaces. For reinforcement, steel bracing options are invaluable for ensuring stability. Lastly, joining professional forums keeps me updated on industry best practices.
Embrace Your Craft with Confidence
Every project is an opportunity to refine your skills and personalize your space. With these insider lessons and resources, you’re well on your way to creating built-ins that not only fit perfectly but also stand the test of time. Don’t let wall irregularities hold you back—see them as opportunities to showcase your craftsmanship and attention to detail. When you master contour scribing and secure your fixtures properly, transforming challenging spaces becomes a rewarding experience. Now’s the time to get started—your flawless built-ins await! How do you plan to tackle uneven walls in your next project? Share your thoughts below and let’s learn together.