

One Saturday morning, I found myself staring at my cluttered garage, desperately trying to hang my trusty bike rack. Usually, hitting a single stud would make it a breeze. But surprise—my wall was composed of old plaster and drywall, with no studs in sight where I needed them most. Frustration crept in. Have you ever faced that sinking feeling, realizing your plan to hang something heavy is about to fall flat because of the wall behind it? I know I have. Luckily, after a few trial-and-error attempts and some clever tricks, I cracked the code. Today, I want to share with you the four best ways I’ve found to anchor garage bike racks—and other heavy gear—without hitting a single stud.
Effortless Garage Storage Without Studs
Here’s the thing—most tutorials make it sound so simple: find a stud, drill in, done. But what happens when your stud layout doesn’t align with your storage needs? Or when your wall is made of bricks, concrete, or other tricky materials? That’s where the real challenge begins, and it’s where many get stuck or, worse, cause damage trying to make it work. But don’t worry. There are several proven methods to securely hang your gear, even on non-stud walls. I’ll walk you through the tried-and-true techniques I’ve tested myself, so you can avoid the common pitfalls and confidently create your ideal storage solution.
Will These Solutions Really Work for My Garage?
Early on, I made the mistake of thinking heavy-duty plastic anchors could do the job for my wide bike rack. Spoiler: they didn’t. The wall sagged, and I was stuck with a wobbling rack and a headache. That mistake taught me the importance of choosing the right anchors and hardware tailored for the weight and wall type. Luckily, there are many effective options—like steel toggles, masonry anchors, and internal steel supports—that can make your garage storage both safe and sturdy. Want to get a deeper dive into selecting the perfect hardware? Check out my guide on how to properly brace heavy-built-ins.
Is Anchoring Without Studs Actually Worth the Effort?
Absolutely. Think about the inconvenience and potential hazards of a poorly mounted bike rack—falls, damage to walls, or even injury. Plus, properly anchoring your garage storage extends far beyond bikes. It’s the difference between a cluttered chaos and a neat, accessible space. According to the National Association of Home Builders, well-installed garage storage solutions can increase functional space by up to 30%. That’s a game-changer, and it all starts with knowing the right anchoring techniques—especially when you can’t rely on studs. Ready to make your garage more organized and safe? Let’s explore the four techniques that have transformed my garage and can do the same for you.
Anchor with Heavy-Duty Toggle Bolts
When I installed my bike rack on a drywall section with no stud nearby, I used heavy-duty toggle bolts. These are like the legs of a tripod—they open up behind the wall, distributing weight evenly. I drilled a hole slightly smaller than the bolt diameter, inserted the toggle, folded the legs, and pushed it into the wall cavity. Once tightened, it held my heavy bike securely. For best results, ensure the toggle is flush against the wall surface. I learned this trick after my first attempt with plastic anchors failed, causing my bike to hang crookedly.
Use Masonry Anchors for Brick or Concrete Walls
If your garage wall is brick or concrete, plastic anchors won’t cut it. Instead, opt for sleeve anchors or wedge anchors. Drill a hole matching the anchor size, insert the anchor, then tighten the bolt. This expands the wedge behind the wall, locking the anchor in place. I once mounted a heavy-duty bike lift on a concrete wall using these, and it hasn’t budged since. Remember, the key is to use a hammer drill and the right bit—regular drill bits won’t penetrate masonry effectively.
Internal Steel Supports Inside the Wall
For extra security, I added steel support brackets inside the wall cavity. This involves installing a steel strip or angle bracket between adjacent wall studs, creating a hidden reinforcement point. I accessed the wall between studs, inserted the steel support, then drilled through the drywall into the support, securing it with screws. This approach is like adding a spine inside your wall, providing robust support that can handle heavy gear. It’s especially useful if you plan to hang multiple bikes or heavy items regularly.
Implement a Plywood Backing for Extra Strength
Another method I tried was attaching a thick plywood panel directly onto the drywall, spanning multiple wall studs if possible. The plywood acts as a solid backing, and I mounted the bike rack brackets to it using screws long enough to reach the studs. This spreads the load over a broad area, preventing sagging or tearing. If your wall lacks enough studs, securing the plywood into the wall anchors described earlier completes the support system. For detailed steps, see my guide on building strong built-in storage solutions.
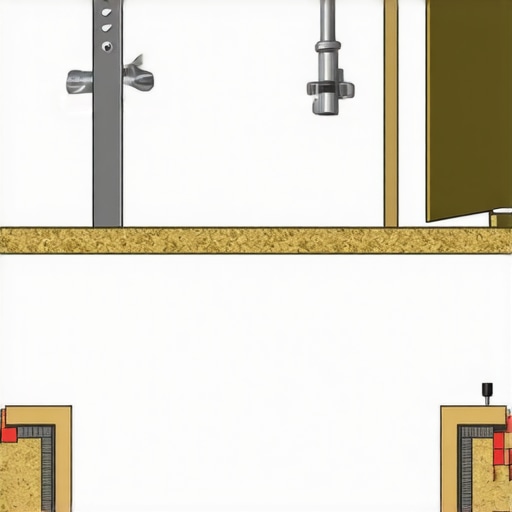 Many homeowners assume that installing built-in furniture or storage solutions is straightforward—simply measure, cut, and mount. However, this oversimplification overlooks crucial nuances that can make or break your project. One prevalent misconception is that standard measures and generic hardware will suffice for all spaces. In reality, every wall and corner has its unique quirks, and what works beautifully in one setting may fail spectacularly in another. For instance, relying solely on wall anchors designed for light loads is a common mistake that can lead to disaster when mounting heavy vanities or shelves; instead, understanding load-bearing capacities and choosing appropriate reinforcement strategies can save you costly repairs later. Don’t fall into the trap of thinking that all hardware is interchangeable; specific applications demand specific solutions, especially in older homes with uneven or irregular walls.
A hidden nuance many overlook is the importance of precise alignment and framing behind the visible surfaces. Installing a built-in countertop or cabinet without considering internal supports often results in sagging or instability over time. For example, internal steel supports or a well-designed plywood backing can dramatically enhance durability and flatness, ensuring long-term satisfaction. This is backed by expert insights from cabinetry professionals, who emphasize that internal reinforcement is critical when dealing with heavyweight fixtures. By neglecting these internal details, you risk installing beautiful units that wobble or fail prematurely.
Another advanced mistake is neglecting to account for wall irregularities, especially in older or uneven structures. A common myth is that shimming is enough for level surfaces; however, this often leads to gaps, wobble, or compromised aesthetics. Instead, employing sub-frame systems or custom scribing techniques ensures a flush, seamless fit, elevating the overall look and function. For those contemplating complex built-in projects, consulting detailed guides on how to adapt to irregular walls can make all the difference. Want to learn how toperfectly install built-ins on out-of-square or sloped walls? Check out my detailed walkthrough on the scribing secret for a perfect built-in fit.
To sum up, understanding these nuances and avoiding common misconceptions will significantly improve your installation’s success rate. Remember, not all solutions are one-size-fits-all, and paying attention to internal supports and structural quirks can prevent costly rework. Have you ever fallen into this trap? Let me know in the comments and share your experiences!
Keep It Working: Essential Maintenance and Tools
Maintaining built-in storage and vanities over time requires more than just sturdy installation; it demands ongoing care and the right tools. Personally, I rely heavily on a few specific items to ensure my installations stay secure and functional for years. One indispensable tool is a high-quality torque wrench. Unlike regular screwdrivers, a torque wrench allows me to tighten fasteners precisely, preventing over-tightening that can damage materials or under-tightening that risks loosening over time. For example, when securing heavy vanity mirrors, I set the torque to manufacturer-recommended specifications—a tip backed by the experts at Hunker.
Another critical tool is a stud finder with deep scanning capabilities. Standard stud finders often fail behind complex wall assemblies or in older homes. I prefer models that detect metal, wiring, and even internal reinforcements, ensuring every anchor point is solid. Having the right electronic helps me avoid guesswork and protects from mistakenly drilling into electrical lines or plumbing, which is both dangerous and costly.
In practice, maintaining your built-ins means regular inspections—checking for loose screws, vertical alignment, and signs of wear. A simple multi-bit screwdriver or a cordless drill with variable speed settings helps tighten or adjust brackets and supports without risking material damage. Keep some wood glue handy for minor repairs or reinforcement along seams. Remember, the longevity of your installation depends on proactive care, not just initial assembly.
Why Choosing the Right Storage Solutions Matters
Long-term results hinge on your initial selection of storage solutions. For example, custom-built plywood backing combined with steel supports, as I mentioned earlier, offers unmatched durability. As trends in storage evolve, lightweight composites and modular systems will likely become more popular, driven by innovations in materials science. Future tools, like smart monitoring systems embedded within cabinetry, could alert you to loosening or structural issues before they become problems—an exciting development in home maintenance. Optimization for long-term performance includes considering these advancements now, so you’re ahead of the curve.
How do I keep my vanities and built-ins in top shape over the years?
Routine cleaning with gentle, non-abrasive solutions preserves finishes while periodic checks for internal supports guard against sagging or loosening. For added protection, I recommend applying a thin layer of high-quality sealant around joints and seams annually. This helps prevent moisture intrusion, especially important in bathrooms or kitchens. Also, avoid overloading shelves and drawers beyond manufacturer specifications—overstress is one of the quickest ways to compromise your work. Implementing these small, consistent maintenance steps will extend the life of your investments.
To see how modern tools can streamline your maintenance process, check out my guide on effortless storage solutions for a tidy, stylish home. If you’re interested in more advanced reinforcement techniques, exploring structural fixes for sagging racks can offer practical insights. Make a commitment today to inspect your built-ins and apply one of these tools or tips—your future self will thank you.
Over the course of my projects, one of the most valuable lessons I’ve learned is that walls can surprise you—no matter how many times you prepare. The secret to successful, long-lasting built-in installations isn’t just choosing the right hardware; it’s understanding the subtle nuances of your wall’s structure and how to reinforce it effectively. When I first started, I underestimated the importance of internal supports and the impact of wall irregularities, which led to sagging shelves and wobbly cabinetry. Now, I realize that a strategic approach—incorporating hidden supports and precise reinforcement—can make a significant difference. In fact, the true expert knows that every project begins with assessing internal framing and considering future load distribution that might not be immediately visible. This mindset shift has empowered me to design and install built-ins that not only look great but stand the test of time, even without the presence of wall studs.