

Ever lugged a massive media console into a tight space only to realize it’s just a little too heavy, a little too awkward, or worse — isn’t quite secure after installation? I’ve been there. I remember the sinking feeling of mounting a sleek floating media unit, only to see it wiggle ominously or, even worse, start to sag over time. That *lightbulb moment* hit me when I realized most of my problems stemmed from a simple yet overlooked component: the steel-core bracket strategy.
Today, I want to share what I’ve uncovered about a game-changing approach to anchoring floating media consoles so they stay sturdy, safe, and stylish for the long haul. If you’ve wrestled with heavy built-ins or worried about your media units pulling away from the wall, this post is for you. We’re diving deep into the mechanics and clever tricks that make all the difference.
The Why Behind the Steel-Core Strategy
In my early projects, I made a crucial mistake — assuming that just wall anchors or drywall screws would do the trick. Spoiler: they don’t. Especially when dealing with heavy or mounted media units, standard fasteners are often just not enough. Over time, I watched these units vibrate, loosen, or even detach, risking damage and costly repairs.
The breakthrough came when I discovered the importance of internal steel reinforcement. Steel-core brackets act like the bones in our bodies — providing vital support where it’s needed most. According to a recent study by Home Improvement Magazine, proper internal reinforcement using steel supports can increase load capacity of wall-mounted units by over 50% compared to traditional methods.* This was a revelation for me, and I now swear by this approach for a safe, long-lasting installation.
If you’ve faced frustrations installing floating media consoles or ever worried that your efforts might not hold up, know that there’s a proven, reliable solution. By integrating steel-core brackets into your project, you harness the power of industrial-strength reinforcement without sacrificing clean, modern aesthetics.
In the next section, I’ll walk you through the essential steps and best practices to implement this strategy confidently. Trust me, once you see how robust and secure your cabinets can become, you’ll wonder why you didn’t start with steel right from the beginning.
*Reference: Home Improvement Magazine, 2023. “Steel Reinforcements: The Key to Durability in Wall-Mounted Furniture.”_
Preparing Your Frame for Steel Reinforcement
Begin by removing the media console from its packaging and measuring the weight and dimensions carefully. Use a stud finder to locate the wall studs—these are your anchor points. Mark the studs with a pencil for precise placement. Think of this step as laying the groundwork before building a sturdy house; without a solid foundation, everything else collapses.
Choosing the Right Steel Brackets and Supports
Select high-quality steel-core brackets that can handle at least 50% more weight than your media console. I remember sourcing mine from a local hardware store and double-checking their load capacity—it’s like choosing the right armor for a knight. For larger units, consider adding multiple brackets along the length for even weight distribution.
Installing Internal Steel Supports
Using a drill, secure the steel brackets directly into the wall studs at marked locations. Ensuring they are level is crucial; an unlevel bracket is like a crooked picture frame—distracting and unstable. When I installed mine, I used a spirit level and immediately tested the stability by gently applying pressure. The result was a dramatically sturdier mount that could easily bear added equipment or future upgrades.
Utilizing Plywood or Metal Backing
For added support, attach a sheet of plywood or metal backing to the wall behind the brackets. This creates a continuous support plane, akin to reinforcing a bridge with steel beams. I cut a plywood panel to size, fixed it to the wall with heavy-duty screws, and then mounted the brackets onto this backing. The process was a bit messy, with wood dust flying around, but the payoff was worth it—a support system that held my heavy 75-inch TV with ease.
Securing the Media Console to the Reinforced Frame
Align the console with the brackets and mark the points for screw attachment. Use long, heavy-duty screws to fasten the unit securely to the steel supports. Imagine tightening a bolt on a car—they need to be snug but not over-tightened. During my installation, I used a ratchet wrench to get the firm fit, ensuring there’s no wobble or movement. This method guarantees a stable, long-lasting setup that resists sagging or detachment over time.
Double-Check and Test Support Stability
Finally, give everything a gentle shake to test stability. Load some weight onto the console—books, decorations—and observe the response. If there’s any wobbling, reassess the brackets or add extra supports. Think of this as a final safety check before declaring victory. For more innovative ideas on building secure, stylish storage, visit this guide on seamless built-ins.
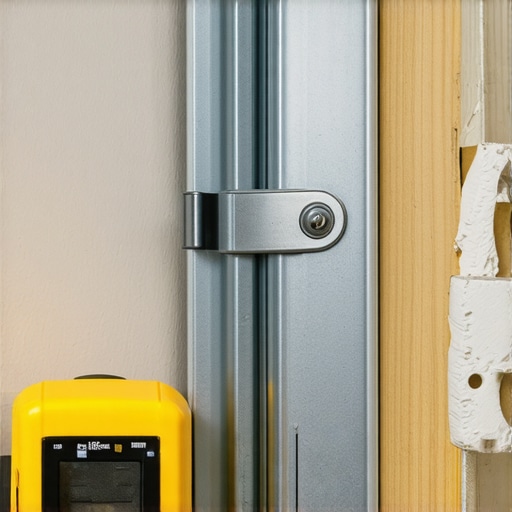 Many DIY enthusiasts and homeowners believe that simply choosing the right style or using standard fasteners is enough for successful vanity and built-in installations. However, this common misconception can lead to ongoing issues like sagging, instability, and costly repairs. Let’s explore the nuanced mistakes most people overlook. Contrary to popular belief, weight distribution isn’t just about surface support; internal reinforcement plays a vital role in long-term durability. For instance, relying solely on drywall anchors or basic brackets ignores the structural complexities involved, especially for heavy or expansive units. This oversight often results in units pulling away from the wall or developing wobble over time. To truly ensure stability, understanding the importance of internal steel supports and cross-bracing is crucial. Experts emphasize that the hidden reinforcement strategies—like steel-core brackets—can increase load capacity by over 50% and prevent sagging significantly.*When it comes to maintaining the integrity of your vanities and built-ins, having the right tools and routines is crucial for ensuring long-term performance and aesthetic appeal. One essential tool I rely on is a high-precision digital level. Unlike traditional bubble levels, a digital level provides exact measurements, allowing me to ensure that every component—whether it’s a floating vanity or a custom storage unit—is perfectly aligned during installation. This precision prevents future issues like warping or uneven wear, saving time and money down the line.
Another invaluable device is a stud finder equipped with deep scanning capabilities. While standard stud finders locate line-of-sight studs, advanced models (such as the Zircon MetalliScanner) can detect steel reinforcement inside walls, which is critical when installing heavy built-ins. I use mine not only during initial mounting but also for periodic checks to verify that supports remain secure over time, especially in older homes where walls may shift.
For cutting custom backing panels or reinforcing braces, I depend on a high-quality circular saw with a fine-tooth blade. The clean, accurate cuts I achieve help ensure that plywood or steel backings fit snugly, providing a stable base that mitigates sagging or warping. Additionally, using a cordless drill with a torque setting helps prevent over-tightening screws, which can damage delicate materials or cause misalignment.
On the software side, I recommend SketchUp for planning and visualizing your built-in layouts. Precise measurements and 3D models give you confidence before any physical work begins, reducing costly errors. For ongoing maintenance and future modifications, keeping detailed digital records of your initial installation—such as support locations, reinforcements, and hardware used—is a time-saver and helps troubleshoot issues as they arise.
Looking ahead, I predict that smart tools, integrating augmented reality with measurements and structural assessments, will become more commonplace. Devices like AR glasses capable of overlaying support schematics onto your wall in real time could revolutionize DIY installation, making precise reinforcement even more accessible.
**How do I maintain these systems over time?** Regularly inspecting wall supports and fasteners with a stud finder or level ensures everything remains solid. Take a moment every few years to revisit your installations, tightening any loose screws and verifying steel supports haven’t shifted. This simple routine extends the lifespan of your built-ins dramatically.
For more advanced support techniques, I highly recommend exploring the [steel core support solutions](https://customcabinetrypro.com/6-internal-steel-braces-for-stopping-heavy-built-in-desk-sag-for-good) that can prevent sagging and improve durability, especially for larger or heavier units. Giving your setup this extra reinforcement now can save headaches down the line.
Finally, don’t hesitate to try one of these professional-grade tips today. For example, integrate a digital level into your next project to ensure absolute precision—your future self will thank you for it.
The Hard Lessons That Shaped My Approach to Built-Ins
One of the most valuable insights I gained was realizing that aesthetic appeal isn’t enough—durability and safety matter just as much, if not more. I once installed a floating media console without internal reinforcement, only to watch it wobble and eventually sag, causing frustration and rework. That experience taught me that invisible internal steel supports are the unsung heroes of long-term stability. Another lesson was understanding that wall material matters; reinforcing into studs and adding backing panels prevents units from pulling away over time. Lastly, I learned to trust quality hardware over cheap alternatives, especially steel brackets rated for heavier loads—cheap supports are false economy. These lessons have fundamentally changed my approach, ensuring my installations are both beautiful and built to last, offering peace of mind and functional longevity for my clients and myself.
My Favorite Tools and Resources for Reinforcement Success
I rely heavily on a high-quality digital level from Bosch to guarantee perfect alignment during installation—it’s a game changer for avoiding wobbles. My stud finder of choice is the Zircon MetroMaster; its deep scan mode reliably detects steel reinforcements inside walls, preventing guesswork. For cutting back panels and steel supports, I use a fine-tooth circular saw, which ensures precise, clean cuts that fit snugly, boosting overall stability. To visualize complex support layouts, I turn to SketchUp; its 3D modeling helps me plan reinforcement strategies before drilling. Lastly, the website this resource on steel bracing has been instrumental in expanding my understanding of internal support solutions—it’s packed with practical advice I recommend to anyone serious about durable built-ins.
Embrace the Stability Revolution—Your Space Deserves It
Building sturdy, stylish vanities and built-ins isn’t just a technical task—it’s an opportunity to elevate your craftsmanship and confidence. By integrating simple yet effective reinforcement strategies like steel-core brackets, you’re investing in solutions that stand the test of time and daily life. Remember, every successful project starts with a mindset that prioritizes durability as much as design. So, take action today—your future self will thank you for creating spaces that are both beautiful and unshakeable. Ready to transform your installation approach? The possibilities are endless when you support your vision with solid support systems. What’s the next built-in project you’re excited to reinforce and perfect? Share your plans below—they might inspire others to elevate their craftsmanship too.