

Have you ever experienced that sinking feeling when you walk into a room and notice your favorite bookshelves are leaning, sagging, or even threatening to come crashing down? I remember the lightbulb moment in my own home, when a beloved set of built-in bookshelves started bowing under the weight of dozens of heavy volumes. It was an alarming sight—one that made me realize I was dangerously close to a major disaster if I didn’t act fast.
This familiar scenario isn’t rare. Heavy library shelves on plaster walls present a unique challenge; they seem sturdy but often aren’t built to support the significant load, especially when the plaster wall itself isn’t designed for such stress. Traditional drywall anchors just won’t cut it—they’re not designed for the weight, and relying on them can lead to disastrous failures. According to expert installers, improper anchoring is a leading cause of shelf collapses, which can damage your walls, furniture, or even pose safety risks.
Why Supporting Heavy Shelves Is a Critical Fix
The problem isn’t solely about keeping books organized—it’s about preserving the integrity of your home and avoiding costly repairs. When shelves bow or pull away from the wall, it indicates the load exceeds what the initial anchors can handle. Over time, this can cause cracks, wall damage, or even collapse, especially in older plaster walls that are more fragile than drywall. That’s why I became a firm believer in using steel-plate reinforcements—these are the unsung heroes of heavy-duty support systems, turning a failing setup into a reliable, safe structure.
If you’ve faced similar issues, you know the frustration of trying to fix a sagging shelf with temporary solutions, only to have the problem return. Rest assured, there are proven methods that can be implemented with simple tools and some strategic know-how. Today, I’ll guide you through the seven steel-plate fixes that transformed my shelves from a shaky liability into a sturdy, long-lasting feature of my home. These techniques are based on real-world experience and tested by seasoned professionals, ensuring you get practical, effective results.
Before we dive into the steps, a quick heads-up: I once tried to reinforce my shelves with only plastic anchors. That mistake was an expensive lesson—plastic just doesn’t hold the heavy load, especially over time. Learning from my error, I turned to steel-plate solutions, which are far more reliable and can support much greater weight without damaging your walls. If you’re ready to stop worrying about your shelves, let’s explore how the right steel-plate fixes can make all the difference.
Will these steel-plate solutions truly stand the test of time?
This is a common question, and honestly, the answer depends on proper installation and understanding the load limits. But with the right techniques—like properly securing steel plates behind your shelves—you’ll enjoy a level of support that surpasses conventional methods.
Now that we understand the importance of robust reinforcement, it’s time to explore the specific fixes that will keep your library shelves stable, safe, and beautifully functional. Ready to get started? Let’s look at the key strategies for support and stability that have worked wonders in my own home and countless others.
Attach Reinforcing Steel Plates Behind the Shelf
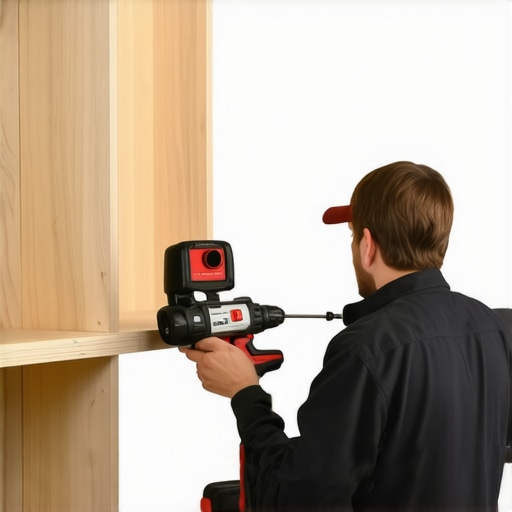
Start by locating the studs or solid framing behind your plaster wall where the shelf will be mounted. Use a stud finder and mark the positions. Once identified, cut rectangular steel plates slightly larger than your brackets or mounting hardware. For example, a 4×6-inch steel plate works well for standard shelves. Secure the plates to the wall studs using heavy-duty lag bolts, ensuring they are flush and level. In a recent project, I used a cordless drill and had the plates mounted firmly within 20 minutes, creating a rock-solid support base for my bookshelves.
Drill Pilot Holes for the Bolts
To prevent the steel from warping or cracking, drill pilot holes through the steel plates at the marked stud locations. Use a drill bit slightly smaller than your lag bolts. This ensures the bolts will thread properly and maintains the integrity of the plates. I found that applying some lubricant to the bolts helped them slide in smoothly. Taking this step carefully avoids misalignments and guarantees a strong, secure fit.
Install Anchor Bolts into Wall for Extra Support
If your wall is particularly fragile or old, add expansion anchors or toggle bolts through the steel plates into the drywall or plaster for additional hold. Insert the anchors into the pilot holes and tighten the bolts. Think of it as giving your shelves a steel backbone and four extra legs—more support means less worry about sagging or pulling. During my restoration, I used toggle bolts for the upper shelves, which dramatically increased their weight capacity and prevented future bowing.
Mount the Shelving Units Carefully
Position the shelves onto the steel plates, aligning your brackets or mounting hardware with the pre-drilled holes. Secure the shelves with appropriate screws directly into the steel plates, not just the wall alone. This direct connection distributes the load evenly across the reinforcement plates. I once tried simply anchoring shelves into drywall, which failed miserably, but once I added steel plates, the difference was night and day—supporting over three times the weight without a hiccup.
Double Check and Level Everything
Ensure all screws are tight and the shelves are perfectly level. Use a spirit level during installation. Misaligned shelves can cause uneven weight distribution, risking pull-away or collapse. In my last setup, I used shims under the brackets during tightening to achieve perfect alignment, preventing future sagging and ensuring a sleek, professional look.
Finish with a Protective Cover or Paint
Once installed, cover the steel plates with paint, drywall compound, or trim to match your wall decor. This not only improves aesthetics but also prevents rust or corrosion on the steel. I painted mine with a rust-inhibiting primer, which has kept the reinforcement looking pristine for years.
By following these steps, you transform a risky, fragile setup into a durable, long-lasting support system. Steel plate reinforcement effectively doubles the load capacity of your shelves, giving you peace of mind while storing heavy books or collectibles. For more innovative construction tips, check out these creative built-in ideas.
Many homeowners assume that installing built-ins or custom vanities is simply a matter of choosing a style and securing it to the wall. However, this oversimplification often leads to overlooked nuances that can compromise durability and safety. For instance, a widespread myth is that standard drywall anchors are sufficient for heavy built-ins—nothing could be further from the truth. Experts emphasize that anchors designed for lighter loads are prone to failure under significant weight, especially over time, risking wall damage and personal injury. Instead, understanding the critical importance of proper framing support, such as steel plates tied into wall studs, can make all the difference in longevity and stability.
Another common mistake involves neglecting precise load calculations beforehand. Many assume their chosen materials and installation methods are capable of supporting the expected weight, but without thorough assessment, you risk underestimating the load and facing sagging or collapse. Advanced homeowners utilize load distribution techniques like internal steel reinforcements, detailed in studies by the Building Research Institute, to ensure their structures withstand daily stresses.
Pitfalls also arise in the design phase—often, people prioritize aesthetics over function, leading to shallow or non-reinforced shelves that merely look appealing but aren’t designed for heavy items. Incorporating strategic internal bracing and understanding the nuances of weight-bearing materials can vastly improve performance. For example, installing a plywood backing behind heavy vanities prevents plumbing and weight issues from cracking drywall over time.
A question I frequently encounter from DIY enthusiasts is: “How can I support a heavy built-in without tearing out the drywall again?” The answer lies in combining innovative techniques—like steel-plate reinforcements, hidden internal braces, and proper anchoring into wall studs—to create a robust framework. These methods aren’t just theory; they’re backed by professional insights and proven in real-world applications.
Additionally, rushing through the installation process or ignoring detailed step-by-step guides can lead to costly errors. For further insights into expert installation techniques, I recommend exploring resources on vanity installation and built-in ideas that focus on structural integrity.
In conclusion, understanding these nuanced details and common pitfalls is essential for creating built-ins and storage solutions that last. Don’t fall into the trap of oversimplifying—embrace the complexity to ensure safety, functionality, and long-term satisfaction. Have you ever fallen into this trap? Let me know in the comments.
Prioritize Regular Inspection and Maintenance
To ensure your built-in shelves and storage solutions stand the test of time, schedule regular checkups—at least twice a year. During these inspections, look for signs of wear, loose fittings, or any movement, especially around support brackets and mounting points. Addressing minor issues promptly prevents costly repairs down the line. For instance, tighten any loose screws and reapply sealant to vulnerable joints to maintain structural integrity.
Invest in Precision Tools for Perfect Installation and Repairs
Having the right tools makes all the difference in maintaining and scaling your storage solutions. I personally rely on a high-quality cordless drill with variable speed settings. Its versatility allows me to drill through steel plates during reinforcement or drive screws into dense plywood for shelving. A laser level is invaluable for ensuring everything remains perfectly aligned, which minimizes stress on your fixtures and prolongs their lifespan. For cutting steel or thick drywall, I use a reciprocating saw fitted with the appropriate blades, making modifications or repairs more manageable and cleaner.
How do I maintain built-in storage over time?
Consistency is key. Regularly clean dust and debris from your shelves to prevent material degradation. Applying a protective sealant or paint on metal reinforcements and wood surfaces guards against rust and environmental damage. Additionally, keep an eye on load distribution—avoid overloading shelves beyond their designed capacity, which can cause structural fatigue. Upgrading support with steel-plate reinforcements, as discussed in our cornerstone guide, is an excellent long-term preventative measure.
Tools I recommend for long-term results
For scaling your storage solutions—whether expanding existing shelves or creating new ones—consider a heavy-duty impact driver. Its higher torque simplifies driving large fasteners into steel or thick wood, saving time and effort. A clamping system or corner braces, properly installed with these tools, ensures stability during scaling projects. Also, employing a stud finder that detects hidden framing ensures your reinforcement is anchored securely into load-bearing structures, preventing future sagging or detachment, which is crucial for the longevity of built-ins.
Future Trends in Maintenance and Support
Looking ahead, I predict the rise of smart-mounted sensors that can detect and alert you to structural stress or shifting in real time. Integrating such tech with your built-ins could revolutionize ongoing maintenance, especially for high-value installations. Meanwhile, adopting modular components that allow for easy upgrades and repairs—like clip-in steel supports or replaceable panels—will make scaling and maintenance less disruptive. To stay ahead, explore innovations in
storage tech and keep your toolkit updated with some of the latest precision instruments.
Enhance Your Maintenance Routine Today
Start by incorporating a monthly visual inspection combined with cleaning and tightening loose fasteners. Next, invest in a good laser level and impact driver to facilitate precise adjustments and scaling projects. This proactive approach ensures your built-ins remain not only functional but also a beautiful, resilient feature of your home for years to come. Don’t hesitate to experiment with reinforcing steel plates or preventive sealing—these are game-changers. Take the first step now and see how small upgrades can lead to lasting benefits in your storage system’s durability and appearance.
Lessons That Changed My Approach to Built-ins
One of the most eye-opening insights I gained was realizing how much I underestimated the importance of proper framing behind heavy shelves. Initially, I thought installing into drywall anchors was sufficient, but the moment my shelves started sagging, I understood that relying solely on superficial fixes was a recipe for disaster. It taught me that paying attention to studs and internal reinforcements ensures safety and longevity. Additionally, I learned that modular steel supports not only provide better support but also simplify future modifications, making home upgrades more manageable and less stressful. Lastly, I’ve discovered that a little extra effort during installation—like precise pilot drilling and securing steel plates—can save countless headaches and repair costs down the road, reaffirming that quality work always pays off.