

Have you ever tried to install a heavy vanity only to find it wobbles, tilts, or worse, pulls away from the wall? I’ve been there, standing in my bathroom, frustrated and convinced that no matter what I did, the thing just wouldn’t sit right. That lightbulb moment hit me hard—what if the uneven plaster was the real culprit? Turns out, many homeowners overlook this sneaky obstacle when mounting bulky fixtures, leading to headaches, costly repairs, and a shaky vanity for years.
Why Ignoring Wall Irregularities Can Ruin Your Vanity Install
Walls, especially old plaster, can have subtle undulations and irregularities that throw off even the most careful installation. I learned this the hard way. Early in my renovation journey, I assumed a level, sturdy surface was enough. Spoiler alert: it’s not. Heavy vanities exert significant force on wall anchors and mounting brackets, and if the wall isn’t perfectly even, the entire weight distribution suffers. Over time, this imbalance can cause cracks, misalignment, or complete detachment.
Research shows that uneven surfaces are a leading cause of mounting failures in heavy fixtures. Properly addressing wall unevenness is crucial for durability and safety. I wish I had known this from the start; instead, I spent extra money on repeated fixes because I didn’t consider the wall’s true condition. That mistake taught me the importance of assessing and preparing the wall beforehand.
Could You Be Underestimating Wall Challenges?
I believed I had a straightforward installation plan—measure, drill, mount—yet I overlooked the subtle flaws in my plaster. Having faced this, I now know the value of thorough wall evaluation. The good news? Once you understand the wall’s quirks, mounting becomes a problem of strategy, not frustration. My goal here is to share what I’ve learned so you won’t face the same pitfalls. From choosing the right anchoring methods to understanding wall reinforcement, I’ll guide you through the essential steps for a flawless, rock-solid vanity mount. And if you’re eager to explore creative storage solutions that complement your upgraded space, check out these innovative ideas to declutter in style.
Ready to get your vanity securely mounted, no matter how uneven the plaster is? Let’s dive into the practical strategies that turned my shaky setup into a sturdy, beautiful feature.
.
Assess Wall Condition Before Drilling
Start by thoroughly inspecting your wall’s surface. Use a long spirit level or a laser level to identify high and low spots. This step is like tuning a guitar string—if the base isn’t smooth, everything else will be off. I once skipped this and ended up with a tilted vanity that required repositioning and extra anchors, wasting time and money.
Prepare the Surface for Mounting
Once you’ve identified uneven areas, mark the high and low points. Fill the low spots with a quick-setting compound or apply backer board to create a level plane. Think of this as laying a foundation; if the base isn’t solid, the structure won’t be either. I used a thin plywood sheet over a patchy plaster wall, which made mounting a breeze and prevented wobbling.
Choose Appropriate Anchors and Supports
Heavy vanities demand heavy-duty hardware. Use toggle bolts, molly bolts, or steel expansion anchors rated for your wall type and weight. For drywall, I prefer toggle bolts because they distribute weight more evenly. If your wall is brick or concrete, consider masonry anchors. I once anchored a bulky marble top vanity with wedge bolts into a concrete wall, which held securely even when I leaned against it.
Implement Reinforcements for Stability
Adding internal reinforcement can prevent wobbling over time. Install steel L-brackets inside the vanity structure or support beams along the wall behind it. During my project, I mounted heavy-duty steel brackets inside a custom-built cabinet, similar to how you’d reinforce a bookshelf—ensuring everything stays perfectly aligned.
Use Shims and Leveling Aids During Installation
Place shims behind the vanity to fine-tune leveling. This is akin to adjusting a picture frame; small changes make a big difference. I kept a stash of plastic shims for quick adjustments, preventing future tilting or instability. Check the level frequently during the process to ensure a precise position.
Secure Wiring and Plumbing Before Final Fixing
Ensure pipes and electrical wiring are properly aligned before tightening all fasteners. Running into plumbing conflict is a common mistake, leading to re-drilling or damaging the wall. After planning, I marked plumbing and wiring pathways on the wall, which saved me from making adjustments post-installation. Consider using masking tape or paint to visualize these routes clearly.
Double-Check and Test the Installation
Once mounted, gently test the vanity for wobble or movement. Place a weight on top to simulate real use; if it shifts, revisit reinforcements or anchors. During mine, a final wobble test revealed a loose bracket, allowing me to tighten it and prevent future issues. This step ensures durability and safety, giving you peace of mind.
Explore Creative Storage Options
With a sturdy vanity in place, consider optimizing space with custom storage solutions. This can include pull-out drawers, hidden compartments, or vertical organizers. Check out this guide on creative storage ideas to enhance both function and style in your bathroom or bedroom.
Properly anchoring and reinforcing your vanity is like building a bridge—it must be solid from end to end. By following these concrete steps—assessing, preparing, reinforcing, and testing—you ensure your installation withstands time and daily use, transforming your space into a showcase of functional craftsmanship.
Many homeowners believe that selecting a trendy vanity or storage system guarantees a seamless fit, but the truth is far more nuanced. A widespread misconception is that prefab solutions are universally suitable, yet in my experience, customizations often outperform generic options, especially in uneven spaces. For example, standard cabinets rarely account for quirks like sloped floors or crooked walls, which can lead to instability and frustration. Delving into the complexities of installation reveals that perfect alignment isn’t just about aesthetics but ensuring safety and durability.
What Advanced Installers Know About Wall Preparation That Most Overlook
Many assume that walls are flat surfaces ready for immediate mounting, but in reality, walls—particularly older plaster or masonry—have hidden irregularities that can undermine your entire project. Experts recommend thorough assessment using laser levels and visual inspection before drilling. Failing to do so risks uneven weight distribution, leading to wobbling or even detachments over time. Incorporating internal reinforcements, like steel brackets behind the drywall or mortar repairs on brick walls, is often necessary for long-lasting results. For a step-by-step approach to flawless vanity installation, you might find this guide invaluable.
An old myth suggests that heavy-duty anchors alone suffice for all wall types, but this oversimplification can be costly. Different wall materials demand specific hardware—toggle bolts for drywall, masonry anchors for brick or concrete—and even then, reinforcement strategies are essential for very heavy fixtures.
Furthermore, many underestimate the importance of internal support structures within the vanity itself. Installing steel L-brackets or crossbeams inside the unit distributes weight more evenly, preventing wobbling and extending its lifespan. Consider exploring innovative storage ideas that incorporate these structural reinforcements for optimal stability.
Regarding built-ins, there’s a common assumption that they require no special preparation. However, their integration into existing architecture demands scribing, shimming, and sometimes custom framing, especially when walls are misaligned. Skipping these steps not only compromises the visual finish but can also cause door misalignments and hardware wear.
When you plan your project, think beyond just choosing materials or designs. Consider the hidden nuances, such as wall condition, reinforcement needs, and the interplay between hardware and wall integrity. Mastering these details elevates your craftsmanship from beginner to expert. Have you ever fallen into this trap? Let me know in the comments.
For those ready to take their installation skills further, I recommend reviewing this expert guide on perfecting every step, from assessment to finishing touches.
Essential Tools for Lasting Vanity Installations
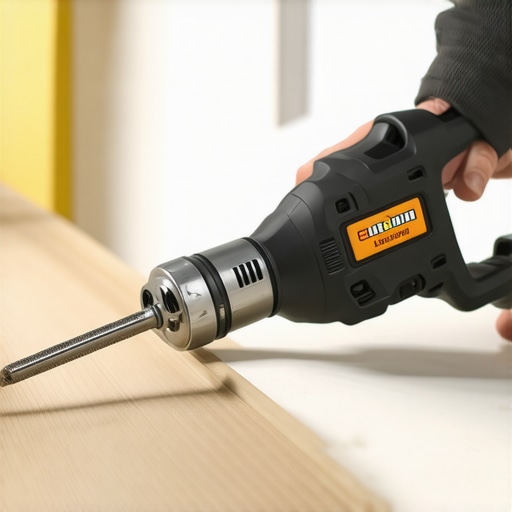
Maintaining the integrity of your vanity and built-ins over time requires more than just initial care; it hinges on having the right tools at your disposal. I personally swear by a high-quality laser level, like the Stabila LL500, because its accuracy ensures that even after years, your installation remains true. Pair that with a digital torque wrench—something like the TEKTON Digital Torque Adapter—to tighten bolts precisely without risking damage or over-tightening. For surface assessments and drywall reinforcement, a cordless rotary hammer such as the DEWALT DCH273B makes tasks like drilling into masonry walls more manageable and less labor-intensive.
To keep plumbing and electrical connections in check, I always use a multimeter and a non-contact voltage tester. These help diagnose issues early, preventing costly repairs down the line. Additionally, a specialized wall repair kit—like the Red Devil Drywall Patch Kit—becomes handy when fixing plaster imperfections post-installation, which is inevitable in older homes. Using these tools regularly ensures your wall reinforcements and mounting hardware last for years, maintaining safety and aesthetic appeal.
Adopt Software That Streamlines Long-Term Maintenance
Believe it or not, digital tools can significantly reduce ongoing upkeep. I rely on SketchUp for visualizing potential modifications and assessing spatial constraints before making changes. For scheduling periodic inspections, I use Trello to set reminders for wall inspections, hardware tightenings, or updates on reinforcements. Mobile apps like iHandy Level turn your smartphone into a precise leveling tool, so regular checks are quick and easy. These investments in software ensure your storage solutions stay secure without the need for constant manual inspections.
What Are the Long-Term Advantages of Proper Maintenance
Consistent care pays off by extending the lifespan of your built-ins. Regularly tightening bolts and inspecting wall reinforcements prevent minor issues from becoming major repairs. Over time, this saves you both money and frustration. In my experience, a simple monthlyチェック with my digital torque wrench and visual assessments using my laser level can detect misalignments caused by house settling, weather changes, or wear and tear, allowing me to address them early. Moreover, keeping plumbing and electrical connections in check ensures safety and functionality, often preventing hazardous situations.
How do I maintain storage solutions and built-ins over time?
Develop a routine that includes inspecting hardware integrity, wall stability, and surface conditions. Keep a toolkit handy—your torque wrench, level, and repair kits—and schedule quarterly reviews to catch issues before they escalate. Also, invest in digital tools like maintenance apps to set reminders and record past inspections, creating a comprehensive upkeep log. Doing so will preserve the beauty and safety of your installation for years to come. For advanced reinforcement techniques, I recommend exploring steel supports like those outlined in this article on steel toe-kicks.
Try integrating a digital level or scheduling app into your routine today—these small steps can drastically improve your maintenance workflow. Remember, proactive care not only maintains your investment but also ensures a safer, more functional space over the long haul. Keep your tools sharp and your inspection schedule consistent, and your storage solutions will thank you for years of reliable service.
The Hidden Lessons That Turned My Wall Woes Into Strengths
One of the most profound insights I gained was that wall irregularities are often the silent saboteurs of installation success. I once believed that a good level and sturdy anchors were enough, but overlooking the nuances of age-old plaster or uneven surfaces led to ongoing wobbliness and rework. The moment I started inspecting and addressing wall quirks — filling low spots, reinforcing behind the surface, and choosing wall-specific hardware — everything changed. These lessons have made me realize that masterful mounting is less about brute force and more about strategic preparation.
Another revelation was the significance of internal reinforcements within my vanities and built-ins. Steel brackets, crossbeams, and custom supports may seem like overkill initially, but they provide unwavering stability over years of use, especially when coupled with the right anchoring techniques for wall type. It became clear that solid internal structure combined with wall reinforcement creates a marriage of durability and safety that no simple surface mounting can guarantee.
Finally, I learned the importance of regular, proactive maintenance. Simple routines like tightening bolts with a digital torque wrench, inspecting wall supports, and visual checks with a laser level keep everything in top shape. These small, consistent actions extend the lifespan of my investments and make future projects smoother and more predictable, transforming a daunting task into a rewarding process.
Tools and Resources That Make the Difference
- Laser Level (Stabila LL500): Precision measurement that keeps your installation perfectly true over time. I trust it to catch even subtle shifts that can cause wobble later on.
- Digital Torque Wrench (TEKTON): Ensures bolts are tightened just right, preventing over-tightening or loosening with use, maintaining the integrity of internal supports.
- Heavy-duty masonry anchors: For brick or concrete walls, choosing the correct hardware makes all the difference. I lean on recommendations from trusted hardware brands that specialize in wall-specific solutions.
- SketchUp software for planning: Visualizing space and reinforcement options beforehand really streamlines the process, avoiding guesswork during physical installation.
Embrace the Future with Confidence
Taking the time to assess, reinforce, and maintain your installation isn’t just about safety—it’s about elevating your craftsmanship. Each successful project boosts your confidence and builds a foundation for future improvements. By mastering wall evaluation, internal reinforcement strategies, and regular inspections, you create a space that’s both beautiful and resilient. Remember, the real power lies in the details — so invest in quality tools, plan meticulously, and enjoy the pride of a job well done. Your dream storage solutions and built-ins are within reach, and with these insider insights, they’ll stay perfect for years to come.
What’s been your biggest hurdle when installing heavy fixtures or built-ins? Share your story below — I’d love to hear how you overcame it!
**