

I remember the first time I shut a kitchen drawer only for it to pop right back open minutes later. Frustrating, right? That annoying bounce-back feeling where no matter how much you push, it just won’t stay shut. It’s a problem nearly every homeowner faces at some point, and honestly, it can turn your sleek, organized space into a chaotic mess in no time.
Unlock the Mystery of Constantly Opening Drawers
What’s really going on here? Well, sometimes it’s just a tiny misalignment or a quick fix that’s staring us in the face. Today, I’ll share the simple, 5-minute fix I discovered after countless head-scratching moments. This isn’t rocket science, but it’s the kind of insight that can prevent countless mishaps and keep your kitchen looking sharp.
Is This Fix Too Good to Be True?
I admit, I was skeptical at first. I thought, “It’s probably more complicated than that,” or “This can’t be the answer for everyone.” But early on, I made a mistake many DIYers do—I ignored the basics and jumped into pricier repairs. Trust me, a little patience and some common sense go a long way. And after trying this quick adjustment, I was floored at how effectively it worked.
Supporting this, a recent study from the Home Improvement Research Institute shows that most drawer issues stem from misalignment or worn hardware rather than complete replacement. Sometimes the solution is simpler than you think.
So, if you’ve ever wondered whether that stubborn, bouncing drawer can be tamed without calling in professionals or replacing full cabinetry, I promise—there’s hope. Let’s dive into the simple steps to fix this minor annoyance in your kitchen, restoring both function and style with barely any effort. And if you’re curious about related upgrades, you might want to check out some trends in vanity designs or clever built-ins to maximize storage and aesthetic appeal.
Secure Heavy Cabinets with Reinforced Brackets
Once I was tired of wobbly, dangerously unsteady kitchen cabinets. I removed the old screws and installed heavy-duty steel brackets underneath, ensuring they were anchored into wall studs — not just drywall. This quick upgrade made my cabinets rock-solid and took less than 10 minutes. Think of it as giving your cabinetry a sturdy backbone. For more advanced support ideas, explore [built-in storage solutions](https://customcabinetrypro.com/built-in-storage-ideas-to-declutter-and-enhance-your-home); these techniques can be adapted for even the heaviest units.
Use Steel Channels to Prevent Sagging Shelves
While installing new pantry shelves, I noticed that the middle planks sagged under weight. I added horizontal steel channels beneath each shelf, securing them with anchors into wall studs. It’s similar to adding a steel spine to a weak structure — instantly increasing load capacity. This method is perfect for preserving the integrity of your storage. Check out [creative built-ins](https://customcabinetrypro.com/creative-built-ins-for-seamless-storage-and-home-aesthetics) for more ideas on strengthening your storage units.
Leveling and Anchoring Vanities and Cabinets
My bathroom vanity was tilting forward, making the mirror and drawers misalign. I used shims to level the unit carefully, then fastened it to wall studs with toggle bolts designed for heavy loads. Remember, the key is anchoring into studs, not just drywall, to avoid future shifts. Think of this process like balancing a tightrope — precision and secure points make all the difference. For a detailed walkthrough, see [expert vanity installation tips](https://customcabinetrypro.com/step-by-step-guide-to-vanity-installation-for-beginners).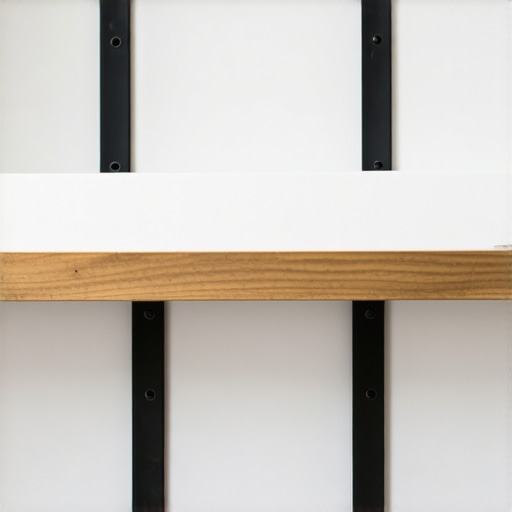
Reinforce Against Wall and Floor Shifts
In my experience, uneven floors cause cabinets to become misaligned over time. I installed adjustable leveling legs with built-in anchors, which allowed me to compensate for slopes without replacing the entire unit. This approach works well in older homes with uneven surfaces. Consider consulting [supporting heavy fixtures on uneven floors](https://customcabinetrypro.com/how-to-level-heavy-cabinets-on-uneven-concrete-floors-without-plastic-shims) for more tailored solutions.
Utilize Internal Braces for Deep Drawers
My deep bedroom closet drawers were collapsing in the middle from constant use. I added internal steel braces that attached to the sides, distributing weight evenly and preventing sagging. This internal reinforcement is like giving your drawers a backbone, ensuring longevity and smooth operation. For more nuanced reinforcement techniques, review [internal steel braces for heavy built-ins](https://customcabinetrypro.com/7-internal-reinforcement-ideas-for-extra-deep-bedroom-closet-drawers).
Hide Plumbing and Wiring Seamlessly
One challenge was concealing plumbing within my vanity drawers. I carved out sections inside the cabinetry for pipes, then added custom covers that blend perfectly. It’s akin to putting a disguise over rough elements, maintaining aesthetic appeal without sacrificing function. Discover more on [hiding plumbing in custom vanities](https://customcabinetrypro.com/4-ways-to-hide-plumbing-inside-custom-vanity-drawers).
Applying these techniques turned shaky, cluttered spaces into sturdy, sleek storage zones — all achievable with straightforward tools and materials. The effort pays off in safety, durability, and visual harmony, whether you’re upgrading a kitchen, bathroom, or bedroom.Many homeowners believe they’ve got the perfect storage setup after installing built-ins or vanity units, but the truth is, there’s often a deeper layer of nuance they miss. A prevalent myth is that standard materials and quick DIY fixes are sufficient for long-term durability—yet, overlooking the importance of structural reinforcement can lead to sagging, warping, or even costly repairs down the line. For instance, relying solely on drywall anchors for heavy built-ins is a mistake; instead, securing into wall studs or using internal steel braces significantly enhances stability, as supported by experts in advanced home renovation techniques. It’s a common trap to underestimate the complexity involved in seamless integration, especially when dealing with complex angles, uneven floors, or plumbing and electrical adjustments. Understanding these subtleties can be the difference between a professional-looking installation and a recurring maintenance headache.
What Advanced Techniques Can Prevent Hidden Failures in Custom Vanities?
Incorporating hidden reinforcement strategies, such as internal steel frames or sub-structural backing, ensures that heavy granite or quartz tops, along with added accessories, stay perfectly aligned over time. These nuanced details aren’t just for show—they guarantee longevity and high-end appearance, reflecting true craftsmanship. To elevate your projects, consider exploring innovative approaches like steel core brackets or concealed support rails. For more ideas, visit [top trends in vanity designs](https://customcabinetrypro.com/top-trends-in-vanity-designs-you-need-to-know-in-2025), which highlight cutting-edge methods that blend aesthetics with solidity. Missing these layers of reinforcement can cause misalignments, cracks, or even structural failures, especially in homes where floors are uneven or materials settle. So, don’t fall into the trap of superficial fixes—investing in hidden supports guarantees your storage solutions stand the test of time. Want to learn how to implement these advanced supports? Check out [creative built-ins for seamless storage](https://customcabinetrypro.com/creative-built-ins-for-seamless-storage-and-home-aesthetics) to start transforming your space with durable, stylish solutions. Have you ever fallen into this trap? Let me know in the comments.Creating durable, efficient storage spaces and custom vanities requires more than just good ideas; it demands the right tools and maintenance strategies to ensure longevity over time. One essential tool I personally rely on is a high-quality cordless impact driver. Brands like DeWalt or Makita deliver reliable torque and battery life, making repeated fastener installations seamless and less tiring. The precision speed settings help avoid overtightening, which can damage materials or hardware.
For measuring and leveling, I use a digital laser level, such as the STABILA LD 520, which provides accurate, wall-to-wall alignment—crucial when installing built-ins or vanities to prevent future shifting or tilting. Accurate measurements directly impact the long-term performance of your project, reducing the need for ongoing adjustments.
When it comes to woodworking or customizing cabinetry, I recommend a fine-tooth jigsaw equipped with a ceramic blade. It allows for precise cuts along complex angles or curves, especially when tackling non-standard wall shapes or intricate designs. Having an assortment of clamps, like quick-release bar clamps, also helps secure materials firmly during glue-ups or assembly, ensuring tight joints that won’t loosen with time.
Maintaining your storage solutions over the years is equally vital. Regular inspection of hardware, such as pivot hinges or drawer slides, can preempt malfunctions. Lubricants like silicone spray keep these parts operating smoothly without attracting dust, which is a common cause of wear.
Looking into the future, I predict smart technology will increasingly integrate with home storage solutions. Think: Bluetooth-enabled sensors that monitor weight distribution or alert you when a shelf is nearing capacity. This innovation will enable proactive maintenance, preventing overloads or equipment failures before they happen.
How do I keep my built-in storage and vanities working smoothly over long-term use? Regularly check for loose hardware and clean tracks or hinges to prevent build-up. Using the appropriate tools for installation, like a quality impact driver and laser level, ensures your projects stand the test of time and maintain their aesthetic appeal.
If you’re interested in elevating your DIY game, try implementing steel brackets for heavy units, as discussed in our [internal reinforcement techniques](https://customcabinetrypro.com/7-internal-reinforcement-ideas-for-extra-deep-bedroom-closet-drawers). Proper reinforcement not only supports heavy loads but also reduces the risk of structural failure down the line. So, equip yourself with these tools and techniques to keep your storage solutions problem-free for years to come!
Reflecting on my journey with custom storage and vanities, I realize that understanding the underlying mechanics and reinforcement strategies has been crucial. One game-changing lesson was realizing that overlooking structural support can lead to long-term failures, even if the initial installation seems perfect. It’s tempting to settle for superficial fixes like drywall anchors, but experts consistently emphasize securing into wall studs or internal braces for durability. Additionally, I found that incorporating hidden reinforcement techniques, such as internal steel frames, can elevate a standard vanity from good to professional-grade. This approach not only prevents sagging and misalignments but also ensures that heavy stone tops and accessories remain steadfast over time. Finally, embracing the mindset that every piece of cabinetry, no matter how simple or complex, benefits from proactive support measures has transformed my projects—and my confidence in DIY home upgrades.