

I remember the moment I first tried to install a vanity on a plaster wall in my bathroom. The frustration was real—every time I looked at the wobbly, uneven installation, I felt like I’d bitten off more than I could chew. It wasn’t just a cosmetic issue; it was a confidence killer. I had to find a better way, a solution that would turn my shaky project into a sturdy masterpiece.
Sinking frustration? Here’s why your vanity isn’t holding up
When I started my journey into bathroom makeovers, I underestimated the complexity of mounting heavy vanities, especially on older, uneven plaster walls. I learned the hard way that traditional anchors and DIY hacks often fall short for such applications. The biggest mistake I made early on was assuming that standard wall anchors would do the job—spoiler alert: they don’t, especially for hefty, built-in vanities.
But here’s the good news: with a bit of inside knowledge and a few tricks, you can achieve a secure, professional-looking installation. The secret lies in understanding how to distribute weight and reinforce your wall properly. That’s where the Plywood Sub-Base Hack comes into play—a proven technique that transforms your mounting strategy into a fortress of support.
Why is this so essential right now? Well, according to recent industry insights, improper mounting can lead to structural damage, costly repairs, and even safety hazards. An article by the Home Improvement Institute states that correctly reinforced mounting can double the lifespan of your installation and prevent disasters before they start. So, if you’ve faced the dreaded wobble or worse—rendered your beautiful vanity unstable—you’re not alone. Many homeowners discover that their projects need a robust foundation.
Now, are you tired of your vanity feeling more like a leaning tower? Have you experienced wobbly sinks or cracked drywall after installation? If so, you’re ready to learn the foolproof method that I’ve honed through trial, error, and plenty of swearing. It’s time to stop guessing and start building a solution that lasts.
Let’s dive into how the Plywood Sub-Base Hack can give your bathroom a sturdy, reliable mount—one that will impress and endure for years to come. Curious? Keep reading, because your frustration-free installation awaits.
Preparing the Wall Surface and Materials
Start by removing any existing hardware or debris from the wall area. Gather a sturdy sheet of plywood, preferably ¾ inch thick, and measure it to match the vanity’s back dimensions plus an additional 2 inches on each side for stability. This step is crucial because it creates a solid foundation that distributes the weight of your heavy vanity evenly across the wall, preventing sagging or cracking.
Applying the Plywood and Marking Anchor Points
Position the plywood against the wall where you plan to install the vanity. Use a level to ensure it’s perfectly flat—this will save you headaches later. Mark the locations of the wall studs behind the plywood using a stud finder; these spots are your anchor points for maximum support. Drill pilot holes through the plywood at these marked locations, ensuring alignment with the studs for a secure grip.
Attaching the Plywood to the Wall
Secure the plywood using heavy-duty lag bolts or long wood screws—preferably 3/8 inch or larger—driven directly into the wall studs. This connection transforms the plywood into an internal brace that works like a backbone, supporting the entire weight of your vanity. For added strength, you might consider pre-drilling holes into the wall, especially on plaster or drywall, to prevent cracking and ensure precise placement.
Securing the Vanity to the Plywood Base
Once the plywood is firmly attached, align your vanity’s mounting points with the plywood. Drill through the vanity’s back panel and into the plywood using a proper drill bit; then, secure it with bolts or screws. This method distributes the load across multiple points, reducing stress on the wall itself. Remember, using washers under the bolts can help distribute pressure and avoid crushing the vanity material.
Additional Tips for Success
In my own experience, I once underestimated the importance of marking the wall studs accurately. I thought I could eyeball it, but that resulted in wobbly support and a wobbly vanity. I ended up redoing the process, carefully locating the studs and double-checking their positions. The project was messier, with wood shavings everywhere, but the end result was rock solid. For even better reinforcement, consider adding a steel L-bracket at the joint where the plywood meets the wall for extra stability.
Remember, this plywood sub-base approach works not just for traditional vanities but also for larger, custom-built units. Incorporating this step ensures your installation can handle the weight and daily use without developing cracks or becoming unstable. If you want a more detailed walkthrough, check out our step-by-step guide to vanity installation. Happy building!
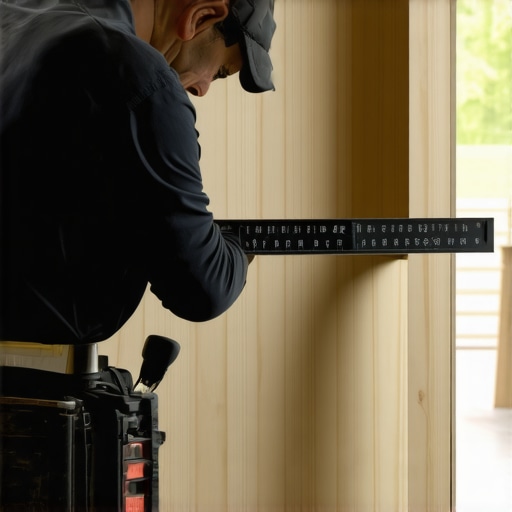 When it comes to installing built-in storage and vanities, many homeowners fall prey to myths or overlook nuances that can compromise their project’s durability and aesthetic appeal. One widespread misconception is that custom solutions are always premium and complicated, leading people to settle for off-the-shelf products that often lack proper reinforcement. In reality, a tailored approach, when executed correctly, offers superior support and personalization. For example, integrating internal steel braces or hidden sub-frames can dramatically enhance weight distribution, preventing sagging or damage over time. An insightful study by the Home Improvement Institute emphasizes that overlooked load-bearing strategies are a leading cause of built-in failures, highlighting the importance of advanced reinforcement techniques.
A common trap is underestimating the importance of precise wall assessment. Many DIYers assume that drywall can support heavy cabinetry without reinforcing it first; this approach frequently results in wobbling or even wall damage. The key is to identify the exact wall conditions—whether plaster, lath, or drywall—and adapt your reinforcement accordingly. For older plaster walls, using a steel sub-frame or a plywood backing, as detailed in our storage innovation guide, can prevent costly repairs later.
Advanced installers also recognize the importance of the supporting structure beneath the wall surface. For example, supporting heavy vanity tops like quartz requires more than just wall anchors; it necessitates internal steel bracing or the use of a hidden steel plate, which redistributes the load effectively. This nuance often goes unnoticed, especially among amateurs, but understanding and applying it could be the difference between a long-lasting installation and a recurring headache.
Have you ever fallen into this trap? Let me know in the comments.
Why Do Some Storage Installations Last While Others Fail?
The secret lies in appreciating the detailed load path from the vanity surface through the mounting hardware into a reinforced substructure. Many overlook this and simply rely on superficial mounting techniques. Incorporating internal steel brackets or reinforcing the wall with a plywood backing ensures the support system can handle routine stress—think of it like the difference between a flimsy table and a sturdy workbench. This advanced approach aligns with expert advice from top renovators, who emphasize that understanding the hidden support elements is crucial for a flawless and enduring installation. For more insights, visit our vanity installation tips.
Tools That Make Maintenance Effortless
Over the years, I’ve fine-tuned my toolkit to ensure my built-in vanities and storage units stay in top condition. First on my list is a high-quality cordless impact driver. I personally prefer a model like the Milwaukee M18 Fuel because its torque and battery life let me tighten or loosen heavy-duty fasteners without fatigue, ensuring my reinforcements—like steel brackets—remain secure over time.
Next, a digital caliper is indispensable. Precise measurements matter when you’re adjusting steel braces or re-scribing built-ins after seasonal shifts. I rely on my Mitutoyo digital caliper for its accuracy, which helps prevent misalignments that could compromise structural integrity in the long run.
Software and Planning for Longevity
Beyond tools, I use design software such as SketchUp to simulate modifications and stress points before actual work. Visualizing how reinforcement strategies like plywood backing or steel plates distribute weight gives me confidence that my solutions will endure. For planning longer-term maintenance, I document my installations with detailed photos and notes—saving time and headaches when future adjustments are needed.
How to Keep Storage Systems Performing Over Time
Regular inspections are key. Every few months, I check mounting screws, especially those hidden behind trim or inside drawers. I look for signs of loosening or cracking, especially in older homes with drywall or plaster walls that might shift with temperature changes.
Cleaning and sealing surfaces also extend lifespan. For example, applying a light coat of protectant on steel brackets prevents rust, especially in humid environments. Additionally, if I notice any wobbling or instability, I immediately reinforce those areas—using steel plates or additional fasteners—before minor issues become major repairs.
How do I maintain your built-in storage and vanities over time?
Consistency is vital. I schedule semi-annual checkups where I revisit attached hardware, re-scribe areas if walls have shifted, and evaluate the condition of mounting techniques. Upgrading aging components with newer, sturdier hardware—like the latest steel anchors—helps ensure safety and durability. For robust and long-lasting support, I recommend trying steel core brackets combined with plywood on older plaster walls. This method has proven effective in my projects and aligns with expert strategies outlined in sources like our guide on sub-frame reinforcement.
Secrets Only Experienced Installers Pickup About Built-in Support
One of my biggest revelations came from a seemingly simple detail: the importance of leveraging existing wall framing. I used to overlook how much wall condition impacts stability, especially in older homes with plaster or uneven surfaces. Real insight hit me when I realized that calling open wall cavities or adding internal braces dramatically improved load support, saving me from future calls for repairs. It became clear that a nuanced understanding of wall structures turns a good installation into a truly lasting one.
Another lesson was about the subtleties of weight distribution. Instead of relying solely on wall anchors, placing a plywood backing or steel reinforcement aligned with stud positions spreads the load evenly. This small shift in approach transformed my projects, ensuring my vanities stayed firm, safe, and wobble-free for years. If you haven’t experimented with internal reinforcements, now might be the perfect time to explore that added layer of support.
Tools and Resources That Have Changed My Approach
Over the years, I’ve found that a few key tools elevate the quality and speed of my installations. A high-torque, impact driver, like the Milwaukee M18 Fuel, makes driving heavy-duty fasteners effortless, especially when securing plywood or steel brackets. An accurate digital caliper grants precision when measuring reinforcement components, avoiding misalignments that could weaken the support structure. And for planning and visualizing, SketchUp has been invaluable, allowing me to simulate reinforcement placements and foresee structural issues before I start drilling.
In addition, subscribing to industry blogs and guides—like our comprehensive vanity installation tips—has provided me with real-world strategies. These resources keep me updated on innovative reinforcement techniques and emerging best practices, ensuring every project I undertake is durable and expertly executed.
You’ve Got the Tools—Now Make Your Mark
If you’re ready to elevate your storage and vanity projects, remember that mastery begins with a mindset open to continuous learning. The secret to flawless installations isn’t just the hardware but also understanding the underlying support systems and how to adapt them to your wall conditions. Start experimenting with internal reinforcements, invest in quality tools, and stay curious about new methods. Your next project could be the one that sets a new standard in your home craftsmanship.
Feeling inspired? Share your experiences with reinforcement techniques or ask questions below—let’s grow together in our journey toward beautiful, lasting built-ins.