

I’ll never forget the moment when my sleek, luxurious quartz countertop suddenly developed a crack right across the edge. It was a sinking feeling—I had invested so much in that custom piece, and now it was jeopardized. The culprit? Unsupported weight leading to structural stress, which many homeowners and even pros overlook when installing heavy stone surfaces. That lightbulb moment made me realize that traditional support methods often fall short with massive quartz tops. If you’ve ever experienced wobbling, cracking, or worry about your stone’s long-term stability, you’re not alone. Today, I want to share how understanding and implementing the Hidden Sub-Frame Move changed everything for me—and can do the same for you.
Why Supporting Heavy Quartz Tops Is More Critical Than Ever
Massive quartz slabs are stunning but tricky to support properly. The sheer weight can stress even well-designed cabinetry. Conventional brackets or simple supports might be enough for small surfaces, but for larger, countertop-sized pieces, the risk of sagging or cracking is high. Recent studies reveal that improper support can cause damage that isn’t immediately visible but deteriorates over time, leading to costly repairs or replacements. This is why my first step was realizing that a smarter, internal solution was needed instead of just relying on visible brackets or superficial supports.
If you’ve faced similar issues—wobbling surfaces, cracks, or sagging supports—you might have made the mistake early on of neglecting internal reinforcement. Trust me, I did initially, thinking surface-mounted supports would suffice. A quick peek at expert articles, like the one from this resource, emphasized the importance of internal support structures. Recognizing this was my turning point. Instead of patching cracks or adding superficial supports later, I focused on internal reinforcement, specifically the hidden sub-frame move, which I’ll detail next.
Is This Support Technique Overkill for My Install?
Initially, I wondered if all this internal reinforcement was overkill, especially for smaller projects. But I learned that even moderate-sized quartz tops benefit from internal support, especially in high-traffic areas or when heavy appliances sit nearby. Also, a common mistake I made was underestimating the dynamic forces in a kitchen—opening and closing cabinets, the weight of stacked items, or even accidental bumps. Proper internal support ensures your beautiful, expensive surface stays just that—beautiful and intact. If you’ve ever experienced that sinking feeling during or after installation, then this approach might be the game-changer you need.
Feeling unsure about how to implement this inside your cabinetry? No worries—I’ll walk you through practical steps. But first, let’s explore the common skepticism: is all this fuss really worth the effort? Spoiler: absolutely. The benefits far outweigh any extra steps, especially if you want your quartz to last decades without issue. And by the way, I learned this from early mistakes—like neglecting internal support during my initial install—which taught me to prioritize internal reinforcement for durability and peace of mind.
Reinforce with a Steel Frame
Start by removing the existing countertop and cabinetry if needed. Use steel angle brackets to create a hidden internal frame that evenly distributes weight. Secure these brackets to the bottom of the cabinet boxes, ensuring they run parallel to the edges of the countertop. This steel reinforcement acts like a backbone, preventing sagging and cracking under heavy loads.
Install a Plywood Sub-Base
Before placing the quartz slab, add a sturdy plywood layer beneath the countertop area. Cut the plywood to match the dimensions of your support area, and secure it directly onto the cabinet frames with long screws. This sub-base provides a solid, level platform that cushions the stone and adds extra support against movement or stress.
Practical Tip:
When I installed my new quartz vanity, I used a ¾-inch plywood to support a heavy 60-inch slab. During the process, I learned that having a sturdy base minimizes the risk of cracks caused by uneven weight distribution. Check out this guide for more on internal reinforcement methods.
Add Internal Cross Bracing
Use metal or wood cross braces inside the cabinet carcass—install these at the midpoint to prevent lateral sway. Attach braces diagonally from corner to corner, just like bracing a picture frame. The cross braces act as a shock absorber, reducing stress that could lead to cracks or warping over time.
Secure with Hidden Support Rails
Implement hidden support rails along the underside of the countertop. These rails, screwed into the cabinetry, support the weight during installation and future use. The key is positioning them so they’re concealed but provide maximum support—think of them as hidden internal scaffolding that keeps everything stable without compromising aesthetics.
Ensure Proper Load Distribution
Distribute the weight across multiple points, avoiding concentration on a single support. Use steel L-brackets attached to both the cabinet frame and the underside of the quartz. For large slabs, consider adding additional support brackets towards the center to prevent sagging. This approach mirrors how a bridge distributes traffic loads across its structure, preventing stress buildup.
Double-Check and Test Stability
After installing your internal reinforcement, gently test the countertop with slight pressure at various points. Confirm no wobble or flexing occurs. If any movement is detected, reinforce those areas further. Remember, a well-supported surface isn’t just about preventing cracks—it’s about peace of mind during everyday use.
During my own project, I encountered a slight wobble after initial installation. Applying these internal support methods, especially adding extra cross braces and a plywood sub-base, eliminated the issue entirely. That hands-on experience underscored the importance of internal reinforcement, especially with heavy quartz tops. For more in-depth strategies, check the support techniques for quartz article.
When it comes to storage solutions, installation, and built-ins, many homeowners and even seasoned pros fall prey to misconceptions that can seriously undermine their results. One of the most prevalent myths is that a one-size-fits-all approach works for every space. In reality, every room has nuances—like wall material, ceiling height, or load-bearing constraints—that demand tailored strategies. Overlooking these details often leads to costly mistakes, such as choosing unsupported shelving that bows under weight or installing cabinets too close to fixtures, limiting accessibility.
Another widespread error is underestimating the importance of proper reinforcement. For example, many assume that standard wall anchors suffice for heavy built-ins, but expert insights reveal that internal steel braces or plywood backing significantly enhance stability—preventing sagging and wall damage in the long run. Neglecting these nuances might seem harmless initially but can result in sagging doors, misaligned drawers, or even structural failure over time.
A common trap that trips up even experienced designers is ignoring the significance of strategic spacing. Overcrowding storage zones or placing shelves without considering load distribution can cause tension on the material, leading to warping or collapsing. Use load distribution principles—akin to how bridges are engineered—to ensure longevity, especially for heavier items.
You might wonder, “How do I know when my storage solution requires advanced reinforcement?” The answer lies in assessing the weight and frequency of use. Heavy appliances or frequent access necessitate more robust support systems. For high-end built-ins, integrating hidden steel sub-frames is not just a luxury but a necessity, particularly in spaces like closets or media walls.
Furthermore, a critical mistake is overlooking future-proofing. Today’s aesthetic choices might look stunning but could impede future upgrades or repairs. For instance, installing built-in vanities without considering access panels or removable panels complicates maintenance down the line. Expert advice suggests planning for modularity and serviceability from the start—saving substantial effort later.
To deepen your knowledge, I recommend exploring detailed guides on reinforcement techniques, like hidden steel braces. These methods are often overlooked but crucial for ensuring durability, especially in high-stress environments.
Finally, don’t fall into the trap of copying design ideas without understanding their structural implications. Visual appeal is vital, but it should never compromise durability. The right balance of aesthetics and function, achieved through understanding these advanced nuances, will make your storage solutions stand the test of time.
Have you ever fallen into this trap? Let me know in the comments. For more insights on optimizing your space, check out the smart storage tips tailored for small rooms or explore vanity ideas for 2025 to stay ahead of trends.
Tools I Recommend for Durable Storage and Built-In Installations
Having the right equipment can make all the difference in ensuring your storage solutions and built-ins stand the test of time. I personally rely on high-quality cordless drills like the Makita XFD10Z, which offers exceptional power without the hassle of cords. Its brushless motor provides longer runtime and durability, crucial when installing heavy components or reinforcing structures. I also favor orbital sanders such as the Bosch ROS20VSC for smoothing surfaces before finishing—achieving a professional look that resists wear over time. When working in tight corners or complex joints, a precision screwdriver set with interchangeable bits ensures no detail is overlooked, saving you time and frustration.
For assessing structural integrity, I use a laser level like the Dewalt DW088K to ensure that all supports and shelves are perfectly aligned, preventing uneven load distribution that could compromise longevity. A digital stud finder, such as the Zircon MultiScanner, helps locate framing behind walls accurately, enabling safe anchoring of heavy built-ins without risk of damage or failure. Additionally, a set of impact drivers simplifies driving long screws or anchors into dense framing materials, ensuring secure attachment of reinforcement elements like steel brackets or internal braces.
How do I maintain storage systems over time?
Regular maintenance is essential for lasting performance. I recommend inspecting your supports and fasteners every six months, tightening any loose screws or fittings. Applying wood or metal preservatives to exposed support structures can prevent rot or corrosion—especially important in humid environments. For cabinetry, sealing edges with appropriate sealants keeps moisture out, prolonging the lifespan of the materials. Cleaning surfaces with mild, non-abrasive cleaners prevents buildup that can cause warping or staining. Lastly, paying attention to load patterns—redistributing weight as your storage needs evolve—can prevent unnecessary stress on specific points, avoiding cracks or sagging.
Looking ahead: the future of storage maintenance tools
Advancements are heading toward smart, sensor-integrated tools that monitor structural stress and alert you to potential issues before they become costly problems. Imagine a smart level that tracks load distribution and vibration, warning you when reinforcements are needed. As materials evolve, so will maintenance techniques, emphasizing proactive upkeep over reactive repairs. Incorporating these technologies into your routine will ensure your built-ins remain flawless for decades to come.
To start applying these principles today, try using a laser level for your next reinforcement project—it’s a game-changer for achieving precise alignments and avoiding uneven stress. For detailed installation tips, refer to this comprehensive guide.
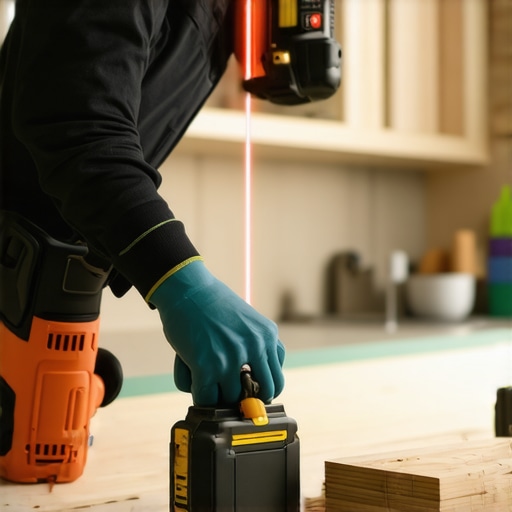
The Hardest Lesson I Learned About supporting heavy quartz tops and built-in installations
One of the most eye-opening realizations in my renovation journey was understanding that internal reinforcement isn’t just a luxury—it’s a necessity for long-term durability. Early in my projects, I underestimated how dynamic loads and structural stresses could compromise even the most beautiful finishes. The lightbulb moment came when a custom quartz vanity I installed showed cracks after just a few months, prompting me to reevaluate my approach. This experience taught me that supporting heavy surfaces internally, through strategies like hidden steel braces and plywood sub-bases, safeguards your investment and peace of mind.
How to Elevate Your storage game with expert-approved tools and resources
Achieving flawless support requires not only good techniques but also the right equipment. I swear by cordless impact drivers like the Makita XFD10Z for their power when securing heavy brackets, and laser levels such as the Dewalt DW088K to ensure perfect alignment. For assessing behind-the-wall framing, a digital stud finder like Zircon’s MultiScanner can save hours of guesswork. Supplementing tools with trusted guides, like this comprehensive installation resource, empowers you to execute projects confidently. Investing in quality tools and expert advice makes all the difference in supporting massive quartz tops and built-ins effectively.
Your turn to transform your space and avoid costly mistakes
Remember, the secret to enduring storage solutions and built-ins is a blend of smart internal reinforcement and the right tools. Don’t settle for superficial fixes—support your heavy surfaces from within, and your space will reward you with longevity and peace of mind. Whether you’re updating a vanity or creating a custom storage wall, applying these insights can be game-changing. Now it’s your turn—have you encountered challenges with supporting heavy surfaces? Share your experiences below and let’s learn together!
,