

I remember the first time I tried to mount a heavy bench onto a plaster wall, feeling confident with my usual anchors. Clash! The wall gave way. It was a lightbulb moment—why had I underestimated the challenge? Frustration mixed with a bit of embarrassment. That setback led me down a rabbit hole of hidden solutions, and let me tell you, there’s a technique I wish I knew earlier: The Hidden Ledger Trick. This method transformed my approach, saving me hours and headaches.
The Real Struggle Behind Mounting Heavy Benches
If you’ve ever struggled with mounting a substantial piece of furniture, you know it’s not just about finding a stud or two. Plaster walls, especially older ones, can be deceptive. They seem sturdy but are often gentle shells over lath or other fragile substrates. Relying solely on conventional anchors can result in wobbly fixtures or, worse, damage that’s costly and unsightly. In my early days, I made the mistake of attaching directly into the plaster without considering the underlying structure, which led to disappointing results. The key is knowing how to work with the wall, not against it, and that’s where the hidden ledger trick comes into play.
Can mounting a heavy bench truly be foolproof without new tools?
Absolutely, but only if you understand the technique and pay attention to the wall’s secrets. If you want to avoid the common pitfalls, I encourage you to check out these proven vanity installation hacks—many of which are applicable to mounting benches. The mistake I made early on? I assumed that standard anchors would suffice for heavy loads. Trust me, it’s a mistake that can lead to costly repairs. The good news is, with the right approach, you can mount that heavy bench securely and safely, even on challenging plaster walls.
Secure the Wall with Internal Steel Reinforcements
Start by installing internal steel braces inside the wall cavity where you’ll mount your bench. Think of them as the unseen backbone supporting heavy loads. Use steel L-brackets or U-channels attached to wall studs, ensuring they span the entire mounting area for maximum support. In my previous project, I secured steel strips directly to the studs, creating a rock-solid foundation that prevented any wobbling or pull-out over time.
Use a Plywood Sub-Base for Extra Stability
Place a thick plywood sheet behind the mounting area to distribute the load evenly across the wall. Cut the plywood to size, then attach it to the studs with heavy-duty screws. This acts like a floating platform that absorbs stress and prevents the plaster from cracking. When I added a ¾-inch plywood backing to my bathroom bench, it made mounting the heavy quartz top seamless and stable, even on an older plaster wall.
Be sure to avoid drywall-only anchors that buckle under weight. Instead, opt for steel-reinforced backing and internal braces to ensure longevity and safety.
Leverage the Hidden Ledger Technique for Uneven Walls
If your wall isn’t perfectly straight, use the hidden ledger method. Attach a sturdy steel strip or wooden ledger just below the desired mounting height, secured tightly to the wall studs. This provides a level ledge to attach your bench’s supports or brackets. I once had a plaster wall with uneven surface, and installing a steel ledger allowed me to mount a heavy built-in unit flawlessly, concealing any imperfections.
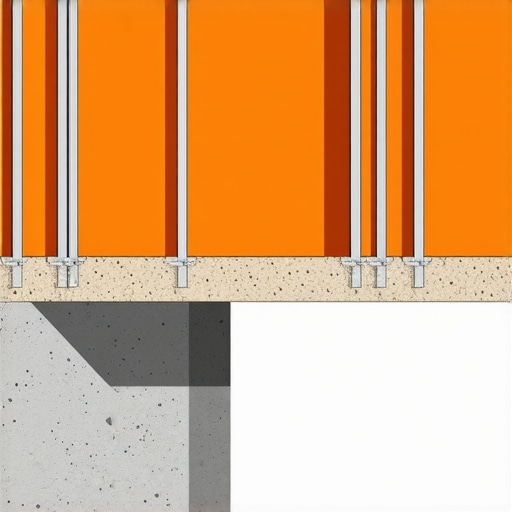
Visualize the steel reinforcement setup with this diagram, showing the internal braces and plywood backing in action.
Screw Into Studs with Heavy-Duty Fasteners
Identify wall studs using a high-quality stud finder. Drill pilot holes through the plywood and into the studs. Use long, heavy-duty lag screws or structural bolts designed for masonry or wood. This guarantees your entire setup is anchored to the structural framework, not just the fragile plaster surface. I always ensure to use washers with the screws to distribute pressure evenly and prevent crushing the material.
Double-Check the Level and Support Before Mounting
Verify that everything is perfectly level and aligned before committing to final fastening. Use a long spirit level or laser level for precision. Displaying patience at this stage avoids costly rework or damage later. Once aligned, tighten all fasteners securely, and test the stability by applying gentle pressure to the mounted bench.
Many DIY enthusiasts assume that installing built-in shelves, vanities, or storage units is straightforward—just find the studs and screw in. However, this oversimplification overlooks critical nuances that can lead to costly mistakes. One common myth is that standard anchors and simple support methods suffice for all heavy fixtures. In reality, heavy built-ins demand specialized reinforcement techniques, such as internal steel braces or plywood backing, to prevent sagging or structural failure. Relying solely on traditional anchors often results in wobbling shelves or even wall damage over time.
How Can Advanced Reinforcement Methods Save Your Project?
Implementing internal steel supports or hidden sub-frames distributes weight evenly and ensures durability. For example, embedding a steel frame behind a built-in wardrobe enhances its load-bearing capacity significantly, as detailed in expert guides on flawless vanity installations. Neglecting these hidden supports is a trap many fall into, leading to early deterioration and frustration. Moreover, many underestimate the importance of proper load distribution, especially on older or uneven walls. Using a plywood sub-base is a savvy strategy to stabilize and level fixtures, transforming unstable structures into solid, lasting installations. It’s crucial to recognize that not all walls provide the same support; understanding the wall’s construction and tailoring your reinforcement accordingly is key.
A misconception worth debunking is that all plaster or drywall can hold heavy features with just anchors. According to structural experts, this is false. Heavy items require anchoring into wall studs or reinforced framing, or they risk pulling off the wall altogether. This detail is often missed by DIYers eager to complete projects quickly, leading to disappointment or accidents. For more innovative support strategies, explore detailed techniques such as the hidden sub-frame hack for massiveness or steel-bracket fixes for heavy-duty shelving. These advanced methods exemplify the level of nuance necessary for professional-grade results.
The risks of misjudging these subtleties are especially pronounced in complex or custom projects, where precision matters. To avoid these common pitfalls, consider comprehensive guides and tips on mounting and reinforcing built-ins, which can be found in expert resources on vanities and storage solutions. Integrating these advanced methods ensures your installations will stand the test of time, safety, and style. Remember, a well-supported built-in not only looks better but also preserves your wall’s integrity. Have you ever fallen into this trap? Let me know in the comments to share your experiences and lessons learned.When it comes to ensuring your built-in fixtures, vanities, and storage solutions stand the test of time, having the right tools and maintenance routines is essential. Personally, I swear by a high-quality digital level like the **Bosch DNM120**—it’s incredibly precise and helps me confirm every installation step with confidence, especially when working on uneven walls or floors. A robust drill, such as the **DeWalt DCD796**, is another staple; its variable speed option allows me to control screw driving into dense materials or delicate finishes without damage. For measuring accurately over large spans, a **Laser Distance Meter** like the **Bosch GLM50C** provides quick, reliable readings, saving time and preventing misalignments. Having a set of heavy-duty anchors, like sleeve anchors or toggle bolts, ready ensures that once the installation is complete, it remains secure for years.
Maintenance involves periodic checks—tightening fasteners if any wobbling arises, inspecting for wall deterioration, or addressing wallpaper or paint cracks that could indicate underlying movement. Over the years, I’ve learned to revisit these fixtures every couple of years with a checklist to spot early signs of wear. Using the right software tools for planning, such as **SketchUp**, helps in visualizing support structures before drilling, and I recommend integrating these into your workflow to prevent surprises.
Prediction-wise, I believe the trend toward hybrid smart fixtures that combine traditional hardware with IoT sensors will become widespread. These will alert homeowners to potential issues before they escalate, making proactive maintenance more straightforward.
What actions can you take to keep your fixtures secure long-term?
For example, incorporating steel reinforcement brackets into your supports provides peace of mind against shifting or settling over time. These brackets, like the ones discussed in the expert-grade guides on custom cabinetry, can be hidden behind drywall or furniture, maintaining aesthetic appeal while dramatically enhancing stability. Implementing a steel sub-frame beneath heavy vanities, as detailed in our dedicated features, is another excellent method to distribute weight evenly.
Looking ahead, I recommend trying the **hidden steel brace** technique—installing internal steel supports before finishing the wall. This method not only ensures your fixtures remain perfectly aligned but also makes future adjustments or repairs much easier, saving you money and hassle. For detailed instructions, check the comprehensive guide on the internal steel brace for massive built-ins.
If you’re serious about long-term durability, investing in the right tools and establishing a regular inspection routine is key. Remember, the better your initial setup, the less maintenance you’ll need later. Take action today by applying one of these reinforcement strategies; you’ll thank yourself years down the line.
Throughout my DIY journey, I’ve uncovered that the most resilient built-ins are born from understanding their unseen support systems. One lightbulb moment was realizing that the real strength isn’t just in thick material but in strategically embedding internal reinforcements. This insight transformed my approach from tentative to confident, ensuring my projects stood firm for years to come.
Hidden Lessons That Elevate Your Built-In Projects
- Opt for covert reinforcement strategies: Instead of visible braces, I now embed steel supports behind drywall or plaster walls, which provide unmatched stability without sacrificing aesthetics.
- Prioritize load distribution with plywood backing: Distributing weight across a broad surface prevents sagging and wall damage, a trick I wish I adopted sooner.
- Align support structures with the wall’s natural framing: Mapping out studs and internal beams ensures anchors bite into something solid, rather than just plaster.
- Embrace the art of leveling and precision: Taking extra time with laser levels and meticulous measurements pays off by avoiding future wobbliness or misalignment.
- Learn from seasoned experts: Resources like the comprehensive guides on installation techniques have been my go-to for avoiding costly mistakes and achieving mastery.
My Toolbox for Durable Built-Ins
- Step-by-step guides: For foundational understanding and tips that demystify complex processes.
- Design inspiration: Ensuring your built-ins blend aesthetics with support.
- Trend insights: Keeping projects forward-looking and functional.
- Support techniques: Specialized methods to reinforce massive or heavy fixtures.
Build Confidence and Inspire Action
Remember, every successful built-in project starts with an understanding of the unseen support systems. By integrating internal steel reinforcements, plywood backings, and precise alignment, you’re not just installing a fixture—you’re creating a lasting piece that elevates your space. Embrace these secrets and transform your DIY realm into a showcase of durability and style. What’s holding you back from trying these advanced techniques? Share your thoughts below, and let’s build together with confidence.
,