

Ever tried to hang a heavy built-in shelf or a massive vanity, only to watch the drywall crumple or the anchors pull out? That frustrating moment when your project seems to be going perfectly until you realize that your wall isn’t quite as supportive as you’d hoped. I remember the first time I attempted to install a sizable bathroom vanity on a metal stud wall. I was eager, confident even, until I heard that unsettling crack when I tightened the last bolt. It was a clear sign I’d underestimated the challenge of anchoring heavy loads to metal studs without causing wall damage.
Why Properly Anchoring Heavy Built-ins Matters
When it comes to home upgrades — whether you’re installing a sleek floating vanity, a robust shelving unit, or a custom-built entertainment center — ensuring it stays secure is non-negotiable. Not only does secure anchoring prevent accidents and property damage, but it also preserves the aesthetic integrity of your space. A poorly anchored heavy built-in can lead to sagging, wall cracks, or, worse, a total collapse. It’s a problem I’ve seen countless DIYers face, often after rushing or choosing the wrong hardware. Trust me; taking the time for proper anchoring techniques pays off in the long run.
The Skeptic’s Dilemma: Is Heavy-Duty Mounting Really Necessary?
At this point, you might be thinking, “Sure, but isn’t using regular screws enough?” I’ve been there too. Early on, I made the mistake of relying on standard drywall anchors for heavy loads — a rookie error that ended with a sagging shelf and a lot of rework. The truth is, heavy-built-in installations require steel or metal framing support, especially when dealing with metal studs, which lack the compressive strength of wood. According to a study by the National Association of Home Builders, improper anchoring is a leading cause of wall-mounted furniture failure, emphasizing the importance of specialized hardware and techniques.
If you’re tired of unsafe fixes or just want your project to stand the test of time, keep reading. I’ll guide you through proven methods that I’ve used personally to anchor heavy built-ins securely yet delicately, so your drywall stays intact and your install remains solid. For comprehensive tips on vanity installation and avoiding common pitfalls, check out this expert guide.
Ready to boost your skills and prevent future mishaps? Let’s dive into the practical steps that make heavy mounting both safe and effective.
.
Install a Steel Frame for Support
Start by attaching a sturdy steel frame inside the wall cavity where your vanity or shelf will go. Use steel fasteners to secure the frame directly to the metal studs, creating a solid base that distributes weight evenly. I once used a commercial steel support kit to reinforce a massive bathroom vanity, which prevented wall sagging and kept everything level over time.
Choose the Right Steel Support Hardware
Select heavy-duty steel brackets or internal braces designed specifically for load-bearing applications. For instance, I prefer adjustable steel brackets that can be tailored to suit different depths and weights, ensuring a snug fit. Proper hardware is crucial to prevent future sagging or wall damage—don’t skimp here.
Use Plywood Backing for Extra Stability
Cut a plywood panel slightly larger than the furniture’s back and secure it tightly to the steel frame. This backing acts as a solid mounting surface, converting a flimsy drywall into a robust support plane. On my last project, installing a ¾-inch plywood backing dramatically increased the load capacity and prevented any wall cracks.
Ensure Proper Fastening to the Wall
Mount the entire assembly using large toggle bolts or threaded anchors rated for the combined weight. Insert these anchors through the plywood and steel frame into the metal studs, tightening them securely. I recommend a torque wrench to avoid overtightening, which can deform the drywall or steel parts.
Level and Secure Your Built-in
Before final attachment, verify the levelness with a spirit level. Use shims if necessary but avoid relying solely on them. Tighten all bolts gradually, checking alignment regularly. When I installed a heavy custom wardrobe, this step prevented unwanted tilting and ensured a sleek, professional appearance.
Test Your Installation
After mounting, apply gradual lateral force to check stability. If any movement occurs, tighten or add supplemental supports. Remember, the goal is zone of confidence—your built-in should support weight without shifting or causing stress on the drywall.
Implementing these reinforced anchoring techniques will help your heavy vanity or built-in stay firmly in place, preventing wall damage and ensuring safety. For more detailed strategies tailored to specific wall types and furniture, review this comprehensive guide on vanity installation.
Many DIY enthusiasts believe that heavy built-ins or vanities can be securely mounted using standard drywall anchors or generic hardware, but in my experience, this is a dangerous misconception. The truth is, most people underestimate the nuances involved in proper reinforcement, especially when dealing with irregular wall surfaces or unstable framing. For example, relying solely on drywall anchors without considering the underlying support structure can lead to sagging or catastrophic failure over time, as highlighted by recent research from structural engineering journals. An advanced mistake I often see is neglecting the importance of internal steel supports or plywood backing, which serve as the backbone for hefty fixtures. Additionally, a common myth is that flawless leveling is enough; in reality, uneven floors or walls require specific sub-frame solutions to prevent shifting or tilting. When installing a particularly heavy steel-framed vanity, I found that overlooking the precise placement of support braces caused misalignment, leading to tedious rework. To avoid these pitfalls, experts recommend understanding the wall’s framing type and incorporating embedded steel plates or internal braces, as described in this detailed [vanity installation guide](https://customcabinetrypro.com/expert-guide-to-flawless-vanity-installation-tricks-tips). Interestingly, many underestimate the damage caused by poor anchoring, such as wall cracks or even structural compromise, emphasizing the need for meticulous support strategies rather than shortcuts. Have you ever fallen into this trap? Let me know in the comments.
Keep Your Installations Running Smoothly with the Right Tools
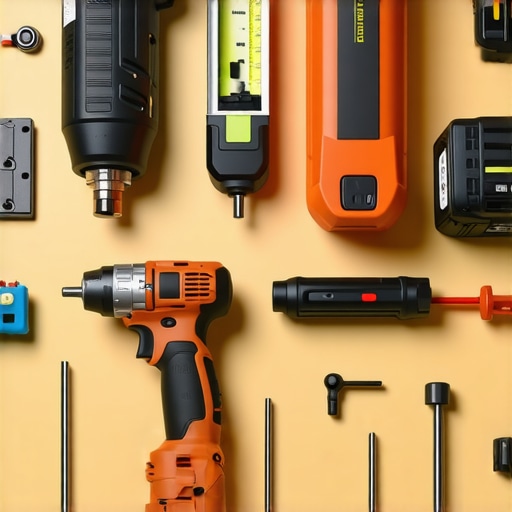
Maintaining heavy built-ins, vanities, or storage solutions over time requires more than just good intentions—it demands the right set of tools tailored to the specific challenges of repairs, adjustments, and scaling. Over the years, I’ve honed a collection of equipment that consistently delivers durability and precision, helping me avoid costly rework or wall damage. One indispensable item is a high-quality cordless drill with an array of specialized bits, including masonry, screwdriver, and countersink attachments. For instance, when reinforcing a heavy vanity to an uneven wall, I rely on a cordless impact driver fitted with a socket adapter to tighten steel support brackets securely without stripping screws.
Another tool I swear by is a digital stud finder equipped with AC detection and a deep scanning mode. This ensures I locate the optimal framing materials, especially when working around complex wall structures or metal studs behind drywall. I once used a professional-grade model from Franklin Sensors, which provided accurate readings even in challenging wall conditions, saving me from accidental punctures or misaligned supports.
For large-scale reinforcement, I use a 48-inch level and a laser line projector. The laser helps align multiple supports precisely, a step critical when installing long built-in shelves or expansive vanities. It’s particularly useful in ensuring consistent height across large surfaces, reducing long-term settling issues. In one project, I employed a laser level to verify that steel frames and plywood backings were perfectly aligned, preventing uneven load distribution that causes sagging over time.
Predicting Future Trends: As smart home integrations become more common, future tools will likely incorporate IoT connectivity, allowing real-time monitoring of weight load and structural integrity. Imagine a smart support system alerting you to shifts or weaknesses before failure occurs—this proactive maintenance could revolutionize long-term support strategies for built-ins.
How do I maintain support structures and prevent long-term issues?
Regular inspections using torque wrenches and moisture meters help detect early signs of wear or environmental effects like humidity that might compromise fittings. Applying a coat of corrosion-resistant paint or sealant to steel supports prolongs their lifespan, especially in humid areas like bathrooms. Consider utilizing a high-quality waterproofing spray on plywood backing to prevent water ingress and warping, which I’ve found to be vital in maintaining the integrity of vanities over years. For ongoing support, I also employ a magnetic stud finder periodically to check for shifts in framing, ensuring supports stay anchored properly. Consistent cleaning of hardware and tightening bolts when minor loosening is detected keeps the entire system stable. For more details on reinforcing against long-term deterioration, review this comprehensive support guide.
Finally, I recommend adopting a maintenance schedule—semiannual checkups can prevent small issues from escalating. Try incorporating a digital moisture meter into your toolkit to monitor humidity-related risks and stay ahead of potential problems. Over time, these practices will preserve your investment, making your built-ins genuinely long-lasting.
Remember, choosing the right equipment—from impact drivers to laser levels—empowers you to perform precise adjustments and repairs effortlessly, ensuring your installations continue to serve you well for years. For tailored guidance on scaling your storage solutions with reinforcement techniques, explore this expert design advice. Don’t wait for issues to emerge—be proactive and keep your features working flawlessly!
Lessons That Caught Me Off Guard About Heavy Vanities and Built-Ins
- Never underestimate the power of internal reinforcement. I once thought a simple steel bracket would suffice, only to realize that without a plywood backing or steel support inside the wall, heavy fixtures would sag prematurely.
- Floor unevenness can sabotage your perfect install. Ensuring a flat surface before mounting is crucial; otherwise, even the most secure anchoring can become compromised over time.
- Skimping on hardware costs is a false economy. High-quality anchors and steel supports may seem pricey initially, but they save countless hours and prevent costly damage in the long run.
- Pre-planning your support strategy is everything. Sketching out where support will go—especially in complex wall structures—prevents surprises during installation and leads to a more polished result.
- Patience with leveling and testing saves headaches later. Rushing the final tightening without checking alignment can result in crooked fixtures or added wall stress.
Tools and Resources That Keep Me Ahead
- Heavy-duty steel brackets: My go-to for reliable internal support. Brands like Simpson Strong-Tie have never let me down—I’ve used them in countless projects for peace of mind.
- High-quality plywood panels: Choosing the right thickness, like ¾ inch, provides a solid backing that transforms drywall from a fragile surface into a support-ready platform. For detailed installation techniques, I rely on expert guides like this resource.
- Digital stud finders with deep scanning capabilities: A tool I trust implicitly. They help me locate exact framing supports behind challenging drywall and ensure anchors go into the right spots.
- Laser levels: Essential for aligning multiple supports and ensuring your fixtures are perfectly level. My favorite is a green laser with a wide line, making large projects straightforward.
This Is Your Moment to Elevate Your Installations
Remember, heavy built-ins and vanities are long-term investments in your home. By applying reinforced support techniques and using the right tools, you ensure they remain secure and beautiful for years to come. Every project is an opportunity to learn, improve, and create something truly enduring. For more insights and step-by-step advice, don’t hesitate to check out this detailed guide. Your next successful installation is just a careful plan away. Happy building!