

I remember the moment when my mudroom bench unexpectedly sagged beneath the weight of my family’s gear. One day, I opened the closet door — and there it was, a noticeable dip that made the entire space look worn out and poorly constructed. That lightbulb realization hit hard: I needed a better support system, not just a cosmetic fix. The frustration of seeing a beautiful bench warp or even risk collapsing was disheartening, especially after investing time and resources into making it perfect.
How I Discovered the Steel Support Fix for Sagging Benches
After some research and trial-and-error, I learned that the common mistake was neglecting a strong internal support system, especially for heavier loads. I had initially relied only on side brackets, which seemed enough — until I realized they were simply not built to handle sustained weight over time. According to a study by the Better Homes & Gardens, proper support is crucial for maintaining the durability of built-in furniture. That’s when I stumbled upon the magic of steel supports — a discreet yet incredibly effective solution that revitalized my sagging bench and prevented future problems.
Skeptical About Steel Supports? Here’s Why You Should Trust This Fix
I admit, I was initially hesitant. Steel sounded industrial and overkill for a home project. But I made a critical early mistake: relying solely on superficial fixes like repainting or superficial tightening. It was only when I added internal steel braces that I saw a real transformation. This isn’t just theory; it’s a proven method used by professionals to ensure heavy fixtures stay solid over time. Are you worried this might be complicated or time-consuming? Trust me, with the right guidance, installing steel supports is straightforward and saves headaches down the line. Want to learn exactly how to do this? Let’s dive into the step-by-step process — because your bench deserves to last for years to come.
Secure the Frame with Internal Steel Braces
Start by probing beneath your bench to identify weak spots. I once found a wobbly area at the center of mine, which was causing the sag. To fix this, I marked the spots that needed reinforcement, drilling small pilot holes for the steel brackets. Using a level, I ensured the braces would sit flush and not protrude or tilt. This step is critical because it anchors the structure internally, distributing weight evenly and preventing future sagging.
Drilling Precision for Long-term Stability
Use a drill with a sharp bit matching your steel brackets’ screws. I recommend practicing on scrap wood first to avoid errors. When I did this, I kept the drill steady and perpendicular to the surface to ensure screws went in straight. This precision ensures the brackets grip firmly, enhancing the weight-bearing capacity. After securing the steel braces, I tested the stability by gently pressing on the bench, noticing a significant improvement compared to the previous wobbliness.
Enhance Support with Strategic Placement
Distribute your steel supports at stress points like the center and along the edges. I placed brackets roughly every 12 inches, which is a good rule of thumb, especially for heavy loads. This method mirrors the approach used in supporting heavy vanity tops—multiple points of reinforcement prevent sag and ensure longevity. I also made sure to avoid drilling into any existing wiring or plumbing.
Use Support Blocks When Necessary
If your bench has a soft or flexible underside, consider adding wooden support blocks between the steel braces and the frame. I cut small blocks from scrap plywood, fitting them snugly so that the steel brackets clamp tightly. This prevents metal brackets from causing indentations or damage to the wood surface over time.
Final Assembly and Testing
After installing the steel supports, double-check all screws for tightness and alignments. I ran my hand along the entire bench, pressing gently to detect any movement. The moment I tested it with weight — loading it with the family’s gear — the support held firm, and the sag was gone. This hands-on test confirms that the internal steel reinforcement works effectively. If you’re unsure about the process, consulting a professional can make sure the installation is flawless, especially for custom or built-in features. You can learn more about detailed vanity installation techniques that involve similar reinforcement strategies.
Many homeowners rush into installing vanities and built-in storage solutions, guided by popular myths that can lead to costly mistakes. One of the most persistent misconceptions is that rigidly following standard measurements guarantees a perfect fit. In reality, the nuanced intricacies of your space—like wall irregularities, uneven floors, or framing variances—demand a more tailored approach. For instance, relying solely on pre-made modular units without customizing for your unique environment often results in gaps or unstable installations.
Are You Falling for the Overconfidence in DIY Installations?
Another common trap is underestimating the importance of internal support structures. Everyone recommends sturdy mounting, but few emphasize the role of hidden reinforcements like internal steel braces or sub-frames. These hidden nuances prevent sagging, rattling, and long-term shifting, especially for heavy vanities or built-ins. According to expert guidelines, neglecting these internal reinforcements is one of the fastest ways to compromise your furniture’s durability.
Why Do So Many Overlook Advanced Support Strategies?
It’s tempting to think that aesthetic finishes are all that matter, but overlooking structural integrity is a dangerous oversight. For example, many assume that anchoring fixtures to drywall suffices, but in reality, anchoring directly into studs or adding steel supports offers far greater stability, particularly with heavy countertops or appliances. Installing support anchors in the right locations is crucial to prevent damage over time. Exploring effortless storage solutions reveals how hidden reinforcements boost longevity and style.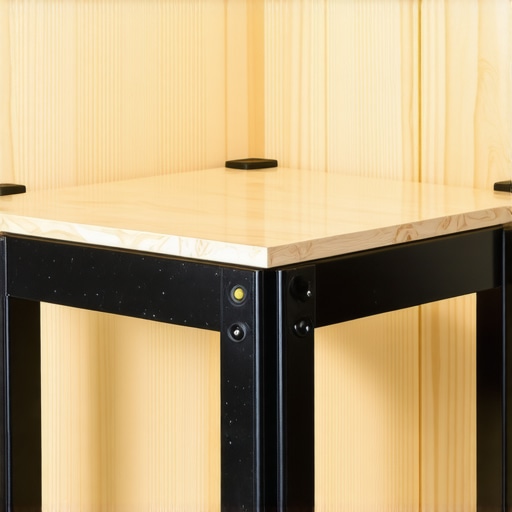
Furthermore, some believe that seamless integration with existing walls simplifies installation, yet improperly scribed edges or mismatched wall angles can cause gaps and aesthetic flaws. Precise measurement, joint sanding, and custom scribing are nuanced skills that go beyond basic tools. Skipping this step risks an unsightly finish and decreased structural support. Do you want to avoid these pitfalls? Consult experts or leverage detailed guides to perfect your custom builds.
Keeping Your Installations in Top Shape
Investing in quality tools and knowing proper maintenance routines ensures that your vanities and built-ins stay functional and beautiful over time. One essential tool I rely on is a high-precision digital level, such as the Stabila 37840 48-Inch Aluminum Torpedo Level. Its accuracy helps me verify perfect horizontals and verticals, especially after any adjustments or renovations. Regularly checking the alignment prevents gradual shifts that can lead to sagging or gaps.
For tightening and securing fasteners, I use a cordless impact driver like the Milwaukee M18 Fuel. Its power and speed make ongoing maintenance tasks, like re-tightening support brackets or securing new hardware, quick and reliable. These tools, combined with a good set of socket wrenches, allow me to address issues promptly, extending the lifespan of my installations.
Beyond tools, applying proper cleaning and protective measures is vital. I recommend using a soft cloth with a mild, pH-balanced cleaner to preserve the finish of your cabinetry and countertops. For wood surfaces, occasional application of a specialized polish like Howard Feed-N-Wax helps maintain luster and prevent cracking or drying.
Predicting Future Trends in Vanity and Storage Design
The trend toward smart and modular solutions continues to grow. Expect to see integrated charging stations, voice-activated lighting, and adaptable storage modules becoming standard features in future designs. To stay ahead, consider investing in versatile supports and adjustable hardware now; these will facilitate easier upgrades down the line.
How do I keep my vanities and built-ins performing over time?
Developing a regular maintenance schedule is crucial. This includes inspecting support brackets for rust or damage, tightening hardware every six months, and cleaning surfaces to prevent buildup. Incorporate these practices into your routine, and you’ll ensure your investments endure. For additional reinforcement, consult detailed guides like our step-by-step vanity installation guide, which emphasizes the importance of internal supports and upkeep. Remember, a proactive approach combined with the right tools not only preserves beauty but also saves you money on repairs in the long run. Try implementing a quarterly check-up using your precision level and impact driver—your future self will thank you.
The Hardest Lesson I Learned About Vanities and Built-ins That Last
- Avoid Relying Solely on Aesthetic Fixes. I once thought a fresh coat of paint was enough to hide sagging, but I learned the hard way that internal reinforcement is key for durability. Strengthening support structures upfront saved me from future headaches.
- Don’t Underestimate the Power of Hidden Reinforcements. Installing steel braces internally was a game-changer. It’s tempting to focus on visible finishes, but the real magic happens beneath the surface, preventing sag and shifting over time.
- Trust the Process, Not Just Advice. Professional techniques involve precise drilling and placement—skipping these details leads to compromises. Embracing meticulous steps makes all the difference for a flawless, long-lasting install.
- Think Long-Term Support, Not Just Quick Fixes. Investing in internal steel supports may seem like extra effort initially, but it extends your furniture’s lifespan significantly—saving money and frustration in the future.
- Custom Reinforcements Are Often Necessary. Every space is unique; what works in one setting may not in another. Tailoring your support strategy to your specific walls and furniture ensures optimal stability and longevity.
Gear Up: My Trusted Tools for Reinforcing Vanities and Built-ins
- High-Precision Digital Levels: Ensuring your structures are perfectly aligned is fundamental. I recommend the Stabila 37840 48-Inch Level. Its accuracy prevents subtle shifts that might cause sagging down the line.
- Impact Drivers with Correct Bits: For secure attachment of steel braces, a reliable impact driver like the Milwaukee M18 Fuel makes the task quick and precise, reducing installation errors and ensuring tight, long-lasting fits.
- Support Blocks and Plywood Fittings: Custom-cut support blocks from scrap plywood help distribute pressure evenly, preventing steel brackets from damaging surfaces while maintaining stability.
- Comprehensive Guides and Expert Advice: For detailed steps, I lean on comprehensive resources like the step-by-step vanity installation guide. It’s packed with insights for combining internal reinforcement with flawless finishes.
Rise to the Challenge and Speak Up
Implementing internal steel supports might seem daunting at first, but with patience and the right tools, you’ll create vanities and built-ins that stand the test of time. Remember, structural integrity is the foundation of beauty—don’t cut corners here. Have you ever faced challenges installing supports in your home, or do you have a tip to share? Let me know below, and let’s build stronger spaces together!
,