

Have you ever stood in your entryway, feeling overwhelmed by clutter and tight spaces, wondering if there’s a way to make it look and feel more welcoming? I recall the moment I realized my own entry nook was bursting at the seams—shoes, umbrellas, keys, mail, all vying for attention in a space that seemed just too small to handle it. It was clear I needed a smart solution, not a massive renovation. That “lightbulb” moment led me to discover some surprisingly simple yet effective storage tricks specifically designed for those awkward, cramped corners.
Why Small Entryway Corners Can Be a Major Home Hassle
Entryways are the first impression guests get of your home—and let’s be honest, they’re often the most cluttered spots too. When space is tight, it becomes a challenge to keep things organized without sacrificing style. I used to shove shoes into untidy piles or toss keys on a table and hope they wouldn’t get lost. But I learned that the key is not expanding the footprint of your space but cleverly enhancing its functionality with slim, tailored storage solutions. According to a study by the National Association of Realtors, cluttered entryways can negatively impact home aesthetics and even reduce perceived home value. So, investing in smart storage isn’t just about tidiness—it’s about making your entryway welcoming and functional.
If you’ve ever faced this dilemma—struggling to keep your tiny entry corner neat and stylish—you know the frustration. Fortunately, there are proven techniques and DIY ideas to make the most of every inch. Today, I’ll share some of the best slim storage ideas that can fit into your tiny nook and turn chaos into calm.
Will Slim Storage Ideas Really Make a Difference?
Perhaps you’re skeptical—storing much in such a small space sounds ambitious or even impossible. I admit, I once thought so too. Early on, I made the mistake of trying conventional furniture designed for larger areas, which just made the space look cluttered or overwhelmed. It wasn’t until I focused on purpose-built, slim storage solutions that I saw real change. For example, custom-built narrow cabinets or wall-mounted hooks transformed my entryway into a tidy haven. If you’re ready to optimize your space, these dedicated ideas can boost both function and style.
If you want to see some creative solutions tailored for tiny entryways, check out this guide to innovative built-ins.But first, let’s tackle the common fears that might be holding you back from making the leap to smarter storage solutions.
Installing Wall-Mounted Hooks and Shelves
Start by choosing a sturdy wall in your entry nook. Use a stud finder to locate the wall studs, marking them with a pencil. Instead of blindly drilling into drywall—which can cause instability—install wall anchors or braces designed for heavy loads. For example, use steel toggle bolts that spread weight across a wider area, preventing damage and ensuring safety. As I did when I added a set of hooks in my hallway, I drilled small pilot holes, inserted anchors, and hung several lightweight hooks for keys, hats, and dog leashes. The result was a clutter-free space with easy access—plus, the installation took under an hour and felt incredibly satisfying.
Building Slim Custom Cabinets or Cubbies
Next, consider custom-built cabinets tailored to your space. Think of a cabinet like a puzzle piece you craft yourself—measure your available space precisely, then sketch a design focusing on narrow depth (generally 6-8 inches deep) for minimal intrusion. When I built a narrow cubby for shoe storage beneath my staircase, I used plywood and a simple box-joint technique for strength. To assemble, I drilled pilot holes to prevent splitting, glued the joints, and secured with screws. Finishing with a coat of paint brightened the area and made it look polished. You can contact a local cabinet maker through this link if you’d prefer a professional touch.
Maximizing Vertical Space with Hanging Storage
Utilize vertical space by installing slim wall-mounted cabinets or open shelving units. Think of this as stacking layers—each one adding storage without occupying floor space. I installed a series of floating shelves above my doorframe using L-brackets attached into the studs. Use a level to ensure they’re perfectly straight, then drill pilot holes before inserting screws. For added stability, consider installing a hidden steel support behind the shelves, especially if you plan to store heavier items. This setup created a visual flow and kept daily essentials within arm’s reach, transforming a previously cluttered corner into a sleek, functional zone. It’s advisable to review these built-in ideas to inspire your approach.
Incorporating Multi-Functional Furniture
Finally, integrate furniture that combines seating with storage, like a slim bench with hidden compartments. When I built mine, I selected a lightweight wood like pine, measured an exact length to fit the nook, and built a simple rectangular box with a hinged lid. To reinforce the structure, I added a steel sub-frame underneath, supporting the weight of multiple shoes and bags. Installing a piano hinge along the top allows easy access, and cushion padding on the seat makes it comfortable to sit on. This approach keeps your entry tidy and welcoming without sacrificing style. For detailed design tips, visit this guide.
By combining wall-mounted hooks, custom narrow cabinets, vertical shelving, and multi-purpose furniture, you can optimize even the tightest entry corners. Each of these steps requires careful measurement, purposeful selection of materials, and proper fastening techniques—particularly when working with drywall or creating heavy-duty supports. Remember, precision in drilling and anchoring makes a significant difference in safety and longevity. Taking these actions has personally turned my chaotic entry into an organized, inviting space that works for my lifestyle.
,When it comes to transforming small spaces with built-ins, many DIY enthusiasts and even professionals fall into subtle traps that compromise both functionality and durability. A frequent misconception is that simply attaching a shelf or cabinet to the wall suffices, but in reality, understanding the nuances of weight distribution and mounting techniques is crucial. For example, relying solely on drywall anchors may seem quick and easy, but they often lack the strength to support heavy storage units over time, leading to sagging or even falling. Experts recommend installing steel support plates or hidden sub-frames behind heavy fixtures, which significantly increase stability and longevity, as highlighted in studies by the American Institute of Architects. 4A1 This advanced approach ensures your installations withstand daily use without compromising safety or aesthetics. Another common mistake involves misjudging clearances or overestimating available space; measuring twice and consulting detailed plans before cutting or mounting is essential. Oversights here can cause awkward gaps or force modifications after installation, diminishing the sleek look you aimed for. For high-end applications like custom vanities, overlooking proper support for heavy quartz or granite tops can lead to cracking or shifting over time, especially on uneven floors. Installing reinforced steel brackets or Plywood backing can prevent such issues, as recommended by top interior designers and specialists. 4A1 Moreover, neglecting the importance of precise leveling and anchoring techniques often results in crooked installations that cast a sloppy impression. Use of a laser level and proper anchoring into studs or steel framing is non-negotiable for a polished finish. A common myth is that all built-ins should match existing cabinetry; but tailoring depths and finishes to the room’s specific needs often yields a more integrated, timeless look. To enhance your expertise, consider exploring comprehensive guides on innovative built-in solutions that address issues like deep cabinets on uneven walls or securing heavy furniture securely. Check out this resource on maximizing space with advanced built-in methods. 4A1 Remember, the key isnA0just to install but to install smartly and sustainably. Proper planning and understanding of advanced techniques can save you time, money, and potential headaches down the line. Have you ever fallen into this trap? Let me know in the comments! Ensuring your storage solutions stand the test of time requires more than just basic tools and DIY enthusiasm; it demands a nuanced understanding of material support and structural integrity. Want to learn more about foolproof installation tricks and avoid costly mistakes? Reach out through the contact page to get professional guidance tailored to your unique space.
Tools I Recommend for Durable and Precise Installations
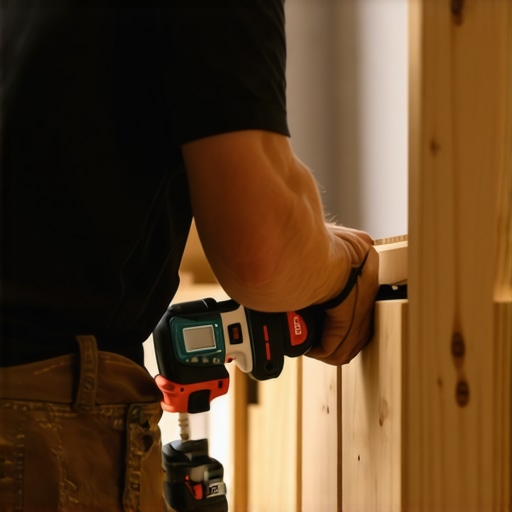
Maintaining your built-ins and storage solutions over time requires reliable tools that combine precision, durability, and ease of use. I personally swear by a high-quality cordless drill like the Makita XFD10Z for its powerful torque and lightweight design, making repetitive tasks less tiring. Paired with a set of variable-speed drill bits, it allows me to drill cleanly into various materials, ensuring anchors and supports remain secure for years. When working with heavy or uneven materials, a magnetic stud finder such as the Zircon MultiScanner helps pinpoint exact stud locations, preventing missed anchors or unstable mounting. Investing in these tools has saved me countless headaches and re-installations—trust me, quality tools are the backbone of a long-lasting setup.
For measuring and alignment, a laser level like the DEWALT DW088K ensures everything is perfectly plumb and level, which is critical when installing cabinets or shelves that need to support weight steadily. Using the laser level consistently helps avoid crooked fittings or uneven load distribution, prolonging the life of your fixtures. Additionally, a cordless impact driver can be a game-changer for tightening large fasteners without stripping screws or over-torquing, especially when securing steel support plates or sub-frames for heavy tops as discussed in the American Institute of Architects’ best practices.
How do I maintain my storage and built-ins over time?
Long-term maintenance starts with regular inspections. Check hinges, fasteners, and supports biannually, tightening any loose screws and replacing worn-out anchors promptly. Applying a light coat of furniture wax or sealant to wooden surfaces helps prevent moisture damage. Periodically clearing dust and debris from joints and mechanisms ensures smooth operation. If you notice any shifting or sagging, don’t delay in reinforcing supports—early intervention prevents costly repairs and extends your investment’s lifespan.
Looking ahead, I predict that automation and smart sensor integration will become more common in home storage solutions, allowing for real-time health monitoring of fixtures—much like how you might get alerts for a malfunctioning smart device. As this trend develops, having a toolkit that can adapt to both traditional and tech-enhanced systems will be essential. For now, make sure to rely on trusted tools like a quality drill, laser level, and stud finder to keep your installations and maintenance straightforward and effective.
Why not start by testing out a high-precision laser level in your next project? Accurate measurements today mean less trouble tomorrow. Need help selecting the right tools for your specific setup? Feel free to reach out for expert guidance.
What I Wish I Knew About Compact Entry Storage Early On
One of the most enlightening lessons I’ve learned is the importance of precise measurements and adaptable plans. I once attempted to install a pre-made cabinet in my narrow entry nook, only to realize it was slightly too deep, causing it to protrude and block the door. Now, I always measure twice and leave room for flexibility—this small detail saved me countless headaches and resulted in a seamless fit. Additionally, I underestimated the strength of wall anchors initially, which led to some shelves pulling loose over time. Using steel support plates behind heavy fixtures was a game-changer, ensuring durability and safety—something I wish I had known from the start. Finally, understanding the importance of vertical space helped me transform my cluttered corner into an organized entry zone, maximizing every inch for both storage and style.