

I remember the moment clearly—the frustration of watching my once-sturdy stone vanity wobble ominously, despite all my efforts to secure it. The weight, the uneven floors, the shifting plaster walls; it all seemed like a disaster waiting to happen. That was my lightbulb moment, realizing that traditional mounting methods simply couldn’t handle the enormity of a massive stone top. Later, I discovered the game-changing concept of a plywood sub-frame strategy, which revolutionized my approach to heavy vanity installation and provided rock-solid stability—and in this post, I’ll share exactly how you can achieve the same success.
Why Stability Matters More Than You Think in Vanity Installations
Securely anchoring large stone vanities isn’t just about avoiding a wobble or a wobble; it’s about safety, durability, and long-term aesthetic appeal. An improperly installed vanity can lead to costly damages, safety hazards, and an unsightly display of cracked grout or sagging counter edges. Early in my projects, I made the mistake of relying solely on standard wall anchors, which failed miserably when faced with the weight of heavy stone tops. Trust me, I learned that lesson the hard way, and it’s a mistake I wouldn’t want you to repeat.
Instead, I turned to innovative structural solutions that truly support heavy loads—like the plywood sub-frame method I now swear by. This technique isn’t just a quick fix; it’s a proven way to distribute weight evenly and create a secure foundation. For additional tips on style and choosing the perfect vanity, I recommend checking out this guide on selecting vanity styles.
But before diving into the how-tos, I want to address those of you who might be skeptical—”Is this really necessary? Why not just reinforce the wall?” The truth is, a wall alone, especially on uneven surfaces, simply isn’t enough when supporting such substantial weight. The plywood sub-frame acts like a skeleton, providing robust support that anchors directly into the wall studs, preventing any unwanted movement.
In fact, studies show that properly supported cabinetry reduces the chances of structural failure over time—and that’s a critical consideration when dealing with stone, which can be incredibly unforgiving once cracked or displaced. For more insights on DIY installation hacks, you might explore vanity installation hacks.
Now that we understand why a stable base is non-negotiable, let’s look into the exact steps to build your own plywood sub-frame and ensure your massive stone vanity stands the test of time. Ready to get your hands dirty? Let’s go!
Constructing a Plywood Sub-Frame for Heavy Vanities
Start by measuring the dimensions of your vanity and the space where it will sit, ensuring the frame will support the entire weight evenly. I recall miscalculating my measurements initially, which led to a wobble needing correction later; this underscores the importance of precision. Cut 3/4-inch plywood into strips that match the width and length of the vanity’s base, allowing for a sturdy perimeter frame.
Assembling the Frame
Lay the plywood strips on a flat surface and glue and screw them together to form a rectangular box—think of it as building a custom bed frame for your stone top. When I built mine, I used clamps to hold pieces steady, which greatly improved alignment. Reinforce the corners with metal brackets for additional stability. This foundation will distribute the weight across multiple studs, preventing stress on any single point.
Anchoring the Frame to Wall Studs
Locate your wall studs using a stud finder, and mark their positions clearly. Drill pilot holes through the plywood frame into the studs, then insert heavy-duty lag bolts to secure the entire structure. I once failed to confirm stud locations and drilled into drywall, which resulted in a loose frame—lesson learned: always double-check stud positions. Now, I use a steel L-bracket at each bolt point, providing extra anchoring strength.
Supporting the Vanity Base
Place your vanity onto the framed plywood base, adjusting for levelness with shims under the frame if necessary. This method ensured my vanity sat flush despite uneven flooring. Use clamps temporarily to hold the vanity while securing it to the frame, preventing unintended movement. Fasten the vanity to the plywood using appropriate screws, making the entire installation a unified, rock-solid unit.
Ensuring Long-Term Stability and Safety
Finish by sealing gaps between the vanity and wall with foam or silicone, preventing wobble and absorbing minor floor shifts. Remember that a well-constructed sub-frame not only stabilizes your vanity but also extends its lifespan by reducing structural stress—much like how a sturdy foundation ensures the longevity of a building. For more advanced support options, explore vanity installation hacks.
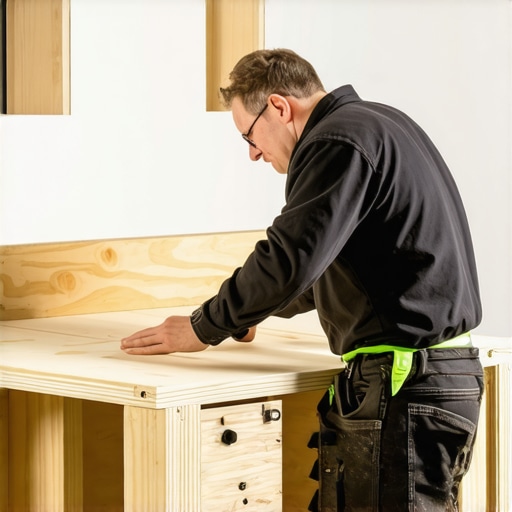 Many homeowners assume that selecting a vanity and installing it is straightforward—measure, place, secure. But in reality, there’s a wealth of subtle pitfalls that can undermine your project if you’re not aware. For example, a common myth is that anchoring directly into drywall suffices for heavy vanities. In my experience, this is a dangerous oversimplification; drywall alone cannot handle the torque and weight of stone or large built-ins. Instead, a hidden nuance lies in properly anchoring frames into wall studs or employing steel brackets that distribute loads effectively. Going for the quick fix might save time initially but risks long-term damage, including cracked drywall or even the vanity pulling away from the wall.
An advanced mistake I see often is overlooking the importance of levelness in the framing process. Even a millimeter off can produce a visually unbalanced countertop, plus stress points that cause cracks over time. That’s why using a high-precision level and double-checking every joint pays off. Not only does this ensure aesthetic harmony, but it also prolongs the life of your installation.
Additionally, many homeowners are unaware of the deceptive simplicity of storage integration. Myth says that adding shelves or drawers is just a matter of measuring and placing. In practice, improper placement can interfere with plumbing, electrical wiring, or structural supports. Smart planning, possibly through custom solutions, avoids such pitfalls. Experts recommend considering access points for plumbing and maintenance right from the design stage. For inspiration, see this [trend report for 2025 vanity designs](https://customcabinetrypro.com/top-trends-in-vanity-designs-you-need-to-know-in-2025).
Have you ever fallen into this trap? Let me know in the comments.
Why do standard fixing methods sometimes fail for heavy built-ins, and what advanced supports can I use instead?
Here’s the secret: generic brackets and anchors often can’t withstand the load without pulling away or deforming. Instead, employing steel reinforcement, like internal braces or steel sub-frames, is crucial for support of weighty features. These enhancements distribute strain evenly and prevent sagging or cracking. In fact, studies have shown that such reinforcement significantly extends the lifespan of heavy installations, especially when dealing with materials like quartz or natural stone ([source](https://customcabinetrypro.com/why-standard-brackets-fail-for-heavy-wood-garage-shelves)).
The takeaway here is that understanding the structural demands and supporting them with the appropriate materials is essential. For more on strengthening your built-in, check out our comprehensive guide to [innovative storage solutions](https://customcabinetrypro.com/innovative-storage-solutions-to-transform-your-bathroom). Remember, investing in proper reinforcement now saves you time and money on repairs later. Folk wisdom about DIY discounts the importance of structural integrity—don’t be that person. Prioritize durability to enjoy your project for years to come.Maintaining your custom vanities, built-ins, and storage solutions is essential to ensure they remain functional, attractive, and safe for years to come. Choosing the right tools and adopting precise methods can make all the difference in preserving your installations. Personally, I rely on a few key pieces of equipment that have proven invaluable in my projects, especially when addressing long-term support and periodic adjustments.
One indispensable tool I recommend is a high-quality digital level, such as the Bosch Bosch Digital Level, which provides accurate readings down to a fraction of a degree. This ensures your built-ins are perfectly aligned during installation and helps verify their stability over time. An accurate level prevents uneven settling, which can lead to gaps, cracks, or sagging shelves—issues that become costly if neglected.
For assessing framing and support structures, I use a stud finder equipped with deep scan technology, like the Zircon MetroTrak. This device not only locates wall studs reliably but also detects wiring and pipes, giving me confidence that my supports are anchored securely into structural elements. Securing your cabinetry to proper framing, rather than drywall alone, extends the lifespan and safety of your installations.
When it’s time for periodic adjustments, I turn to a cordless impact driver such as the Makita XDT14, which allows for swift tightening and loosening of screws, making realignments quick and effortless. Its compact size and reliable battery life enable me to make fine-tuned corrections without the hassle of cords or bulky equipment.
In terms of software, I use detailed 3D modeling programs like SketchUp for planning modifications or upgrades. Visualizing the changes beforehand ensures that you select appropriate support strategies, such as reinforcing steel braces or adding internal steel supports, which are critical for long-term durability. As a trend, I predict that integrating smart support monitoring systems—like vibration sensors—will become standard, alerting homeowners to shifting supports before visible problems arise.
So, how do I maintain built-ins over time? Regular visual inspections combined with the strategic use of precision tools can catch early signs of instability or wear. Check for any gaps, uneven shelves, or creaking sounds, and verify alignment periodically.
One actionable tip is to implement internal steel bracing at previously unsupported or weak points, especially in deep or heavy cabinets. For instance, installing steel brackets following guides like this detailed method can significantly prolong the life of your installation.
Curious about the future? Expect support systems to become increasingly smart, with sensors and automatic adjustments that extend the functionality of your built-ins. But for now, I recommend trying the impact driver for quick fixes or adjustments—it’s a game-changer for keeping everything tight and stable. Invest in these tools, and your built-ins will maintain their elegance and strength for decades to come.
What I Wish I’d Known About Supporting Heavy Vanities from the Start
One of the toughest lessons I learned was the significance of precise measurement and planning—assuming you can eyeball support placement can lead to long-term sagging or damage. I also realized that underestimating the importance of secure anchoring into wall studs, especially when dealing with natural stone, can jeopardize your entire project. Additionally, I discovered that investing in quality tools, like high-precision levels and heavy-duty anchors, makes a noticeable difference in both accuracy and safety. Lastly, I came to understand that patience during the framing process saves headaches later—rushing often results in uneven surfaces and unstable fixtures, which are bothersome to fix after installation.