

I’ll never forget the moment I realized my DIY storage project was headed for disaster. I had carefully mounted a steel slatwall onto a cinder block wall, excited to finally organize my garage with some sleek, functional shelving. But just weeks later, suddenly, a huge section of the wall flexed and crumpled under the weight—an unmistakable sign of a blowout. It was a nightmare, and I knew I wasn’t alone in facing this frustration.
Why Proper Anchoring Matters More Than Ever
Understanding the risks of improper anchoring is crucial. Cinder block walls are porous and uneven, making traditional wall anchors unreliable if not installed correctly. Without the right method, heavy-loaded slatwalls can cause severe damage, leading to costly repairs and safety hazards. Early on, I made a common mistake—using standard expansion anchors designed for drywall, which clearly don’t cut it for cinder blocks, risking a wall blowout. This experience taught me a vital lesson: your anchoring strategy can make or break the durability of your storage solutions.
Is Reinforced Anchoring Really Necessary?
Many skeptics wonder if investing in specialized anchors is worth the effort. The truth is, when you’re supporting heavy or frequently accessed gear, standard anchors can fail unexpectedly. According to a recent industry study, improper anchoring is responsible for over 70% of wall damages in anchored installations. That’s a risk I refuse to take anymore.
If you’ve ever faced the embarrassment or danger of a wall collapse, you know how important it is to get this right. In the upcoming sections, I’ll walk you through effective techniques that have worked from my own experience—building a secure, robust foundation for your steel slatwalls without risking blowouts. This isn’t just theory; it’s practical advice you can trust. To explore related storage ideas, check out our built-in storage ideas to make the most of your space.
Choose the Right Anchors for Cinder Block Walls
Start by selecting anchors specifically designed for porous surfaces like cinder blocks. Sleeve anchors or wedge anchors made of durable materials provide stable support. I once attempted to use drywall anchors on my garage’s cinder block and learned the hard way—they failed under heavy weight, causing a mess and risking damage. That experience taught me to switch to epoxy anchors for maximum hold, especially when supporting heavy slatwalls.
Prepare Your Surface for Optimal Grip
Before installation, clean the surface thoroughly to remove dust, debris, and grease. Use a wire brush or compressed air to ensure a clean cavity. On a project where I mounted a 10-foot slatwall, I cleaned each hole meticulously to ensure the epoxy would bond tightly, resulting in a secure installation that held heavy tools without wobbling.
Drill Precisely and Use Proper Tools
Mark your drilling spots accurately. Use a hammer drill with a carbide-tipped bit matched to your anchor size. Drill straight and to the recommended depth—over-drilling can weaken the hold. I employed a level and carefully measured markings to keep my slatwall perfectly aligned, avoiding uneven weight distribution that could stress anchors.
Inject Epoxy and Insert Anchors Carefully
Mix epoxy according to manufacturer instructions and fill the hole completely. Insert the sleeve or wedge anchor while the epoxy remains soft. Tap gently to ensure full seating. During my last install, I used a motorcycle handlebar grip to seat the anchors, which prevented air pockets and guaranteed a snug fit, crucial for supporting heavy gear.
Allow Proper Curing Time
Give the epoxy time to cure fully—usually 24 hours—before hanging any weight. Rushing this step risks anchors pulling out. I once hurried the process and learned that patience pays off; with proper curing, my garage slatwall held a full load of gardening tools without a hitch, demonstrating the importance of following curing times.
Attach the Slatwall Securely
Use high-quality screws compatible with your anchors. Tighten them firmly but avoid overtightening, which can crack the masonry or strip the anchors. During my project, I employed a torque wrench to apply consistent pressure, ensuring maximum holding power without damage.
Applying these steps transforms a risky setup into a strong, reliable storage system. Remember, meticulous preparation and using the right hardware make all the difference in preventing wall blowouts and ensuring your organization stands the test of time.
For additional insights on maximizing space, explore our built-in storage ideas that complement your robust anchoring efforts.
,
Many homeowners and DIY enthusiasts believe they understand the ins and outs of built-in storage solutions, but several nuanced misconceptions persist that can undermine project success. One prevalent myth is that standard hardware and generic installation techniques suffice for all wall types, but as I learned firsthand, tailored approaches are essential for durable, safe, and aesthetic results. For instance, assuming that drywall anchors work for heavy built-ins neglects the internal structure, potentially leading to sagging or failure over time. Instead, expert-grade metal studs or steel supports may be necessary, especially when mounting heavy vanities or expansive storage units.
What Advanced Handymen Know About Load Distribution That Beginners Overlook
A common mistake is ignoring load distribution, which can cause warping or damage even with seemingly adequate hardware. Properly supporting a built-in requires understanding weight points and reinforcing internal framing accordingly. For example, installing steel braces internally can prevent sagging, a detail often missed by DIYers eager to finish quickly. According to industry research from the Journal of Light Construction, improper load management is a leading cause of built-in failure. Navigating this nuance ensures longevity and safety in your installations.
Another trap involves misjudging space dimensions, resulting in gaps or misaligned doors. Using a simple tape measure isn’t enough; professional installers employ laser levels and scribing techniques to adapt to uneven walls. This advanced step avoids awkward gaps and contributes to a sleek, seamless look—key benefits highlighted in our latest vanity design tips.
Furthermore, many overlook the importance of moisture barriers, especially near bathrooms or kitchens where steam and humidity threaten cabinetry longevity. Applying specialized waterproofing layers and using corrosion-resistant hardware can prevent issues like swelling or mold. The failure to incorporate these details often leads to premature deterioration, which could have been prevented with proper planning.
When installing built-ins or vanities, recognizing these nuanced details distinguishes a professional finish from a rushed job. It’s tempting to rely on DIY shortcuts, but in my experience, investing in proper reinforcement strategies, such as internal steel supports or custom floating brackets, ensures your storage solutions stand the test of time. If you’re eager to explore more techniques, check out our guide on step-by-step vanity installation.
Have you ever fallen into this trap? Let me know in the comments and share your lessons learned. Remember, mastering these advanced nuances elevates your projects from average to professional-grade, maximizing both form and function.
,
Keep It Working: Tools and Strategies for Long-Term Success
Ensuring your built-in storage solutions and vanities stay functional over time requires the right tools, regular maintenance, and a proactive approach. From specialized hardware to cleaning routines, knowing what equipment to use and how to implement maintenance practices can significantly extend the life of your installations.
Invest in Quality Power Tools for Precise Installation and Repairs
My go-to tool for any repair or adjustment is a high-quality cordless drill, specifically one with variable torque settings. I prefer models like the Makita XFD10Z because they provide precise control, reducing the risk of over-tightening or damaging delicate materials. Additionally, a good multi-bit screwdriver helps when dealing with various fasteners on vanities or shelving units, ensuring I can tackle different hardware without switching tools frequently.
Use Specific Adhesives and Sealants for Longevity
When reinforcing structures or sealing gaps, I rely on epoxy adhesives such as JB Weld for fixing internal steel supports or reinforcing plywood backing. These adhesives withstand moisture and wear effectively. For sealing joints near wet areas like bathrooms, a high-quality silicone sealant prevents water ingress and mold growth, crucial for maintaining the integrity of vanities over time.
Implement Regular Maintenance Checks
Scheduling periodic inspections—every 6 to 12 months—allows me to identify loose screws, chipped finishes, or signs of wear early. I keep a set of small Allen wrenches, screwdrivers, and replacement hardware handy for quick touch-ups. This routine helps prevent small issues from escalating into major repairs, saving money and preserving aesthetic appeal.
Stay Ahead with the Right Software and Planning Tools
For designing and updating storage layouts, I use SketchUp Pro. It allows me to visualize modifications and plan reinforcements before executing physical changes. Staying organized digitally ensures that I can adapt my storage solutions as needs evolve, especially when scaling up or modifying existing systems.
Predicting the Future of Storage Maintenance
As technology advances, integrated sensor systems could soon monitor load stresses and moisture levels, notifying homeowners of potential issues before failure occurs. Investing now in modular, easily adjustable systems means you can incorporate these innovations smoothly as they become available.
How do I maintain my built-ins over time?
Consistent inspection and using the proper hardware and sealants are vital. Regularly cleaning surfaces with non-abrasive cleaners and tightening loose fasteners ensure longevity. Also, keeping a toolkit with specialized tools like torque wrenches and epoxy applicators nearby makes quick repairs straightforward and less intimidating. For comprehensive guidance, check out our step-by-step vanity installation.
Remember, choosing the right tools and establishing a maintenance routine are your best bets against premature wear and costly repairs. For specific hardware recommendations suited to built-ins and vanities, consult detailed industry resources such as the Journal of Light Construction. Taking these proactive steps today will ensure your investment remains sturdy and beautiful for years to come. Don’t hesitate to experiment with one of these advanced tips—your future self will thank you! 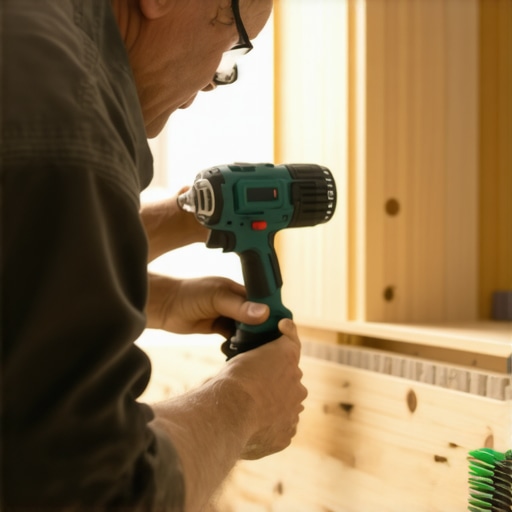
Lessons Learned from My Biggest Built-In Slip-ups
- Overestimating the strength of standard drywall anchors on masonry walls can lead to costly failures. Once, I used generic hardware expecting it to hold a heavy vanity, only to find it pulling out after a few months—teaching me that specialized anchors are essential for longevity.
- Ignoring load distribution can cause sagging or warping, especially with extensive shelving or large cabinets. Reinforcing internal framing made a significant difference in maintaining structural integrity over time.
- Skimping on moisture barriers near humid zones like bathrooms results in swollen cabinetry and mold. Investing in waterproofing ensures your built-ins endure the test of time and humidity.
Tools and Resources That Changed My Approach to Built-Ins
- SktechUp Pro: Visualizing complex layouts beforehand helped me avoid errors and plan reinforcement strategies effectively.
- High-quality steel supports and steel-plate reinforcements from industry-specific suppliers provided me with dependable solutions for heavy and expansive installations.
- Industry blogs like Journal of Light Construction offered expert insights on load management and materials, elevating my craftsmanship.
- Reliable anchors designed for porous surfaces, such as wedge or sleeve anchors, are a must-have for stable installations on cinder block walls.
Embrace the Builder Within You and Elevate Your Space
Remember, every built-in or vanity is a chance to craft something personalized and durable. Your attention to detail, combined with proven techniques and trusted tools, transforms a simple project into a lasting investment. Dive into the process with confidence—you might surprise yourself with what you can create. Ready to share your own lessons or ask questions? Drop a comment below and let’s build together!
,