

There was a moment in my garage when I tried to yank open a stubborn, overloaded drawer filled with my heavy power tools. Instead of smoothly sliding out, it groaned and caught, threatening to dump everything onto the concrete. That frustrating experience was a lightbulb moment for me. I realized that, after all the careful shelving and custom cabinetry, the secret to truly reliable storage lay in the hardware supporting those drawers—specifically, the heavy-duty drawer slides designed to handle weighty loads without fuss.
Why Settling for Ordinary Just Won’t Cut It
Most people overlook the significance of drawer slides until they face a jammed or sagging storage solution. In a typical garage, where tools and equipment can weigh hundreds of pounds, using standard slides is a recipe for disaster. I learned this the hard way—early on, I bought inexpensive slides that failed under minimal load, leading to misaligned drawers and damaged cabinetry. It was a costly mistake that could have been avoided with the right choices from the start. If you’re tired of dealing with wobbly, stuck, or squeaky drawers, you’ll want to pay attention because choosing high-quality, heavy-duty drawer slides is a game-changer. For expert tips on how to maximize your space with custom solutions, check out this guide.
Do Heavy-Duty Slides Really Make a Difference?
Initially, I wondered if splurging on premium slides was worth it. Would they truly hold up? Well, I soon discovered that investing a little more in sturdy slides meant smoother operation and longer longevity. According to industry research, high-capacity slides can support weights of 150 pounds or more per pair—something most standard slides can’t handle reliably. This means your garage drawers won’t sag or warp over time, even with the heaviest tools inside. My early mistake was installing cheap slides on a large, deep drawer filled with heavy power tools. The slides bent and failed after just a few months, forcing me to redo the entire setup. I wish I’d known then what I know now about heavy-duty drawer slide options.
Now, as we dive into this post, my promise is to help you avoid my mistakes and understand how to select and install the best slides for your garage. Whether it’s for a custom-built workbench or a full tool wall, the right hardware changes everything. Ready to transform your storage space? Let’s get started with the essentials of choosing the perfect heavy-duty drawer slides that won’t let you down.
.
Preparing for Installation
Start by measuring your drawer dimensions meticulously—use a tape measure and note the width, height, and depth. Select heavy-duty slides rated for at least 150 pounds per pair to ensure they can handle the weight of your tools. I remember misjudging my drawer size and rushing into purchase; measuring twice saved me from having to redo the entire setup. Use a level to mark the mounting points clearly, ensuring the slides will run straight. Cut wooden blocking from scrap plywood to align with your markings, acting as support brackets for the slides, especially on uneven or soft surfaces.
Mounting the Slides Accurately
Attaching the Slides to the Cabinet
Remove the drawer. Clamp the slide to the side panel of the cabinet, aligning with your marked positions, then drill pilot holes. When I installed mine, I used a carpenter’s square to double-check alignment—any crooked mounting throws off the drawer movement. Use self-tapping screws for quick installation but avoid overtightening to prevent deforming the slides. For thicker or uneven panels, consider shimming with washers or spacers to achieve a flush fit. For an extra layer of support, I added internal steel braces behind the panels, which you can learn more about here.
Attaching the Slides to the Drawer
Line up the slides on the drawer sides, making sure they’re flush with the edges. Mark the screw holes carefully, then drill small pilot holes. During my first attempt, I found that not pre-drilling caused the screws to split the plywood. Insert the slide into the mounted position and verify that it slides smoothly with minimal resistance. If it doesn’t, check for obstructions or misalignment. Using a level here ensures your drawer will sit perfectly straight once installed.
Installing the Drawer and Testing
Slide the drawer into the mounted slides gently, ensuring the wheels or rollers align properly. Push and pull repeatedly to test smoothness; listen for squeaks or resistance. My first trial was messy—furniture wax applied to the wheels reduced squeaking significantly. Make adjustments as necessary—loosen or tighten the mounting screws, reposition if needed. For maximum strength, consider installing internal steel braces that bridge the slide mounts, especially with deep or wide drawers holding heavy equipment. This prevents sagging over time and enhances stability.
Final Tips for Long-Lasting Performance
Lubricate the slides with a silicone or lithium-based spray to keep movement effortless. Avoid oil-based lubricants that collect dust and grit. Regular maintenance, such as checking screw tightness and cleaning debris, prolongs the lifespan of your installation. When I added a second set of heavy-duty slides to a large, deep drawer, combining steel support with proper alignment kept everything running smoothly for years. Remember, precision during installation is key—taking your time pays off in durable, hassle-free storage solutions. For more expert tips on optimizing your space and choosing the right hardware, explore this comprehensive guide.
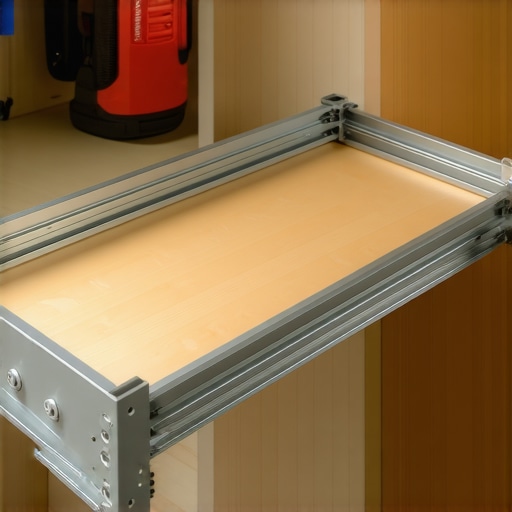
Most homeowners and even some professionals believe that choosing premium materials and following basic installation steps guarantees a flawless built-in or vanity setup. However, the true nuance lies in understanding the subtle details that can make or break the longevity and functionality of these installations. A common myth I often encounter is the assumption that standard mounting techniques suffice for heavy or complex built-ins. In my experience, neglecting the importance of proper framing and reinforcement can lead to sagging, shifting, or even damage over time, especially with heavier materials like quartz or stone tops. Experts like Mike Holmes emphasize the significance of hidden supports and proper load distribution, which many overlook. Failing to implement these can result in costly repairs or replacements down the line.
Why do so many built-ins fail despite seemingly correct installation?
One major oversight is underestimating the forces exerted on the structure, especially in areas prone to movement or settling. For instance, installing a vanity without accounting for uneven flooring can cause uneven weight distribution, leading to cracks or warping. Using inappropriate fasteners is another trap—screws suitable for drywall won’t support heavy loads on a plywood or framing backing. Incorporating internal steel bracing or hidden sub-frames can distribute weight evenly, preventing long-term sagging and damage. For a deep dive into effective reinforcement techniques, consider exploring this expert guide.
Furthermore, the installation process itself often involves nuanced steps that amateurs overlook—like aligning the unit perfectly on sloped floors, which can be mitigated with shims and anchor systems. Another common mistake is neglecting environmental factors such as moisture, which can warp or weaken materials over time. Proper waterproofing and sealing are crucial, especially for bathrooms or humid spaces. It’s not rare to see built-ins fail because of poor initial planning—skipping these details might seem trivial at first but can cause significant headaches later. As highlighted in this article, integrating hidden reinforcement strategies during installation ensures durability, especially when supporting heavy or awkwardly shaped objects.
In sum, the secret to successful built-ins and vanities isn’t just about aesthetics or materials—it’s about understanding and implementing the underlying support and installation nuances that experts swear by. Always anticipate potential movement, err on the side of over-engineering, and pay attention to environmental factors. This approach saves time, money, and frustration in the long run. If you’re interested in more advanced hacks, such as supporting heavy quartz tops or anchoring into tricky walls, check out these expert tips. Have you ever fallen into this trap? Let me know in the comments.
Ensuring your custom-built storage solutions and vanities remain functional and beautiful over the years demands the right tools and consistent maintenance. From specialized lubricants to structural reinforcements, I rely on a suite of equipment tailored for longevity and ease of repair. One indispensable item I frequently use is a high-quality, cordless multi-tool like the Dremel Multi-Max. Its precision blades come in handy for making minor adjustments or removing stubborn caulk without damaging surrounding finishes. For cleaning and lubricating slides and hinges, I swear by a silicone-based spray such as WD-40 Specialist Silicone, which provides smooth operation and repels dust. Applying these lubricants during routine checkups prevents squeaks and stiffness, significantly extending component lifespan.
Gear Up for Long-Term Success
When it comes to structural maintenance, I always have a cordless drill with a variety of driver bits in my toolkit. A reliable impact driver, such as the Makita XT255T, streamlines tasks like tightening support brackets or replacing hardware without stripping screws. For delicate adjustments, I prefer a digital level and laser distance measurer. These help me ensure that mounts and runners stay perfectly aligned, preventing uneven wear or jamming over time. Additionally, investing in a compact, portable vacuum like the Dyson V8 Absolute keeps dust and debris at bay, especially around sliding components and corners where dirt can cause operational hiccups.
How do I keep built-ins and vanities humming beyond installation?
Regular inspections are your best offense. I schedule biannual checkups, paying close attention to hardware tightness and wear signs. If I notice a slide or hinge feeling sticky, I disassemble and clean or replace parts before a failure occurs. Reinforcing heavy or sagging panels with internal steel braces, as detailed in this expert guide, extends the lifespan of even the most ambitious projects. Implementing these small but vital practices prevents costly repairs and keeps your space looking polished.
Looking forward, trends point toward smarter, self-maintaining systems—like slides with integrated lubrication chambers or sensors that alert you to wear. Embracing these innovations now can future-proof your installations. I recommend trying the advanced tip of installing a lubrication port on your heavy-duty slides—it’s a game-changer for rapid maintenance. For detailed instructions, check out this article.
Incorporate quality tools and proactive upkeep into your routine, and your built-ins will serve you reliably for years to come. If you’re ready to take your maintenance game to the next level, start by experimenting with a lubrication port setup on your heaviest drawer slides. You’ll thank yourself in the long run.

Proper maintenance isn’t just about tools—it’s about understanding the delicate balance of hardware, materials, and environmental factors that keep your built-ins and vanities dependable over time. An illustrative image showing a technician applying lubricant to a slide with a detailed close-up can help convey this importance visually. The prompt for this image is a professional setting with a focus on a hand using a small syringe or precision applicator on a slide mechanism, emphasizing meticulous care and attention to detail.
What I Wish I Knew Before Starting My Built-in Journey
One of the most profound lessons I learned is that no matter how perfect your design or choice of materials seems, overlooked details in support and installation can undermine long-term durability. Initially, I underestimated the importance of internal steel bracing in heavy built-ins, which led to sagging after a few years. Now, I know that incorporating hidden reinforcements during the planning stage is crucial for lasting stability. Additionally, I realized that choosing the right hardware, like heavy-duty drawer slides, isn’t just about weight capacity but also about smooth operation over time. Sometimes, the simplest step—like measuring twice—can save a lot of trouble. And never forget that proper environmental considerations, such as moisture control, are vital to prevent warping or warping-related failures in vanities and storage units.
My Go-To Resources That Keep Me Ahead
For dependable advice and innovative solutions, I lean heavily on expert guides like this comprehensive storage guide. It covers everything from hardware selection to maintenance routines. The built-in ideas resource has inspired many of my projects, pushing me toward smarter, more resilient designs. When I need real-world tools, I trust impact drivers like Makita’s XT255T for their power and durability, and silicone lubricants like WD-40 Specialist to keep slides humming. Regular consultation of my favorite design trend sites ensures I stay ahead of the curve and implement cutting-edge ideas that stand the test of time.
Keep Building, Repairing, and Innovating with Confidence
Your journey into heavy-duty storage and built-ins isn’t just about following steps—it’s about cultivating a mindset of precision and proactive care. Every project offers an opportunity to learn something new, refine your techniques, and develop a sharper eye for detail. Embrace challenges as lessons, invest in quality tools, and stay curious about how innovative reinforcements can extend the life of your most ambitious builds. Remember, the true satisfaction comes not only from a job well done but from knowing you’re creating solutions that will serve you reliably for years. So, dive in, experiment, and don’t shy away from revisiting and enhancing your work over time—your future self will thank you for it.
What’s the one support or reinforcement tip you wish you had known earlier? Share your experiences and questions in the comments below to inspire fellow builders on their journey toward durable, beautiful built-ins.
