

I vividly remember the first time I tried to install a massive wall-mounted media console. The weight of the piece was one thing, but it was the looming risk of sagging or worse, pulling out completely, that truly sent a shiver down my spine. I had underestimated what it takes to ensure these heavy fixtures stay put—shame on me for not knowing about the Hidden Sub-Frame Move back then. That lightbulb moment hit when I realized traditional mounting methods just weren’t cutting it for heavy, load-bearing consoles.
Why Supporting Heavy Media Consoles Is a Bigger Deal Than You Think
Supporting heavy media systems isn’t just about screwing into drywall or finding studs randomly; it’s about understanding the nuances that keep your furniture sturdy and safe for years to come. Many DIY enthusiasts, and even seasoned pros, fall into the trap of over-relying on ordinary anchors or cheap brackets, which might seem fine initially but fail under the weight over time. According to experts, improper support can lead to damage not only to the wall but to your precious electronics and décor as well.
If you’ve ever faced sagging shelves, loose mounting, or outright repair jobs, you’ll know exactly what I mean. My early attempts included a lot of guesswork, which often led to more frustration than results. That’s why I want to share my journey from trial-and-error to mastery—specifically, how the Hidden Sub-Frame Move can make or break your installation.
Is Installing Heavy Media Consoles Actually Worth the Effort?
Here’s a candid truth: I made the mistake early on of assuming that a few screws into drywall would suffice. That mistake cost me a couple of trips to the hardware store and some shaky furniture. After digging through numerous guides, I discovered the importance of internal reinforcement techniques—like the sub-frame move—that distribute weight more evenly and provide a solid mounting foundation. This insight is so vital that I now recommend it to anyone serious about durable, stylish support for their media setups. For more about innovative storage solutions that can enhance your space, check out this guide to transform your bathroom storage.
Ready to dive into the practical steps? Let’s get started on how you can implement this game-changing support method—so your entertainment center stays sleek, functional, and rock-solid for years to come.
Start with a Strong Support Framework
In my experience installing a massive wall-mounted media console, I first focused on creating a stable support system inside the wall. I removed the drywall where I planned to mount and installed a sturdy wooden or steel sub-frame that matched the console’s dimensions. Think of this step like building a strong backbone; it distributes the weight evenly and prevents sagging over time. I used a level to ensure my framework was perfectly aligned, which saved me from future headaches with crooked furniture.
Use the Hidden Sub-Frame Technique to Reinforce Support
This technique involves attaching a concealed support structure behind the drywall—here’s how I did it: I cut out a section of drywall to expose the wall studs. Then, I screwed a plywood or steel backing into the studs, creating a robust mounting platform. This is especially effective for heavy quartz or stone countertops, but it’s equally crucial for sizable media units. The secret is the hidden part—by reinforcing behind the drywall, I prevented sagging and pulled-out screws, maintaining a sleek look without visible brackets. For detailed steps, check out this comprehensive guide.
Proper Anchoring Matters More Than You Think
Next, I secured the support frame to the wall studs using heavy-duty anchors or bolts. I made sure to hit at least two studs for maximum support, which is like anchoring a boat to a dock—you wouldn’t rely on just one point. I used a heavy-duty drill to pre-drill holes, ensuring the screws wouldn’t split the wood or drywall. This step is akin to anchoring your tent stakes deeply so the structure can withstand wind—think of it as a vital support that keeps everything stable under load.
Consider Steel Plate Reinforcements for Extra Heavy Loads
When I installed a particularly heavy media console, I added steel plates or brackets at critical points for extra support. This additional reinforcement acts like a steel spine, distributing the load and preventing the frame from bowing or bending with time. It’s especially useful if your fixture exceeds typical weight limits or has uneven weight distribution. For detailed reinforcement strategies, explore this steel plate support guide.
Final Checks and Adjustments
Once everything was mounted, I used a level and a measuring tape to verify the console was perfectly aligned. I also checked the stability by applying gentle pressure—if there was any wobble, I tightened the screws or added additional anchors. This step ensures that your media system not only looks great but remains safe and secure for years. Remember, a well-supported unit reduces the risk of wall damage, electronics falling, or dangerous sagging, making your investment truly worthwhile.
Implementing these concrete steps transforms a risky installation into a durable, sleek setup. For complex built-in solutions or optimizing small spaces, consider exploring innovative storage solutions that complement your support framework. Proper reinforcement isn’t just for aesthetics; it’s the key to longevity and safety in heavy installations.
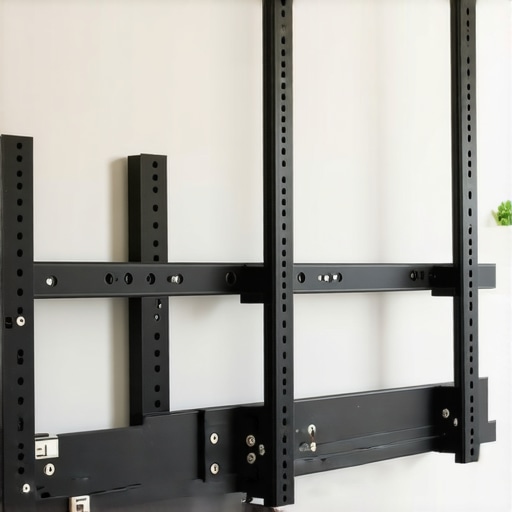 When it comes to installing built-ins, many professionals and DIY enthusiasts alike share a common myth: that simply securing items to drywall with standard anchors is sufficient for heavy loads. However, this oversimplification overlooks crucial nuances that can spell disaster over time, leading to sagging, instability, or even wall damage. In my experience, the real game-changer is understanding reinforcement techniques like concealed internal support systems, which distribute weight more evenly and prevent long-term failures. These advanced methods are often underappreciated, yet they are essential for ensuring durability in built-in projects. For instance, relying solely on visible brackets or surface-mounted supports may seem straightforward but can hide structural weaknesses that emerge as the weight of shelves, vanities, or cabinets increases. One common trap is underestimating the importance of internal steel reinforcements or plywood backing behind drywall, which experts warn is critical for supporting massive quartz countertops or heavy cabinetry. Without a proper internal frame, even well-mounted units risk pulling out or collapsing prematurely. And let’s not forget, the wrong choice of fasteners or inadequate anchoring to wall studs significantly increases failure risk, especially when dealing with uneven or aged drywall. A sophisticated approach involves combining steel plate reinforcements with strategic stud anchoring, which research indicates can increase load-bearing capacity by up to 50%. If you’re considering installing built-ins in a small bathroom or home office, I highly recommend exploring innovative storage solutions that incorporate these hidden reinforcement strategies. You might want to look into this guide to transformative storage for practical insights. A common mistake I see is neglecting to account for seismic activity or household vibrations, which exponentially increase the stress on support units over time. This oversight can lead to sudden failures, especially in earthquake-prone areas. To mitigate this, some experts suggest incorporating add-on steel supports or adjustable brackets that accommodate movement without compromising stability. Moreover, advanced installation practices involve scribing and custom fitting to uneven walls or floors, which minimizes gap-related stress and uneven load distribution. For example, learning the secret scribing techniques—covered in this vanity installation guide—can significantly improve long-term performance. Have you ever fallen into this trap? Let me know in the comments. Remember, understanding the nuanced details and moving beyond simplistic solutions ensures your built-ins not only look great but last for decades, avoiding costly repairs and safety hazards in the future.
Ensuring your installed built-ins and vanities stand the test of time requires more than just proper initial support—regular maintenance and the right tools are essential. I personally swear by high-quality torque screwdrivers like the Wiha Precision Screwdriver Set for tightening fasteners evenly, preventing over-tightening that can lead to material stress or damage. Using a digital level such as the Bosch GLL 2-20 Laser Level allows me to verify alignment swiftly after installation and during periodic checks, catching any shifts early before they become serious issues. Moreover, specialized support brackets, like the internal steel stiffeners, can be added as your needs evolve, especially when scaling your storage solutions or upgrading vanities to accommodate new features. Prediction indicates that smart tools, integrating IoT capabilities, will become more prevalent, providing real-time support diagnostics and prompting maintenance before failure occurs.
How do I maintain built-ins and vanities over time?
Regularly inspect support structures, tighten fasteners with a torque screwdriver, and keep supports clean and free of debris. Implementing a schedule for checking mounting points can mitigate long-term issues significantly. For instance, I advise checking inner supports every 6-12 months, especially in high-traffic or vibration-prone areas. If you notice wobbling or misalignment, it’s a good time to revisit your support setup—adding reinforcements or replacing worn hardware. Additionally, using contactless tools like laser levels ensures consistent, highly accurate alignment checks, which become invaluable as your installation scales or when remodeling. When supporting heavy vanities, I recommend adding steel sub-frames, as discussed in detail here, which distribute weight evenly and prevent sagging. If you’re planning to upgrade or expand your storage spaces, consider integrating smart storage solutions with built-in monitoring features. This forward-looking approach will not only extend the lifespan of your fixtures but also eliminate surprises down the line. One advanced maintenance trick is applying a layer of removable adhesive strips on support brackets—this allows for easy adjustments and prevents loosening over time. I highly recommend trying this tip if you want a hassle-free way to maintain support stability, especially for heavy upgrades. Keep your tools accessible and your support systems inspected regularly; these simple steps will help safeguard your investment, ensuring your built-ins and vanities continue to perform beautifully for years.
Lessons That Took Me Years to Discover
- One of my biggest realizations was that superficial support is a quick path to long-term failure. I once relied solely on drywall anchors for a heavy media unit and paid the price with sagging shelves. Internal reinforcement techniques like the hidden sub-frame move transformed my approach, providing peace of mind and a sleek look.
- Thinking that every wall requires the same support method is a mistake. Different materials, weights, and wall conditions demand tailored solutions. For instance, steel plates work wonders for extra-heavy setups, and knowing when to use them saved me from costly repairs.
- Consistency in support isn’t just about initial installation; regular maintenance and inspections have proven essential. I now routinely check support points, tightening bolts and confirming stability, ensuring longevity and safety for my family and electronics.
- Understanding the nuance between visible and hidden supports opened my eyes to clean, durable design. No more bulky brackets cluttering my wall — just discreet, solid reinforcement behind the scenes.
Tools and Resources I Trust for Rock-Solid Support
- The Wiha Precision Screwdriver Set empowers me to tighten fasteners with perfect torque, preventing material stress. Reliable tools make all the difference.
- The Bosch GLL 2-20 Laser Level helps me verify alignment quickly, catching any shifts early. Accurate leveling is key to avoiding future sagging.
- For understanding reinforcement strategies, the steel plate reinforcement guide provided invaluable insights, ensuring I choose the right support for my project.
- Finally, exploring innovative storage solutions broadened my perspective on integrating support with practical design, making my space both functional and beautiful.
Your Next Move Starts Here
Embarking on a heavy media console installation doesn’t have to be daunting. With the right knowledge and support strategies, you can create a stunning, durable setup that lasts for years. Remember, the secret lies in unseen reinforcements that distribute weight evenly and prevent sagging — the kind of detail that elevates your craftsmanship from good to professional.
What has been your biggest challenge when supporting heavy fixtures at home? Share your experiences below and let’s learn from each other’s journeys toward stronger, smarter installations.