

Ever had that sinking feeling when you realize your beautifully installed vanity is wobbly, or worse, terrifyingly loose after just a few weeks? I remember the moment vividly—standing in my bathroom, holding a heavy mirror, and watching it sway ominously on the wall. It was a lightbulb moment, but instead of despair, I found a solution that transformed my project and might just do the same for you.
Why Conventional Mounting Methods Fall Short in Metal Stud Bathrooms
Many homeowners and DIY enthusiasts underestimate the challenge posed by metal framing. Traditional wood screws and drywall anchors don’t cut it, leading to frustration and future repair jobs. I initially tried multiple standard anchors, only to see my vanity or mirror shift over time. The problem? Metal studs are hollow and lack the sturdy backing that wooden frames provide. This means your mounting hardware needs to be smarter, not just stronger.
Is Plywood the Superhack That Really Works?
Early in my renovation, I made a mistake—rushing into mounting heavy fixtures without considering proper support. I used simple anchors, a mistake I learned the hard way. Over time, I discovered that installing a plywood subframe behind the drywall dramatically improves load distribution. This method ensured a secure hold, even on the thinnest metal studs. According to industry experts, this approach not only increases the weight capacity but also protects your fixtures from future damage or sagging. Curious to learn the step-by-step process? Stay tuned, because I’ll show you exactly how to implement this hack and avoid common pitfalls.
Prepare and Locate Your Mounting Area
Start by measuring your vanity’s back to determine the ideal placement on the wall, ensuring alignment with existing plumbing or electrical fixtures. Use a level to mark a horizontal line at the desired height, which will serve as your guide for mounting the support system. I once made the mistake of hanging a heavy mirror without proper measurements and it sagged within days; aligning from the start saves time and hassle.
Build the Plywood Support Frame
Cut the Plywood to Size
Choose sturdy ¾-inch plywood. Measure the width and height of the vanity’s support area. Cut a piece slightly wider than the vanity’s width to provide ample support. For a typical 60-inch vanity, I cut a 62-inch panel for extra stability. Ensure all edges are smooth and square.
Attach Vertical Supports
Install vertical lumber supports on each side of the plywood cut, about 2 inches in from each edge. These supports act as mounting flanges and help distribute weight evenly. Secure them with 2.5-inch wood screws, pre-drilling holes to prevent splitting. Imagine this support as the backbone of a ship — sturdy and reliable.
Secure the Frame to the Wall
Hold the plywood frame against the wall, aligning it with your markings. Use a stud finder to locate metal studs behind the drywall; this is critical, as drywall anchors won’t hold heavy fixtures properly. Mark their positions on the plywood. Drill pilot holes through the plywood into the studs, then fasten the frame securely with heavy-duty lag bolts. This method ensures your mount isn’t just anchored into drywall but directly into the metal studs.
Attach the Vanity to the Support Frame
Position your vanity onto the support frame, aligning it with the edge. Drill through the vanity back and into the plywood frame, using appropriate screws. For added strength, consider installing L-brackets at the corners. This setup provides a solid base, preventing wobble or sagging over time, which I experienced firsthand with a poorly mounted vanity that felt unstable when leaned on.
Finishing Touches and Considerations
Seal any gaps with caulk to prevent moisture ingress behind the vanity. Double-check levelness and stability before completing the installation. Incorporate adjustable leveling feet if your vanity has uneven legs to ensure perfect alignment. This approach not only secures the vanity but also prolongs its lifespan, making future repairs or adjustments straightforward.
For further insights into optimizing storage and enhancing your bathroom aesthetics, explore top storage ideas for 2025 or consider the installation hacks that save both time and money.
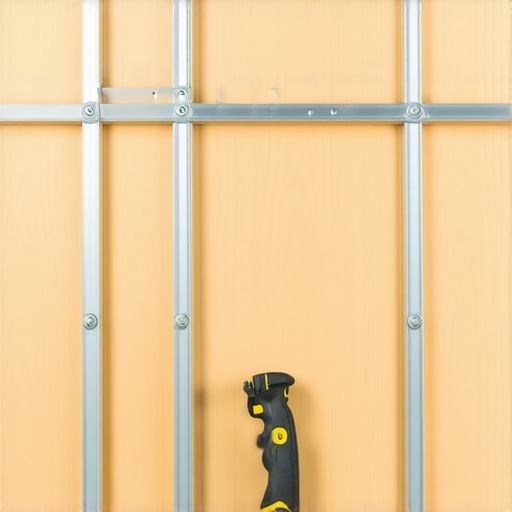 Many homeowners and even seasoned DIYers fall prey to common misconceptions about vanities, built-ins, and storage solutions, often resulting in frustration and subpar results. Let’s dig deeper into some nuanced truths that can elevate your project from basic to expert level. First, a widespread myth is that anchoring heavy vanities directly to drywall suffices. In reality, unless you’re anchoring into multiple sturdy studs—preferably steel for durability—your installation risks wobbling or catastrophic failure over time. experts warn that relying solely on drywall anchors for heavy fixtures is a recipe for disaster; proper support involves integrating into structural elements or adding reinforcement like plywood backing. Second, many assume that all storage solutions suit every space; however, the true challenge lies in customizing built-ins to match not just aesthetic preferences but also space constraints and usage patterns. For example, in small bathrooms, maximizing vertical storage with discreet, custom-designed units often outperform generic cabinets, thereby enhancing both function and style. Have you ever fallen into this trap? Let me know in the comments. Third, misconceptions also persist about the simplicity of DIY installation—mythical notions like “just drill and hang” overlook the necessity for meticulous alignment, levelness, and support. Cutting corners here can lead to uneven surfaces, sagging, or future repairs. Advanced practitioners understand that detailed support strategies—such as using steel brackets, hidden cleats, or engineered support frames—are essential for long-term stability, especially on uneven or challenging wall substrates. For instance, supporting heavy quartz or stone countertops demands precise anchoring techniques to prevent shifting or cracking, as emphasized by industry experts. Before undertaking your next project, consider exploring critical techniques like installing plywood support frames or utilizing innovative support brackets. These methods can save time and money in the long run, a good example being the plywood sub-frame strategy for supporting massive vanities. For more advanced insight, check out our guide on [vanity installation hacks that save time and money](https://customcabinetrypro.com/vanity-installation-hacks-that-save-time-and-money). Remember, elevating your approach from basic to expert requires understanding these nuances. Why settle for less when your space can look built-in and perform flawlessly? If you’re ready to refine your technique and avoid common pitfalls, I recommend reviewing our resources on [built-in storage ideas](https://customcabinetrypro.com/built-in-storage-ideas-to-declutter-and-enhance-your-home) or [custom vanities design tips for 2025](https://customcabinetrypro.com/enhance-your-home-with-sleek-built-in-vanities-design-tips-for-2025). Your home deserves more than generic fixes; it requires thoughtful support strategies that last.
Maintaining your custom vanities and built-ins is crucial to ensuring they stand the test of time and continue to function flawlessly. Having the right tools at your disposal makes routine upkeep and troubleshooting much more manageable. One tool I personally recommend is a digital laser level—specifically, the Bosch GLL 3-80. This device provides unparalleled accuracy when checking for levelness after installation or during adjustments. Its Bluetooth connectivity allows me to sync with my smartphone, enabling easy documentation and sharing of measurements for future reference.
For detailed cleaning and minor repairs, I favor a set of precision screwdrivers with magnetic tips. They make tightening or replacing hardware a breeze without risking damage to delicate surfaces. I’ve found that maintaining the integrity of your support structures, such as steel brackets or plywood reinforcements, with regular inspection is vital. I typically schedule a quarterly review, checking for any signs of loosening or corrosion, especially in humid environments like bathrooms.
In the realm of software, I rely heavily on design and project management apps like SketchUp and Trello. SketchUp helps in planning modifications or additions to storage solutions, ensuring seamless integration with existing aesthetics. Trello keeps track of maintenance schedules, upcoming upgrades, or customizations you might want to consider as trends evolve.
Looking forward, I believe the trend is moving toward sensor-integrated hardware. Imagine adjustable shelves or supports that can be monitored and fine-tuned via smartphone apps, offering effortless long-term management. Industry experts are even developing smart moisture sensors that alert you to potential water damage before it becomes serious, which is especially beneficial in bathroom installations.
How do I keep my vanities and built-ins performing over the years? It begins with regular, proactive maintenance using your best tools. Develop a routine that includes inspection, minor adjustments, and cleaning. For example, periodically checking the support brackets with a torque wrench ensures bolts remain tight under load. Implementing these practices can significantly extend the lifespan of your fixtures and save you money in the long run.
For advanced DIY enthusiasts, I recommend trying the plywood support frame method discussed earlier—it’s a game-changer for mounting heavy fixtures securely over time. Visiting resource pages like vanity installation hacks can provide additional insights to optimize your maintenance routines. Regular use of precise tools combined with strategic upgrades ensures your bathroom elements remain both beautiful and durable for years to come.
The Hardest Lesson I Learned About vanities,built-ins,installation,storage solutions
One of the most profound lessons I discovered was the importance of proper support before installation. Jumping into mounting heavy fixtures without reinforcing the wall can lead to wobbling or worse—damage that’s costly and frustrating. Ensuring you understand the wall structure and using robust backing, like plywood support frames, transformed my projects from shaky to solid.
3 Myths About vanities,built-ins,installation,storage solutions That Held Me Back
I once believed that drywall anchors could handle all mounting needs—big mistake. I also thought that all storage solutions fit every space, which isn’t true. Lastly, I overestimated the simplicity of DIY installation, ignoring the value of meticulous alignment and support strategies. Debunking these myths opened the door to more durable, professional-looking results.
What Experts Won’t Tell You About vanities,built-ins,installation,storage solutions
Industry pros often keep quiet about the necessity of integrating into structural elements rather than relying solely on drywall. They also recommend advanced support techniques, like steel brackets and engineered support frames, especially when dealing with heavy quartz or stone. Such insights can save you time and money, and ensure your installations stand the test of time.
Top Tools and Resources That Elevated My Approach
My go-to toolkit includes a digital laser level, like the Bosch GLL 3-80, which guarantees precision during installation, and magnetic-tip screwdrivers that simplify hardware adjustments. For design inspiration, SketchUp helps plan modifications, while Trello keeps track of ongoing maintenance routines. Exploring resources like installation hacks that save time and money has consistently improved my process.
Embrace the Challenge: Your Next Vanities or Built-Ins Awaits
Remember, elevating your skills with these insider tips not only ensures longevity but also boosts your confidence. Every successful project is a step toward transforming your space into a stunning, functional haven. Be brave—start your next vanity or built-in installation today, knowing you have the knowledge to make it last.
What’s the most daunting part of installing vanities or built-ins for you? Share your thoughts below—I’d love to help you overcome it!