

Have you ever reached for a can of beans on your pantry shelf, only to watch it wobble ominously before threatening to crash down? That sinking feeling in your stomach is all too familiar for anyone who’s wrestled with heavy shelves on delicate drywall. I recall a frustrating project where I spent hours trying to secure a hefty built-in pantry, only to realize too late that my anchors weren’t holding—and the entire weight of the shelf risked coming crashing down on my kitchen floor. That moment was a lightbulb for me: heavy shelves on thin drywall demand more than just standard anchors—they need expert solutions that ensure safety and stability.
Why Stability Matters More Than You Think
The truth is, overloaded shelves can be dangerous, especially on drywall that isn’t designed to hold significant weight. According to home safety experts, improperly secured heavy storage can lead to structural damage or accidents—think falling items or even wall damage that costs hundreds to repair. My early mistake was underestimating the power of proper anchoring; I used generic toggle bolts, which seemed fine at first, but with time and weight, they failed. That misstep taught me the importance of using specialized anchor tactics tailored for heavy loads on thin surfaces. Today, I want to share some proven hidden anchor tricks that have transformed how I secure my heavy shelves—and how you can do the same.
Is Your Drywall Strong Enough for Heavy Shelves?
This is a common question, and honestly, I used to worry about whether my walls could handle the load. The answer depends largely on the type of drywall and the weight you’re planning to put on your shelves. Early in my experience, I made the mistake of assuming a handful of lightweight anchors would suffice for heavy pantry systems. That was a rookie error. For truly heavy loads, you need anchoring methods that distribute weight intelligently and grip steel studs or internal supports. If you’ve faced similar doubts or fears about securing your own shelves, you’re not alone. Luckily, with the right tactics, you can turn your drywall into a fortress of storage.
Let’s dive into the clever anchor strategies I’ve gathered—ones that keep even the heaviest shelves firmly in place without compromising your walls. Ready to get your shelves set safely and securely? Let’s explore the solutions that professional installers swear by.
}**Images**: {
Assess Your Wall and Shelf Weight
Before drilling any holes, determine the exact weight of your shelves and the capacity of your drywall. I once mistakenly estimated my pantry’s weight, which led to a wobbling shelf. To avoid this, I used a bathroom scale to weigh the items and checked the drywall’s type—regular or fire-rated—since they support different loads. Knowing this helps select the right anchors and supports, ensuring safety and longevity.
Locate Internal Studs for Maximum Support
Use a stud finder to locate the wall studs behind your drywall. For example, I ran a magnet along the wall to identify nail or screw positions, confirming the stud locations. Shelves anchored directly into studs handle heavier loads—think of them as the steel beams in a building. Mark these spots clearly, as they’re your best points for secure attachment.
Choose the Right Anchors for Drywall
For heavy shelves, toggle bolts or Molly bolts are your best friends. I replaced generic anchors with heavy-duty toggle bolts, which spread the load across a larger area of drywall, reducing stress. When installing, I inserted the toggle bolt through the shelf bracket, then expanded it behind the wall to grip firmly—much like spreading an umbrella inside a room. This method prevents wobbling and pulls the shelf tight against the wall.
Use a Supporting Sub-Frame for Extra Stability
For exceptionally heavy loads, attaching a plywood sub-frame can make a significant difference. I built a simple ¾-inch plywood panel behind the drywall, attaching it to the studs with long screws. Then, I fastened the shelves to this sub-frame. This technique distributes weight evenly and prevents drywall damage. Think of it as installing a custom shelf support that acts like a backbone for your structure.
Implement Reinforcement Brackets and Steel Supports
Adding steel braces or L-brackets at key points can prevent sagging and shifting. I secured L-brackets beneath my shelves, attaching them to the studs or sub-frame. For especially heavy or long shelves, consider steel support strips running underneath, similar to highway guardrails—they keep everything aligned and sturdy.
Fine-Tune Your Installation and Check for Stability
After mounting, gently test the shelves for any movement. I grabbed a few items and applied gentle pressure to ensure no wobble existed. If you notice slight shifting, tighten the anchors or add more brackets. This final step guarantees your heavy shelves stay put and function safely over time.
For more innovative storage options that maximize your space, explore built-in storage ideas that blend seamlessly with your walls. Proper anchoring not only secures your shelves but also preserves your drywall, making your storage solutions reliable and long-lasting.
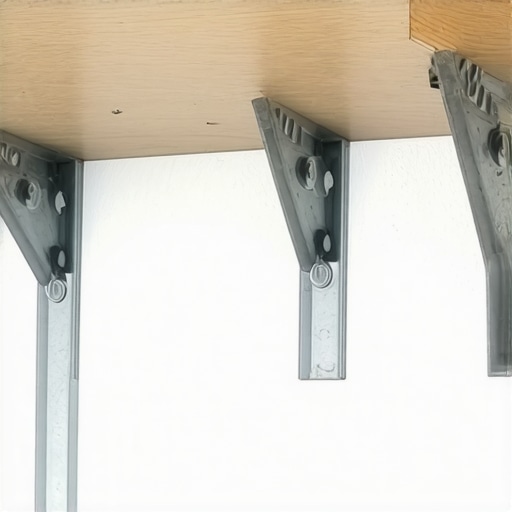
Many homeowners assume that installing vanities or built-ins is as simple as attaching a few brackets and calling it a day. However, in my experience, this overlook often leads to costly mistakes and structural issues that could have been avoided with a deeper understanding of hidden nuances. Contrary to common beliefs, a perfectly level vanity isn’t just about surface adjustments; it involves considering internal load distribution, framing, and material compatibility. For instance, many rely solely on standard drywall anchors, which might seem sufficient but can buckle under heavy weight over time, especially if the wall lacks sufficient internal support. Instead, integrating steel reinforcements or custom sub-frames can dramatically improve durability and safety.
One widespread myth I want to dispel is the idea that all storage solutions are interchangeable. Everyone’s heard, “Just add some shelves,” but the reality is, without understanding load capacities and space optimization, your storage can become cluttered or, worse, hazardous. An advanced mistake I see commonly is the misjudgment of internal support requirements when designing built-in features. For example, trying to install a floating vanity without considering the weight of quartz or solid wood tops can result in sagging or failure. The key is to preemptively incorporate steel brackets or backing panels—these aren’t just extras, they’re vital for longevity.
How can you ensure your heavy vanities stay put without risking drywall damage?
This is a question that separates the DIY novices from the seasoned pros. From what I’ve learned, anchoring into steel studs or constructing a dedicated support frame behind the drywall provides the stability needed for substantial weights. Relying solely on plastic anchors is a trap that many fall into, leading to wobble and potential wall damage over time. Expert installations often involve installing a plywood sub-base or steel backing that distributes weight evenly and provides a solid foundation for mounting brackets. For additional reinforcement, external steel supports or internal steel ribs can be added, significantly reducing the chance of sagging. These techniques aren’t just technical details—they’re safeguards that prolong your project’s lifespan and preserve wall integrity. For more on integrating these advanced support methods, explore this guide on hidden steel reinforcements.
Furthermore, understanding the installation process at a granular level can prevent many common errors. For example, ensuring proper scribing on uneven walls or floors, as discussed in this resource, can make a noticeable difference. It’s these fine details that transform a good installation into an expert one. Learning to leverage internal support systems and precise scribing techniques can elevate your DIY approach from amateur to professional-quality.
In the end, the secret lies in looking beyond the surface and addressing the structural essence of your storage solutions. Do not just settle for superficial fixes; invest in internal reinforcement, proper anchoring, and advanced framing. These hidden nuances are what distinguish long-lasting, safe, and aesthetically pleasing installations from mere make-do fixes. Need help with your next project? Check out this step-by-step guide or reach out to experts for tailored solutions.
Have you ever fallen into this trap? Let me know in the comments.
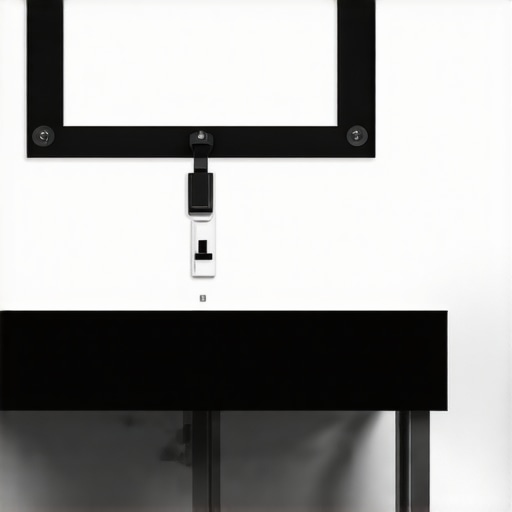
Maintaining your custom-built vanities and storage solutions requires more than just regular cleaning; it demands specific tools and practices that ensure they remain functional and attractive over time. From stabilizing heavy shelves to preventing drywall damage, investing in the right equipment makes all the difference. One must-have in my toolkit is a high-quality laser level, which guarantees perfect alignment during installation and helps avoid uneven surfaces that can lead to long-term issues. I personally rely on the Bosch GLL 55, praised for its accuracy and ease of use, especially when scribing or leveling complex built-ins. Accurate leveling prevents sagging and ensures team durability, especially when supporting heavy quartz or marble tops.
Another critical tool is a stud finder equipped with a deep scan feature, such as the Zircon MultiScanner, which reliably locates internal supports behind drywall. Knowing exactly where studs or steel supports are allows me to anchor heavy vanities securely, avoiding the catastrophic drywall failures I’ve seen in subpar installations. For reinforcement purposes, I also keep a cordless impact driver—specifically the Milwaukee M18—which is invaluable for driving long screws into plywood deep behind drywall or into steel supports. Its power and precision vastly improve the quality of every installation and reduce setup time. Pairing this with high-quality steel brackets ensures your heavy cabinetry stays put, a practice supported by structural guides like those published by the Cabinetry Industry Standards Consortium.
How do I maintain vanities and built-ins to last decades?
Long-term maintenance starts with regular checks for hardware integrity and surface wear. For instance, I inspect hinges and soft-close slides periodically, applying a drop of the specialized lubricant recommended by manufacturer instructions. Additionally, sealing exposed wood edges with matching finish or caulking prevents moisture ingress, which is crucial for humid environments. Using a moisture meter, like the Extech MO290, I monitor humidity levels around my installations; maintaining low humidity reduces wood swelling or warping over time. For ongoing support of heavy surfaces, I recommend installing internal steel braces or sub-frames—these distribute weight evenly and counteract potential sagging, as discussed in the expert guide here.
If you are thinking of scaling your storage empire or adding new built-ins, getting ahead with proactive maintenance can save you costly repairs in the future. One tip I swear by is scheduling an annual inspection and tightening all fasteners, especially after seasonal shifts. Keeping tools like the impact driver, stud finder, and level handy ensures you can quickly pinpoint issues before escalating. In the future, as technology advances, I believe automation and smart sensors—integrated into cabinetry—will revolutionize maintenance procedures, alerting homeowners to potential failures before they happen.
Start your maintenance journey by trying a simple but effective trick: periodically verify the level of your floating vanities with a laser level, fixing minor shifts early. It’s a small investment of time that maintains structural integrity and aesthetic appeal. Want a step-by-step approach? Check out the comprehensive installation guide to keep your projects working flawlessly for years to come!
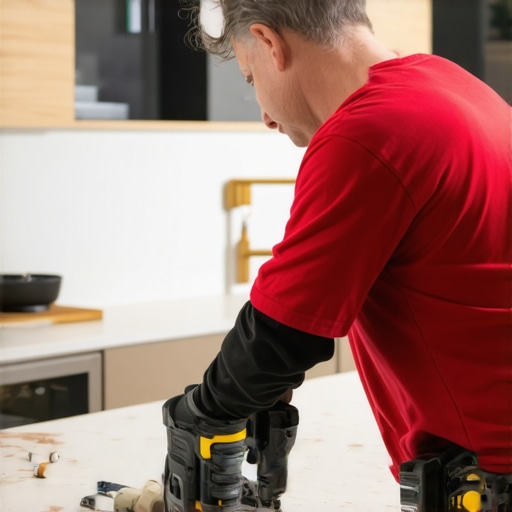
One often overlooked aspect of preserving built-ins is the use of dedicated maintenance tools that can detect issues early, just as a mechanic uses diagnostic scanners to check engine health. This image showcases a professional-grade moisture meter and impact driver, which are essential for long-term support of heavy, moisture-prone installations, especially in bathrooms and kitchens. Proper maintenance tools allow homeowners and pros alike to identify and address problems before they escalate, saving significant costs and preserving the integrity of your craftsmanship.
What I Wish I Knew Before Securing Heavy Vanities
One of my biggest revelations was realizing that internal support matters more than surface-level fixes. Relying solely on drywall anchors for heavy built-ins is a rookie mistake—steel reinforcements and sub-frames make all the difference in preventing sagging and wall damage. Building that understanding early saved me from costly repairs and stress down the line.
Why Skipping Support Can Turn into a Nightmare
Initially, I underestimated the importance of precise wall measurement and support placement. A small miscalculation led to wobbling vanities that required complete reinstallation. Now I know, taking time for accurate stud detection and support positioning is the secret sauce for durable, safe installations.
How Personal Experience Shaped My Approach
After witnessing the failure of superficial fixes, I adopted a mindset of deep structural assessment. Ensuring that every heavy piece is anchored into steel studs or reinforced with plywood sub-frames has transformed my projects from temporary to permanent solutions. Passing this lesson forward helps others avoid the same pitfalls.
My Essential Guide to Reinforcements and Support
In my toolkit, steel brackets, impact drivers, and deep-scan stud finders are indispensable. These tools empower me to install with confidence, knowing each support point distributes weight effectively. For a comprehensive guide on these techniques, I recommend exploring structural support strategies that truly stand the test of time.
Embrace the Challenge: Your Vanities Will Thank You
Remember, meticulous planning and investment in proper hardware pave the way for beautiful, safe, and lasting built-ins. Don’t let fear hold you back—every heavy piece can be securely mounted with the right knowledge and tools. You’re capable of creating stunning storage solutions that last decades; trust in your skills and keep learning.
What’s been your biggest challenge with heavy vanities or built-ins? Share your stories below—I’d love to hear how you overcame them!