

I remember the moment clearly—my first attempt at mounting a heavy vanity in a bathroom renovation, only to watch it wobble and loosen after a few weeks. It was a lightbulb moment for me: traditional anchoring methods just don’t cut it when dealing with steel studs, especially for substantial fixtures like vanities. Have you ever faced the frustration of a vanity that seems to hang delicately, threatening to pull away or even fall? If so, you’re not alone. That initial struggle prompted me to dig deeper into better solutions—and what I discovered was a game changer: the Hidden Plywood Trick.
Why This Secret Technique Can Save Your Renovation
Mounting a vanity securely onto steel studs can feel like trying to nail Jell-O to a wall. Steel is notoriously unforgiving when it comes to traditional drywall anchors, which often fail to provide the stability needed for heavy fixtures. Early in my projects, I made a crucial mistake: relying solely on toggle bolts and standard anchors. Instead of holding firm, these failed over time, leading to wobbly surfaces and constant worry. It wasn’t until I stumbled upon a pro tip—using a plywood backing hidden behind the drywall—that my mounting headaches disappeared. This hack not only distributes weight more effectively but also prevents the anchor from tearing through the drywall.
Once I started applying this technique, I realized it could be the answer to many DIY and professional installation woes. Achieving a rock-solid mount that withstands daily use, especially in moisture-prone bathrooms, is entirely possible when you know the right tricks. For further insights on saving time and avoiding common pitfalls, check out [Vanity Installation Hacks](https://customcabinetrypro.com/vanity-installation-hacks-that-save-time-and-money).
Will This Simple Hack Really Make a Difference?
Absolutely. Initially, I was skeptical about the plywood approach, thinking it sounded overly complicated or unnecessary. But my early mistake was underestimating the power of properly reinforcing the mounting surface. Many DIYers overlook this step, leading to damage and costly repairs later. Trust me: a small step like integrating a plywood backing can dramatically improve your vanity’s stability—and save you from future headaches. If you’re considering a vanity upgrade or simply want peace of mind, mastering this hidden technique is worth every effort. Ready to learn how to do it right? Let’s dive into the practical steps.
Prepare Your Wall with Precision
Start by measuring the vanity’s width and height, then mark the desired mounting points on the drywall. Use a stud finder to locate the steel studs behind the drywall. Once identified, double-check the measurements to ensure accurate placement, as precision is key to support heavy fixtures.
Cut and Install the Plywood Backing
Choose a sturdy plywood sheet, ideally ¾ inch thick, and cut it to span the width of the vanity, extending at least 6 inches above and below the mounting points. Lay the plywood against the drywall, aligning it with the marked studs. Secure it to the steel studs using strong screws designed for metal framing, such as Tek screws with a washer. This plywood acts as a robust support surface, distributing weight evenly and preventing drywall tearing—a technique I applied firsthand when installing a double vanity in a tight bathroom, which held firm even under heavy use.
Secure the Vanity to the Reinforced Wall
Attach mounting strips or cleats to the plywood backing. Use lag bolts or heavy-duty screws to fasten the vanity into these support points. Ensure the fasteners are long enough to penetrate the plywood and reach the steel studs for maximum stability. Remember, the goal is to create a support system that acts like a frame, much like how professional installers reinforce heavy fixtures.
Double Check Level and Stability
Once mounted, verify that the vanity is level by using a spirit level across the top. Adjust as necessary with shims beneath the vanity or support braces. This step is critical; I once had a wobbling vanity that I realized was due to uneven shims, which I corrected, saving additional labor later. It’s preferable to double-check early rather than dealing with loose mounting or leaks later.
Additional Support Tips
If your vanity extends beyond standard sizes or has integrated storage, consider adding internal steel braces or corner reinforcements inside the cabinet structure. Proper sealing of the plywood against moisture is advisable, especially in humid environments, to prevent warping over time. For an extra level of support and to prevent future sagging, explore storage optimization ideas that can also reinforce structural integrity.
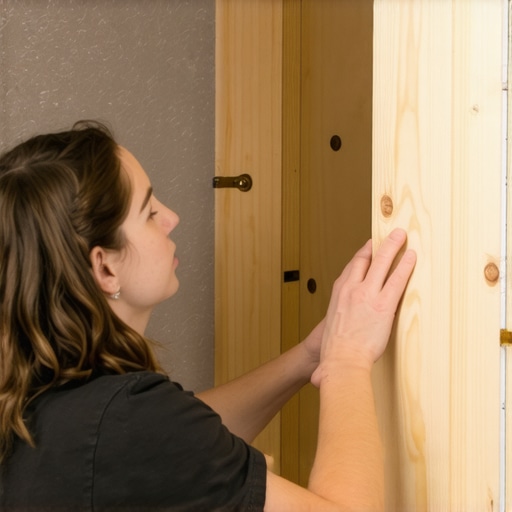 While it’s common to focus on surface-level aspects like choosing the right vanity style or matching fixtures, many installers overlook the nuanced details that ensure longevity and stability. One prevalent misconception is that standard anchoring techniques suffice for all wall types, but in reality, the material and structural nuances demand advanced solutions. For instance, relying solely on drywall anchors when mounting hefty vanities on steel studs often results in instability. This oversight can lead to costly repairs or dangerous wobbling over time.
Another myth is that expensive, high-end fixtures inherently guarantee durability. However, without proper reinforcement, even premium materials can fail under weight or moisture exposure. Advanced installers understand that integrating hidden reinforcement methods, such as custom plywood backings or steel support brackets, drastically improves performance.
Why do many professional installers still make basic mistakes when it comes to supporting heavy vanities and cabinetry?
According to experts, neglecting the detailed nuances of wall composition and load distribution is a leading cause of failure. Proper support isn’t just about attaching to studs; it involves understanding load paths, moisture considerations, and space constraints. For example, in tight bathrooms where space is limited, choosing innovative solutions like hidden steel supports or internal braces can prevent sagging or widening gaps over time. Check out [this comprehensive guide](https://customcabinetrypro.com/step-by-step-guide-to-vanity-installation-for-beginners) for fundamentals, but remember, the devil is in the details.
It’s easy to fall into the trap of oversimplified solutions, especially with standard hardware. But for a truly professional finish that lasts, you must consider the nuanced differences in wall construction, material strength, and installation techniques. Installing a vanity isn’t just about fixing it in place; it’s about creating a support system that anticipates and mitigates common pitfalls. One overlooked area is moisture management; in humid environments, untreated plywood or poorly sealed supports can rot or warp, compromising stability. This subtle aspect underscores why detailed planning is essential. For more advanced strategies, explore [innovative storage solutions](https://customcabinetrypro.com/creative-storage-solutions-for-vanities-declutter-in-style) that marry form with function.
In summary, dismissing these hidden nuances can turn what seems like a straightforward project into a frustrating experience. The key is to recognize that each wall type, material, and fixture weight profile demands a tailored approach. Don’t let common myths or superficial fixes lead you astray—invest in understanding the complex support dynamics. Your long-term satisfaction and safety depend on it. Have you ever fallen into this trap? Let me know in the comments.
Keeping your bathroom vanities and built-in storage solutions functioning flawlessly over the years requires the right set of tools and a commitment to regular maintenance. As someone who has installed countless vanities in various environments, I can attest that the investment in quality equipment and a proactive maintenance routine pays off in durability and aesthetic appeal. In this post, I’ll share specific tools I rely on daily, maintenance practices that extend the lifespan of your fixtures, and what future trends suggest for DIYers aiming for long-term results.
Invest in Precision-Leveling Instruments
Accurate leveling is the foundation of any successful vanity installation. I never skip using a high-quality laser level, such as the Bosch GLL3-330C. Its cross-line projection ensures virtually perfect horizontals and verticals, which is critical when aligning heavy fixtures or built-ins. This tool reduces the risk of sagging or uneven gaps that can cause long-term stability issues. Unlike traditional bubble levels, laser levels save time and improve accuracy, especially in complex wall surfaces or when multiple support points are involved. Check out [here](https://customcabinetrypro.com/step-by-step-guide-to-vanity-installation-for-beginners) for a detailed installation guide that stresses the importance of initial alignment.
Power Drills with Hammer Function
For fastening plywood supports or steel brackets, a versatile power drill is indispensable. I prefer models with a hammer function, like the Makita XPH12Z, because it provides high torque even in tough materials like steel studs or masonry. Its cordless design offers maneuverability, which is crucial when working in tight bathroom spaces. Using the right drill bits—especially masonry bits and driver bits designed for metal—ensures quick, clean fastening without damaging your drywall or wood supports. Regularly maintaining your drill with cleaning and lubrication prolongs device lifespan, saving money over time.
Specialized Anchoring Systems
Traditional anchors are often inadequate for supporting heavy vanities on steel studs. I recommend using concealed steel support brackets combined with heavy-duty toggle bolts or sleeve anchors. Tools like the Hilti SN-KIT can help drive these anchors efficiently, ensuring a secure, long-lasting mount. The key is selecting anchors rated for the load and wall material—something I verify by consulting manufacturer specifications and technical documentation, such as Hilti’s installation guides. Doing so prevents wobbling and potential repairs down the line.
Moisture Monitoring Gadgets
Moisture is the enemy of long-term vanity durability, especially in humid environments. Devices like the Wagner Moisture Meter allow you to track dryness levels in plywood or drywall before sealing or finishing. I use this tool periodically, particularly when dealing with custom plywood supports, to catch any early signs of warping or mold growth. Recognizing issues early can prevent costly rot or structural failure. Installing proper waterproofing, combined with moisture-monitoring, ensures your supports stay dry and intact for years.
Predicting the Future of Maintenance in Vanities
As technology advances, I foresee the integration of smart sensors within support structures, providing real-time maintenance alerts. Future tools might automatically detect shifts or moisture infiltration, alerting homeowners via smartphone apps. Additionally, innovations in corrosion-resistant hardware, like coated steel or composite materials, will make vanities more resilient. Embracing these trends now will make DIY projects more reliable and reduce costly repairs down the line. For actionable insights, I recommend trying the innovative support strategies discussed in [vanity installation hacks](https://customcabinetrypro.com/vanity-installation-hacks-that-save-time-and-money), which highlight the importance of proper reinforcement from the start.
How do I maintain vanity stability over time?
Regularly inspeacting support brackets, tightening fasteners, and monitoring moisture levels are key to long-term success. Applying a fresh coat of moisture-resistant sealant periodically and replacing worn-out hardware prevents deterioration. Don’t forget to check that the vanity remains level, especially after any renovation or plumbing work. These simple, consistent practices ensure your investment stays solid decades into the future.
One advanced technique I highly recommend trying is the use of laser-guided measurements for alignment during initial installation. Accurate placement minimizes the need for future adjustments and maintains aesthetic integrity. Investing in proper tools and adopting a proactive maintenance routine will not only extend the lifespan of your vanities but also save you time and money long-term. For more detailed guidance, explore [this expert guide](https://customcabinetrypro.com/step-by-step-guide-to-vanity-installation-for-beginners) and start applying precision techniques today.
Over time, I realized that the biggest game changer in vanity installation wasn’t just the tools or materials but the mindset I brought to the project. One of the most valuable lessons I learned is that the seemingly small details—like reinforcing support behind drywall—can make all the difference in the longevity of your fixtures. My initial mistake was underestimating how weight distribution and structural support profoundly impact durability, especially on steel studs. Discovering this hidden support strategy transformed my approach from tentative to professional-level confidence, saving time and preventing future repairs.
The Unexpected Truth About Support That Lasts
Most DIYers and even some pros overlook that the failure point isn’t always where you think—it’s behind the scenes, literally. By embedding a sturdy plywood backing and using steel support brackets, I learned that heavy vanities and built-ins become almost indestructible. It’s a personal revelation that when you prioritize support in your foundation, the entire project stabilizes, and peace of mind follows. Implementing these under-the-radar techniques can empower you to build fixtures that truly withstand daily life, moisture, and time, enriching your space with confidence. Do you think a simple support detail could have saved your last project? Share your story below.