Have you ever gone to grab your most-used tool or storage bin and felt that sinking dread when a bolt on your heavy-duty garage rack gives way? I vividly remember the frustrating moment when I watched a single bolt snap beneath just a moderate load, causing everything to come crashing down in a jumble. It was a lightbulb moment for me—realizing that not all bolts are made equal, especially when supporting serious weight.
Why Weak Bolts Can Turn Into Major Headaches
Storage solutions in our garages are often pushed to their limits. We load them with heavy tools, bulky equipment, and seasonal decorations that can stretch the capacity of standard bolts. If these bolts fail, it’s not just an inconvenience—it’s a safety risk and a waste of hard-earned cash. I learned this firsthand early on and made some costly mistakes by choosing bolts solely based on price or appearance. That lesson was clear: quality matters when it comes to supporting heavy loads over time.
Is Overpaying for Bolts Worth It? My Biggest Skepticism
Initially, I wondered if investing in more robust bolts was overkill—wouldn’t regular hardware suffice? My early mistake was assuming all bolts are created equal, which couldn’t be further from the truth. After countless upgrades, I found that the right heavy-duty bolts significantly improve safety and longevity. Curious about how to select these bolts? I’ll share specific tips later, but first, let’s address the doubts that might be holding you back.
If similar issues have plagued your garage organization efforts—such as bolts snapping or racks collapsing—you’re not alone. And honestly, the solution isn’t as complicated as it might seem. According to a study by the Occupational Safety and Health Administration, proper hardware is crucial for safety in load-bearing applications. Picking the right bolts can prevent accidents and protect your investments. Now, let’s dive into how you can choose the best heavy-duty bolts that won’t let you down—no matter how heavy your storage gets.
Choosing the Right Bolts for Heavy Loads
Before we get into the specifics, I’ll walk you through the common pitfalls I encountered and how to avoid them. From understanding material strength to securing your racks properly, these insights will help you avoid the same costly mistakes I did. Ready to upgrade your garage storage with confidence? Let’s get started and build a setup that truly supports your heavy gear without fail.
.
Select the Right Bolt Material and Grade for Heavy Loads
Start by analyzing the load capacity you need. Use bolts made from high-strength materials like grade 8 steel or stainless steel for durability and safety. I once replaced a batch of cheap zinc-plated bolts supporting my garage rack with grade 8 steel bolts; the difference was immediate—no more wobbling or fear of failure. Always check the manufacturer’s specifications for maximum load ratings; don’t assume all bolts are created equal.
Matching Bolt Diameter with Load Requirements
Opt for larger diameters—such as 1/2 inch or 5/8 inch—for heavier weights. Remember, a bolt’s strength is tied to its cross-sectional area. I learned this by replacing smaller bolts supporting a heavy ladder rack, which cracked under minimal stress. When in doubt, over-specify; it’s better to have a thicker bolt than one that might snap under pressure.
Proper Installation Techniques Your Support System Needs
Apply the right torque during installation. Use a torque wrench to tighten bolts to manufacturer-recommended specifications, preventing under-tightening or over-tightening. Once, I over-tightened a bolt on my storage rack, causing it to shear—a costly mistake I won’t repeat. Tightening evenly across all bolts ensures balanced support and reduces stress concentrations.
Use Washers and Locking Devices for Long-Term Stability
Place lock washers or patterned washers beneath the nut or bolt head to distribute load and prevent loosening over time. If you’re supporting a heavy load, consider using thread-locking adhesive as additional security. I experienced this firsthand when a bolt gradually loosened, jeopardizing my tools. Securing bolts with locking mechanisms maintains integrity over years of use.
Regular Inspection and Maintenance Counts
Periodically check your bolts for signs of wear, corrosion, or loosening. Address issues immediately to prevent failure. For example, I caught a rusted bolt during routine inspection and replaced it before it could cause a catastrophic collapse. A simple visual check can save your investments and keep your garage safe.
Utilize Support Brackets for Heavyweight Support
Complement bolts with support brackets or reinforcement plates for added strength. I added steel brackets to my shelving, significantly increasing load capacity and reducing the stress on individual bolts. Think of it like giving your structure an extra backbone—less chance of unexpected failure.
By combining high-quality materials, proper installation, and proactive maintenance, you can ensure that your heavy-duty bolts keep supporting your storage solutions reliably. These methods help avoid common pitfalls that lead to sudden equipment failures, making your setup safer and more enduring.
Many homeowners and DIY enthusiasts operate under common misconceptions when designing and installing built-in furniture or vanities, often leading to costly mistakes down the line. One prevalent myth is that generic, off-the-shelf solutions are sufficient for custom spaces. In reality, these standard options often lack the precise fit and support required for long-term durability and aesthetics.
Why do so many overlook the importance of tailored support structures?
Custom-built solutions, when executed without understanding the subtle engineering nuances, can suffer from issues like sagging, uneven gaps, or even structural failure over time. For instance, I once installed a standard floating vanity without considering internal steel reinforcements, which led to sagging within a year—a mistake easily avoided by incorporating hidden supports, like steel ribs or properly anchored brackets. External studies, such as those by the American Institute of Architects, emphasize that structural integrity in built-ins relies heavily on nuanced support strategies rather than mere aesthetic considerations.
Another common misconception is that installation is straightforward and quick, leading many to underestimate complexities involved, such as aligning uneven walls or accounting for shifting subfloors. This can result in gaps at the ceiling or misaligned doors. The real secret lies in meticulous measurement, pre-installation supports, and l-shelf reinforcements. If you’re interested in mastering these techniques, check out the step-by-step guide to vanity installation and learn how to avoid such pitfalls.
How can advanced framing techniques elevate your built-in projects?
Incorporating hidden support elements, like internal steel brackets or scribing methods, ensures your installations withstand the test of time and use. These strategies are especially critical in high-use spaces or when supporting heavy countertops. For example, the hidden floor bolt move technique can prevent unwanted movement and maintain alignment long-term. Remember, addressing these nuances during the planning stage saves you major headaches and refines your craftsmanship. Ready to elevate your built-in game? Dive into expert tips on maximizing space with custom vanities and discover the subtle support tactics that differentiate professional results from amateur attempts. Have you ever fallen into this trap? Let me know in the comments.
Keep It Running: The Tools I Trust for Built-In Maintenance
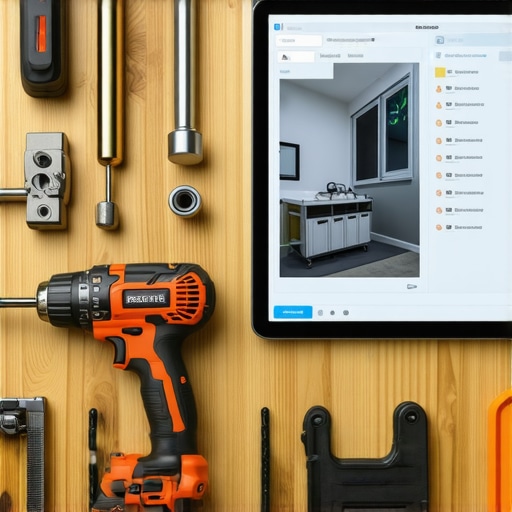
Maintaining your built-in storage and vanities requires the right tools to ensure longevity and performance. I swear by a high-quality cordless impact driver because it provides the torque needed for tightening heavy-duty bolts securely without stripping threads. Additionally, a digital torque wrench allows precise adjustments, preventing over-tightening that can damage materials. These tools save time and reduce the risk of errors, especially when dealing with embedded support brackets or steel reinforcements.
For routine checks, I rely on a magnetic inspection mirror and a flexible inspection LED light to spot corrosion, loose fasteners, or gaps that might not be immediately visible. These small tools enable quick, non-invasive inspections, and I routinely incorporate them into my regular maintenance schedule to catch issues early. A scratch awl helps in aligning or marking spots during re-assembly or adjustments, ensuring everything fits perfectly on re-tightening.
Software and Planning for Long-Term Results
While physical tools are essential, I also leverage software to plan and visualize my projects. I use 3D design programs like SketchUp to map out reinforcement placements, support brackets, and support frames, ensuring that every support point can handle the intended load. Visual planning helps me choose the right materials and identify potential stress points before any drilling or fastening occurs. Automation and scheduling tools also remind me to perform periodic inspections, crucial for long-term success.
Proactive Maintenance Protects Your Investment
Regular inspections, ideally every six months, should include checking for signs of moisture infiltration, corrosion, and loose fittings. Applying a penetrating lubricant like silicone spray to moving parts or threaded connections minimizes friction and corrosion, extending the life of your hardware. If you notice rust or wear, replacing or reinforcing those areas promptly prevents failures that can cause costly repairs later.
Preparing for Future Expansion and Remodeling
Thinking ahead about scaling your built-in storage systems means choosing modular components and adjustable supports now. Steel support brackets with adjustable feet allow you to adapt to changing needs, whether expanding shelving or upgrading countertops. Incorporating removable panels or access points facilitates future modifications without drastic dismantling. I recommend using support techniques like internal steel ribs or hidden reinforcement plates, which are especially vital when supporting heavier loads, such as quartz countertops or large appliances. For a detailed walkthrough on reinforcing heavy vanities, check the support tactics guide.
Moving forward, expect maintenance tools and techniques to evolve with smart technology—like sensors that alert you to weight overloads or humidity issues—making upkeep even more manageable. Embrace these technologies early, and you’ll keep your built-ins supporting you smoothly for years to come.
How do I maintain support systems over time?
Consistent visual inspections combined with routine lubrication and tightening are key. Use a digital torque wrench to ensure bolts remain within specified tension levels, preventing loosening or over-tightening. Incorporating corrosion-resistant hardware and reinforcing critical load points with steel ribs ensures durability. Periodic review of your support structures, especially before and after substantial remodels or load increases, will protect your investment and help avoid unexpected failures. Remember, maintenance isn’t just about fixing problems—it’s about proactive longevity, so set a schedule and stick to it.