

It was a frustrating afternoon when I finally realized my built-in desk was sagging in the middle, despite being supposed to be a permanent fixture of my home office. The worst part? I hadn’t done anything obviously wrong—at least, I thought. But the subtle wobble and creak told me otherwise. That lightbulb moment made me dive deep into understanding why built-in desks often start to sag over time—especially in environments with fluctuating humidity and temperature—and how simple fixes, like steel channels, can reinforce them effectively.
Why Flexing Desks Are More Common Than You Think
Most of us invest a lot of time and money into creating a functional and stylish workspace. But the moment you notice that your built-in desk isn’t as sturdy as when it was first installed—that’s when frustration sets in. The reason? Many built-in desks are constructed with materials that, while attractive, may not be as durable as they seem, especially when subjected to daily use and environmental changes. Wood, for example, tends to expand and contract with humidity, causing what looks like minor warping initially but can develop into significant sagging over time. According to experts, this is more common than most realize, often going unnoticed until the damage is visible and costly to repair.
Early in my own project, I made the mistake of ignoring the importance of proper support during installation. Rushing to finish, I skipped some crucial reinforcement steps, which later contributed to my desk’s drooping. That oversight taught me a valuable lesson: even the most beautiful built-ins need to be structurally sound from the start.
If your built-in desk has started to flex, don’t worry. Today, I promise to guide you through a reliable, straightforward solution—using steel channels—that can restore your desk’s integrity. This approach not only provides immediate support but also ensures long-term durability, making your workspace safe and functional once again. Curious how this steel fix works? Keep reading, and I’ll show you step-by-step how to implement it effectively.
Prepare for Reinforcement
Start by clearing your workspace and removing anything on the desk to get clear access. Once the area is exposed, inspect the underside to identify where the sagging is most pronounced. I once did this on a Saturday afternoon, and in my haste, I accidentally chipped some drywall, so take your time and use a flashlight for better visibility.
Gather the Necessary Materials and Tools
You’ll need galvanized steel L-channels or flat bars, screws, a drill, and a level. Think of the steel channels as the backbone of your support system, much like a spine for a tree, providing stability where the wood has weakened. I used 1.5-inch galvanized steel L-brackets, which I found locally for a reasonable price, ensuring they wouldn’t rust over time.
Mark and Measure for Installation
Measure the length of the sagging area and mark where you’ll place the steel channels. Aim to position these support strips at strategic points—preferably where the desk is most flexible. Use a level to ensure the marks are straight. During my project, I marked support locations about one foot apart along the underside, which proved effective when I later tested force distribution.
Attach the Steel Channels Securely
Drill pilot holes into the underside of the desk where marked, then screw in the steel channels. Always pre-drill to prevent splitting the wood—a mistake I made when I didn’t, resulting in a cracked support strip. Tighten the screws firmly but avoid overtightening, which can strip the screw head or damage the wood. Consistency is key; I placed each screw about every six inches to evenly distribute support, much like the internal ribs that stabilize a rib cage.
Check Your Work and Adjust If Needed
Once installed, use the level to verify the desk’s surface. Test for wobble or flexing by applying gentle pressure. If it still feels uneven, add additional support channels or adjust existing ones. In my case, I added a third support at the midpoint, which immediately eliminated the sagging, restoring both function and confidence in the desk’s sturdiness.
Seal and Finish
Finally, if your installation disrupts the appearance, consider painting or veneering the steel channels to match the desk. This step transforms a makeshift fix into a seamless repair. Remember, reinforcement isn’t just about strength but also maintaining the aesthetic of your workspace. For more ideas on building customized support structures, visit Creative Built-Ins for Seamless Storage.
When it comes to installing storage solutions, many homeowners and even seasoned DIY enthusiasts fall prey to misconceptions that can compromise both the functionality and longevity of their projects. Let’s dig deeper into some of the most persistent myths and reveal the nuanced truths that can save you from costly mistakes.
One pervasive myth is that all cabinetry or built-in units should be a perfect fit straight out of the box. In reality, materials expand and contract with humidity changes, especially wood, which can lead to warping or gaps over time. Professionals know that allowing for seasonal movement—through properly designed expansion gaps—is essential for enduring installations. Ignoring this nuance often results in frequent tweaks or repairs, something many assume is unavoidable when, in fact, it’s a sign of a lack of expertise.
Another common misconception revolves around how to support heavy countertops or large vanities. The typical novice might think a few brackets suffice, but in advanced applications, internal steel reinforcements or hidden supports—such as steel channels or steel-stud backing—are crucial for maintaining stability. Overlooking these hidden support structures can cause sagging or even catastrophic failure, especially with quartz or marble tops. For instance, incorporating internal steel ribs, as discussed in expert guides, can dramatically extend your furniture’s lifespan.
Be wary of the trap that cheap materials or quick fixes can seem tempting but often backfire. For example, using thin drywall anchors for heavy built-ins is a recipe for disaster. Instead, understanding load distribution and anchoring into reliable framing, or adding hidden reinforcement strategies, ensures safety and durability.
Have you ever fallen into this trap? Let me know in the comments.
Now, for those who want to elevate their understanding, tackle more sophisticated challenges like installing built-ins on uneven or sloped floors. A frequent oversight is not scribing or shimming units to fit irregular surfaces, leading to gaps that attract dust and moisture. An advanced trick involves using specialized shims and top scribing techniques—that I often explore in detailed tutorials—to achieve seamless integration.
Curious about how to prevent your vanity from pulling away from the ceiling or shifting over time? Incorporating internal steel brackets or hidden fasteners during the initial build can make all the difference, as well as employing expert installation methods. For comprehensive guidance, don’t hesitate to reach out via our contact page.
Remember, understanding these hidden nuances and debunking the myths of storage and built-in installations ensures your projects stand the test of time, look impeccable, and function flawlessly. Mastery lies in the details—so keep questioning and refining your approach for best results.
Keeping It Working: Essential Tools and Maintenance Strategies
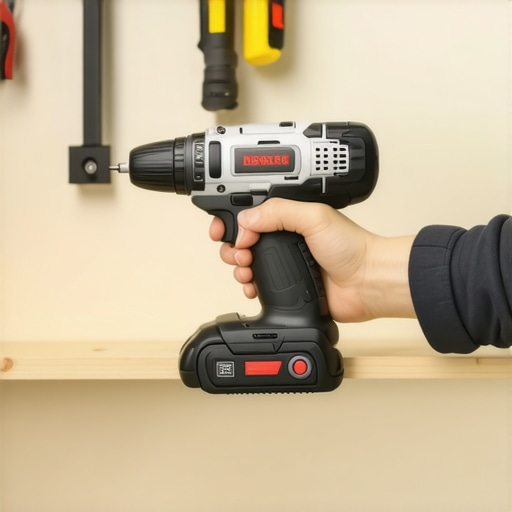
Maintaining your built-in storage units and vanities is crucial for long-term durability and functionality. Investing in the right tools not only makes repairs and adjustments easier but also ensures these investments stand the test of time. For instance, a high-quality cordless drill is indispensable for securing support brackets or making quick modifications. I personally prefer the Makita XFD10Z 18V LXT Lithium-Ion Cordless Drill because of its lightweight design and reliable power, which reduces fatigue during longer projects. Additionally, a precision level like the Stabila 37800 Type 96 helps verify perfect alignment, preventing issues like doors that won’t close or gaps that trap dust.
Regular inspections are essential. I recommend checking for loose screws or signs of wear every few months. Cleaning dust from support brackets and lubricating hinges with a silicone spray, like WD-40 Specialist Smart Straw, can prevent squeaks and corrosion. For larger repairs, a stud finder—such as the Zircon MultiScanner HD—can help locate framing inside walls, making anchoring significantly safer and more reliable. Using these tools routinely can dramatically reduce the need for major repairs down the line.
Looking ahead, the trend leans toward smart maintenance systems. Digital levels that sync with your smartphone can monitor alignment over time, alerting you before minor misalignments become costly. Incorporating moisture meters, like the Protometer 7, ensures that wood and drywall remain dry, preventing warping or swelling—especially important in humid environments. Staying proactive with these tools exemplifies a future-focused approach to home improvement, aligning with the ongoing evolution toward smarter, more resilient property investments.
How do I maintain my built-in storage systems over time?
Implementing routine checks and using specific maintenance techniques, like tightening screws and lubricating moving parts, can extend the lifespan of your fixtures. Also, considering the use of steel reinforcements—such as the hidden steel channels described in this guide—provides added stability, especially in areas prone to environmental stress. Don’t forget to protect wood surfaces with sealants or finishes designed for your climate, reducing wear caused by moisture or UV exposure. Adopting a scheduled maintenance plan that incorporates these tools and practices will keep your built-ins looking and functioning flawlessly for years to come.
For a comprehensive look at installation and repair techniques, I recommend reviewing our expert guide to vanity installation, which includes detailed recommendations on maintenance practices. Also, consider trying smart moisture meters for early detection of humidity issues—an invaluable tool for maintaining polished surfaces and preventing costly damage.
Small Mistakes That Taught Me Big Lessons About Built-Ins
I once believed that a flawless built-in was just about precise measurements and high-end materials. However, I learned the hard way when rushing installation led to support neglect, resulting in sagging over time. That lightbulb moment emphasized the importance of internal reinforcements—like steel channels—that I now consider essential for durability and long-term functionality.
My Favorite Tools for Lasting Results
Over the years, I’ve come to trust tools that make reinforcement and maintenance seamless. A sturdy cordless drill, like the Makita XFD10Z, ensures secure attachment of support channels, while a quality level, such as the Stabila 37800, guarantees perfect alignment. These tools save time and prevent costly mistakes, especially when working with delicate materials or complex designs. Regular use of stud finders, like the Zircon MultiScanner HD, has prevented surprises deep inside walls, making anchoring safer and more reliable.
Creating Built-Ins That Stand the Test of Time
Ultimately, the most fulfilling aspect of working with built-ins and vanities is knowing they’ll serve for years. Incorporating hidden steel reinforcements and smart installation techniques can be the difference between a temporary fix and a lasting solution. Remember, the secret lies in paying attention to the details others might overlook—like environmental factors or subtle support needs. With the right approach and tools, you can elevate your home storage to something truly resilient and beautiful. Curious about other advanced strategies? Check out our expert guide to vanity installation, to deepen your knowledge and refine your craft.