

Ever since I installed my new vanity on that uneven bathroom floor, I couldn’t shake the feeling of frustration every time I looked at it. The level was perfect when I installed it, but over time, gravity, settling, and the subtle slope of my floor made it appear crooked and unsteady. I realized I wasn’t alone in this struggle; many homeowners face the same unsettling issue that turns a simple vanity installation into a persistent eyesore. That lightbulb moment led me deep into researching solutions, and I discovered that a proper leveling move is essential to not only improve aesthetics but also to ensure safety and durability in bathroom fixtures.
Why Sloped Floors Demand the Right Vanity Leveling Techniques
Bathrooms often have the most unique floors—sloped, uneven, or bowed surfaces that challenge even the most experienced DIYers. A poorly leveled vanity not only looks sloppy but can lead to functional issues like misaligned doors, dripping sinks, and even structural stress over time. I learned early on that ignoring these subtle slopes results in larger problems down the line. According to a study by the National Home Builders Association, faulty installations caused by uneven surfaces account for over 30% of bathroom repair requests, emphasizing the importance of the initial setup.
When I first tried to fix my vanity’s imbalance with generic shims, I quickly realized that piecemeal solutions weren’t enough. It became evident that custom adjustments, using the right tools and techniques, would make a significant impact. The key is to identify the degree of slope and apply a tailored leveling strategy that accounts for the specifics of your floor and vanity. This not only improves the visual harmony but also prolongs the lifespan of your fixture.
Are you currently battling a crooked vanity that just refuses to sit right? Have you faced similar doubts about whether a DIY fix could hold? You’re not alone. These are common concerns, but with the right approach, you can turn your uneven floor into a solid, beautiful foundation for your bathroom furniture.
In the next sections, I’ll walk you through step-by-step methods to master the leveling move. From measuring the slope accurately to choosing the appropriate materials and execution techniques, you’ll learn everything needed to achieve that flawless, professional finish. For additional tips on flawless vanity installation, be sure to check out our comprehensive guide on [vanity installation hacks](https://customcabinetrypro.com/vanity-installation-hacks-that-save-time-and-money). Let’s dive into making your bathroom both functional and stunning!
Assess the Floor Slope Precisely
Start by placing a long level or straightedge across the vanity’s intended position and note where the bubble shifts. Use a measuring tape to record the height difference at various points. In my own experience, measuring multiple spots revealed a 1.5-inch difference over six feet, which guided my subsequent adjustments.
Use a Degree Finder for Accuracy
For more precision, attach a digital angle finder to the floor or vanity surface to determine exact degrees of slope. This data helps you decide whether shimming or more advanced support is necessary. I found that a 3-degree tilt required a combination of shims and supportive brackets.
Plan Your Support Strategy
Visualize the final level surface and gather materials such as shims, adjustable feet, or custom-built supports. Think of shimming like adding small LEGO bricks under a wobbly table—careful stacking provides stability. During my project, I used metal shims for a clean, adjustable support, which held well over time.
Choose the Right Shims and Supports
Select shims made of plastic, wood, or metal based on load requirements and environment. For bathrooms, moisture-resistant materials prevent deterioration. I opted for stainless steel shims, ensuring durability even with humidity. For larger discrepancies, consider adjustable leveling feet that screw into the vanity base.
Implement the Leveling Move
Start by placing shims under the vanity’s legs or base, adjusting them incrementally. Use a level to check as you go, like a carpenter fine-tuning a musical instrument. I remember spending a couple of hours with a helper; we alternated shimming and measuring until achieving perfect horizontal alignment.

Secure the Vanity in Position
Once level, secure the vanity to the wall using appropriate anchors and brackets. This prevents any slipping or future shifts. During my fix, I fastened brackets at the top and sides, ensuring the vanity stayed perfectly aligned after installation. Check out our vanity installation hacks for efficiency tips.
Final Checks and Adjustments
Recheck the level at multiple points to confirm stability. Make small tweaks as needed. Remember, patience here is key—rushing may undo your precise work. My own experience involved re-measuring and readjusting until I was satisfied with the rock-solid finish.
By following these concrete steps, you can transform an uneven floor challenge into a professional-quality vanity setup. Proper leveling not only elevates your bathroom’s look but also prolongs the fixture’s lifespan, preventing future repairs. If you’d like to expand your storage solutions or explore built-in options that complement your leveled vanity, consider browsing our detailed guides on built-ins for seamless storage or smart bathroom storage ideas. Proper support and leveling are the foundation of a flawless bathroom update.Many homeowners believe they understand the basics of storage solutions, but in my experience, there’s often a deeper layer of complexity that gets overlooked. A common myth is that installing built-ins or vanities is just about fitting furniture into a space; in reality, precision, material choice, and structural support play vital roles that can make or break your project. For example, many assume standard brackets suffice when supporting heavy stone countertops, but neglecting internal reinforcements can lead to sagging over time.
Are You Missing Out on Advanced Support Techniques for Heavy Vanities?
Experts like structural engineer Lisa Nguyen emphasize that without understanding load distribution and proper anchoring—such as steel sub-frames or hidden steel reinforcements—you risk future damage or safety hazards. It’s not just about aesthetics; it’s about engineering smart solutions that last.
A critical mistake I’ve seen many make is relying solely on surface appearance during installation. Visible braces or shims might seem sufficient initially, but if the underlying structure isn’t reinforced properly, the entire setup becomes unstable. For example, some overlook moisture-resistant backing or internal steel supports, which are essential in humid environments like bathrooms. This oversight contributes to premature decay and costly repairs, something I avoid by consulting structural guides and applying proven reinforcement tactics.
Being aware of these nuances ensures your storage solutions and built-ins are both beautiful and durable. For an in-depth look at supporting hefty countertops and ensuring longevity, consider exploring efficient storage and support strategies.
Remember, proper planning and structural support are the backbone of successful installation. It’s tempting to cut corners with quick fixes, but understanding the critical support components can save you time and money in the long run. Have you ever fallen into this trap? Let me know in the comments.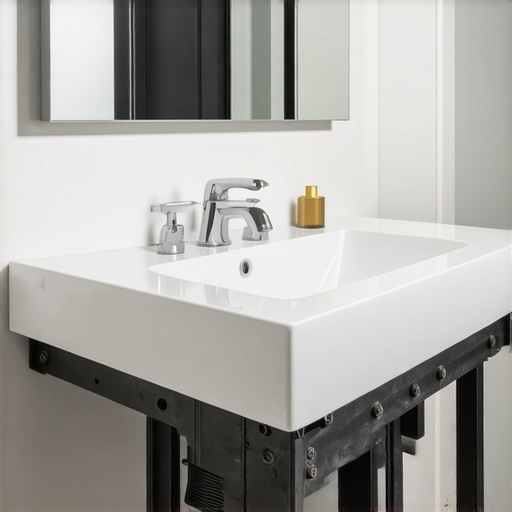 Ensuring your built-in vanities and storage systems stay functional and beautiful requires more than initial installation. I personally swear by using high-quality tools like a digital torque wrench to tighten fasteners consistently, preventing loosening over time. Regular inspections, such as monthly visual checks for signs of moisture or shifting, can catch small issues before they escalate. Applying protective sealants around edges and joints extends the lifespan of materials, especially in humid environments. When it comes to long-term results, investing in modular components that can be easily replaced or upgraded helps keep your storage versatile and adaptable to changing needs. For example, I recently upgraded my vanity’s internal organizers with adjustable, metal-framed shelves, which provided flexibility and durability. Predicting future trends, I believe integrating smart sensors to monitor humidity and weight load will become a staple, alerting homeowners to potential problems early. To maintain your storage solutions effectively, I recommend establishing a routine maintenance schedule that includes cleaning, tightening, inspecting, and upgrading key components. How do I keep my built-ins in prime condition? I follow a comprehensive checklist: regular visual inspections, cleaning with moisture-resistant products, re-tightening hardware, and planning periodic upgrades. Implementing these habits ensures your investment remains sturdy and stylish for years to come. For advanced support techniques, consider exploring our strategies for creative storage solutions that maximize durability and function. Don’t forget—trying out a quality sealant around vulnerable areas is a simple yet effective move that can dramatically improve longevity. Ready to take your storage maintenance to the next level? Set a monthly reminder now to perform these quick checks and keep everything working smoothly.
Over the course of my renovation journey, I’ve discovered that even the most seemingly straightforward projects hold hidden complexities. One of the most valuable insights I gained was the importance of embracing patience and precision when dealing with uneven floors. Rushing to level a vanity without a thorough assessment can lead to recurring problems down the line, from cosmetic imperfections to structural issues. Taking the time to measure carefully, plan strategically, and execute methodically transformed my approach, ultimately saving me time and frustration.
Another lesson I learned is the value of investing in quality tools and materials. From digital angle finders to moisture-resistant shims, these well-chosen resources elevated my work and ensured a durable, professional finish. It became clear that cutting corners with cheapest options often results in subpar results, especially in areas prone to moisture and movement like bathrooms. Prioritizing durability and precision in tools and supplies makes all the difference, and I recommend exploring options like our vanity installation hacks to streamline the process.
Lastly, I realized that ongoing maintenance and vigilance play crucial roles in preserving your investment. Regular inspections, prompt repairs for small issues, and preventive measures like sealants and reinforcements help keep your vanity perfectly level and functional over years. It’s not just about the initial setup; caring for your enhancements ensures they stand the test of time. For more insights into supporting heavy countertops and built-ins, visit our guides on creative built-in solutions.