

Have you ever spent hours installing a sleek new garage shelf only to find it wobbling or, worse, falling apart after a few weeks? Honestly, I’ve been there—frustrated, wondering what I missed. That lightbulb moment hit me when I realized the secret wasn’t just in choosing the right shelf or using good brackets, but in understanding one simple yet crucial rule: the concrete anchor rule. It’s a game-changer for heavy-duty garage shelving, but I’ll admit, I ignored it at first, which cost me time, money, and a lot of frustration.
Why the Concrete Anchor Rule Matters So Much
The foundation of any sturdy, load-bearing garage shelf isn’t just the quality of the materials—it’s how you attach it to the concrete wall. This is where the concrete anchor rule comes into play. If you’re planning to hold heavy tools, bulk storage bins, or even an entire wall of gear, the anchors you choose will determine whether your shelving stands strong or crumbles under pressure. Early on, I made the mistake of relying solely on standard wall anchors meant for drywall or light loads. Big mistake. According to a study from the Occupational Safety and Health Administration (OSHA), proper anchoring can prevent accidents and property damage, which is especially important when heavy shelves are involved. Without the correct anchors, everything your shelves hold could become a dangerous mess, or worse, a hazard.
Ever Faced This Problem? Here’s How To Fix It
If you’re tired of wobbly shelves or fear sudden collapses, understanding and applying the concrete anchor rule is your best bet. I learned this lesson early on, and now I want to share what I wish I knew then: not all anchors are created equal, and choosing the right type for your wall’s material and load capacity can make all the difference. Want to get it right the first time? I highly recommend checking out this comprehensive guide to hardware and installation tricks. It provides expert advice on selecting the perfect anchors for heavy-duty applications, ensuring your shelves stay put no matter what you load onto them.
Now, with that foundation laid out, let’s dive into the specifics of how to choose and install the best anchors for your garage shelving project, so you can finally enjoy a clutter-free, secure storage space without the worry of collapse. Ready? Let’s do this.
Select the Right Anchors Based on Your Wall Material
Choosing unsuitable anchors is like trying to hang a heavy painting with push pins—it simply won’t hold. When installing heavy garage shelves into concrete, use wedge or sleeve anchors designed for solid masonry. I once tried to save a few bucks with plastic anchors, only to come home to a wobbling shelf that threatened my tools. Replacing the anchors with quality masonry ones immediately stabilized the shelf, saving me future headaches.
Mark and Prepare Your Drilling Points Precisely
Accurate markings prevent misaligned holes, which can weaken the mounting. I recommend measuring the bracket placement twice and using painter’s tape to mark drill spots—this prevents slipping. During my first attempt, I misaligned by a few millimeters, causing the anchor to miss its mark. Careful measurement and marking eliminated this issue. Imagine it like aligning puzzle pieces—you want everything to fit perfectly from the start.
Use the Correct Drill Bits and Techniques
Drill the Right Hole Diameter
Match your drill bit size to the anchor specifications. Using a too-big or too-small hole can compromise holding strength. I once drilled a 10mm hole for a 12mm anchor—what a mistake! The anchor didn’t grip well, leading to instability. Reading the anchor packaging carefully and drilling precisely made the difference.
Prepare for Dust and Debris
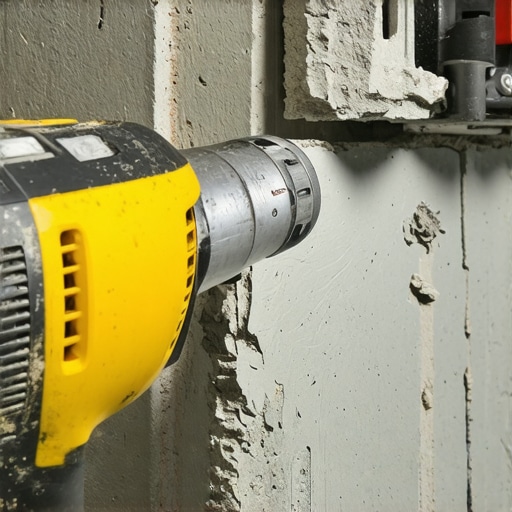
Concrete dust can clog the hole and weaken the anchor’s grip. Clear out debris with a hand brush or compressed air after drilling. During a recent project, I neglected this step, and the anchor felt loose. Clean holes ensure optimal expansion of the anchor and maximum holding power.
Insert Anchors Properly and Confirm Stability
After drilling, insert anchors fully and tap gently if needed. Avoid forcing or pushing them in at an angle. Once inserted, tighten the bolts slowly and evenly to engage the wedge mechanism. I once overtightened, cracking the anchor, which required starting over—patience here is key. Test the shelf by applying weight gradually to ensure it’s secure.
Additional Tips for Heavy Loads
For extremely heavy shelving, consider using multiple anchors per bracket or installing reinforcement plates. During my last installation, I added steel plates behind the brackets, dramatically increasing load capacity. Always verify the weight limits on your anchors and avoid exceeding them.
Seek Expert Advice When Needed
If you’re unsure about wall conditions or anchor types, consult professionals or visit this expert guide. Proper anchoring isn’t just about tools—it’s about understanding your specific wall and load requirements to avoid costly mistakes.
Remember, taking the time to get this process right will save you from future repairs and potential hazards. A stable shelf isn’t built overnight—it’s crafted with precision and patience, applying these core techniques for success.
 Even seasoned homeowners and professional installers sometimes fall prey to misconceptions about vanities, built-ins, and storage solutions. One prevalent myth is that choosing the most popular or trendy design guarantees a seamless installation. In reality, the nuance lies in how these elements integrate with your space and how attention to detail during installation can make or break the final look and functionality. For instance, many assume that standard hardware or off-the-shelf components suffice for custom projects, but overlooking material compatibility and structural support can lead to sagging or misalignment over time. An advanced mistake is neglecting thermal expansion—materials like wood and metal expand and contract differently with temperature changes, causing gaps or warping if not properly accounted for. According to industry expert tips, understanding these material behaviors is crucial for long-term durability. Have you ever fallen into this trap? Let me know in the comments.
What most people overlook is the importance of precise measurements and bespoke adjustments during installation. For example, installing a vanity without accounting for sloped floors or uneven walls can result in gaps or uneven surfaces that are both unsightly and challenging to use. Professionals often employ scribing techniques or custom shims to achieve a perfect fit, especially in older homes. Also, many forget that structural reinforcement is vital when supporting heavy countertops or multiple drawers; neglecting internal bracing or steel reinforcements can lead to early sagging or damage. For those interested in mastering these finer points, this comprehensive guide offers detailed insights.
Another advanced nuance is the importance of proper anchoring. Many assume that wall anchors alone are sufficient for heavy built-ins, but in reality, combining anchors with sub-frame support ensures stability and safety. For instance, steel bracing behind drywall or masonry provides a much more secure foundation for heavy cabinetry. And don’t forget about moisture and environmental factors; in humid climates, untreated wood can warp, so using moisture-resistant materials and sealants is essential. Such details are often overlooked by DIYers eager to complete the project quickly, but these small steps significantly impact the longevity and appearance of built-ins.
To avoid these common pitfalls, consider consulting industry professionals or engaging with expert resources. This vanity installation hack not only saves you time but ensures your projects stand the test of time. Remember, building with precision and forethought transforms a standard installation into a showcase of craftsmanship. So, before your next project, take a moment to review these nuanced aspects—they can make all the difference. Want more expert advice? Reach out through our contact page or explore additional tips on modern vanity designs that combine style with durability.
Keeping Your Vanity and Built-Ins in Peak Condition
Maintaining your custom vanities, built-ins, and storage solutions isn’t just about periodic cleaning; it involves using the right tools, adopting effective methods, and planning for long-term durability. When you invest in quality materials and proper installation, the next step is ensuring these elements stay functional and attractive over years. I personally rely on a combination of specialized equipment and disciplined routines to keep my installations performing flawlessly.
Essential Tools for Ongoing Maintenance
One of my go-to tools is a high-quality digital caliper. Precise measurements are crucial when adjusting hinges, drawer slides, or leveling components as materials expand or shift over time. For cleaning, I prefer a soft microfiber cloth combined with a gentle, pH-balanced cleaner to prevent damage, especially on natural wood finishes or lacquered surfaces. Additionally, a pinpoint electric screwdriver helps me re-tighten screws or hinges without over-tightening, reducing wear and tear.
For sealing and protective measures, I recommend a silicone-based or polyurethane sealant gel. It’s invaluable for waterproofing joints, especially in bathrooms, and can be used to reseal gaps in countertops or edges that may develop over time. I use a caulking gun with a fine nozzle for controlled application, ensuring neat, long-lasting results. Regularly inspecting and reapplying sealant as needed prevents moisture damage and maintains structural integrity.
Adopting Effective Methods for Long-Term Results
One technique I swear by is the periodic inspection of hardware tightness. It’s easy to overlook slight loosening over months, which can lead to sagging or misalignment. I schedule quarterly check-ins with a torque screwdriver to ensure all bolts and hinges are secure. This proactive approach saves me from more extensive repairs down the line. I also monitor for signs of wood warping or material fatigue—small cracks or gaps can indicate the need for reinforcement or additional support.
Applying protective coatings is another critical method. For wooden vanities, I routinely use a clear urethane topcoat, which adds a barrier against water, staining, and wear. For metal components, a corrosion inhibitor spray helps prevent rust, especially in humid environments. These simple steps drastically extend the lifespan of built-ins and keep them looking new.
Tools I Recommend for Maintenance and Scaling
As your home evolves, you might want to scale your storage or upgrade existing built-ins. In these cases, a cordless multi-tool like the Dremel Versa is invaluable—it can cut, grind, and sand with precision, making modifications straightforward. For larger projects, I rely on a portable digital level attached to a laser distance measurer to ensure consistency and accurate placement of new elements.
Looking forward, trends point toward smart home integration and automated maintenance solutions. Devices like humidity sensors that alert you to potential moisture issues or app-controlled LED lighting can enhance your upkeep routine, making sure your investments stay pristine over the years.
How do I maintain vanities and built-ins over time?
Developing a routine inspection schedule—checking for loose hardware, signs of water damage, and material shifts—can prevent minor issues from escalating. Pair this with the use of specific tools like torque drivers, sealants, and protective coatings, and you’ll extend the life of your installations significantly. For more expert tips on installation and long-term care, don’t hesitate to visit this comprehensive guide. Start with one maintenance task today, such as resealing a countertop joint or tightening loose hinges—it’s simple, effective, and pays off in durability.
What I Didn’t Know About Structural Integrity Before Starting
One of the most eye-opening lessons I learned was that flawless aesthetic design isn’t enough without a deep understanding of the underlying support systems. I once believed that attaching a vanity with basic anchors was sufficient, only to realize that overlooking internal bracing and reinforcement could lead to sagging and long-term damage. This taught me that investing in quality hardware and understanding load distribution are crucial for durability.
Tools That Changed How I Approach Installation and Maintenance
Over time, I discovered that having the right toolkit—like a high-precision digital caliper, a reliable torque screwdriver, and moisture-resistant sealants—not only made repairs easier but also enhanced the overall quality of my projects. These tools became indispensable in ensuring each built-in or vanity remains sturdy and beautiful for years to come.
Practical Insights That Saved Me Time and Money
Instead of rushing through measurements, I learned to double-check every mark and to use laser levelers for alignment. Additionally, understanding material behaviors, such as how wood expands or contracts with humidity, helped me avoid gaps and warping. Applying these insights has made my installations more professional and resilient, proving that patience and attention to detail pay off.
Where I Turn When I Need Expert Advice
Whenever I face complex challenges, I turn to trusted resources like comprehensive expert guides or seek advice from professionals. These sources have been invaluable in expanding my knowledge and ensuring my projects meet high standards, especially when dealing with unique wall conditions or heavy fixtures.
Take Your Skills to the Next Level and Build Confidently
The journey of installing vanities and built-ins is as rewarding as it is challenging. With the right knowledge, tools, and a willingness to learn, you can create stunning, durable features that stand the test of time. Start small, experiment with techniques, and don’t hesitate to seek expert advice—your future self will thank you for the sturdy, beautiful result.
Have you ever struggled to get a built-in or vanity just right? Share your experiences below, and let’s learn from each other’s journeys!
**