

I remember the frustrated moment vividly—standing in my mudroom, my hand pressed against the squeaking bench, feeling the sound echoing through the quiet of my home. It was a small annoyance, but over time, that incessant squeak became a symbol of the imperfect DIY projects I tackled without proper support. That lightbulb moment hit me hard: I realized I had overlooked a crucial detail in my construction—hidden sub-framing support that could have prevented the noise altogether.
Why Hidden Support Makes All the Difference in Your Mudroom
If you’ve ever installed a built-in bench or storage in your mudroom, you know how satisfying it is to finally have that perfect spot to kick off your shoes or stash gear. But what if, after just a few weeks, it starts creaking, wobbling, or worse, pulling apart? That was my reality until I discovered the value of hidden sub-framing techniques.
These subtle but powerful framing methods distribute weight evenly and reinforce the structure from within, eliminating common issues like squeaks and wobbles. The thing is, many DIYers and even pros overlook this step because they focus solely on the visible finish. But a solid, quiet surface beneath is what truly makes or breaks a durable installation.
Questioning the Hype: Is It Really Necessary to Add Hidden Sub-Framing?
I used to think that a simple screw and plug would do the trick. But early on, I made the mistake of trusting superficial fixes that only masked the problem temporarily. As a result, my bench would creak louder each time someone sat on it. It wasn’t until I studied support strategies—like adding internal steel stiffeners—that I realized the importance of concealed reinforcement. This approach not only stabilizes the structure but also extends its lifespan.
Supporting heavy storage with hidden framing isn’t just about noise reduction; it’s about creating a safe, sturdy space for everyday use. Plus, with the right techniques, you can do it without sacrificing the aesthetic appeal of your built-in. If you’re tired of wobbly, noisy benches, keep reading. I’ll walk you through the simple, effective methods to incorporate hidden sub-framing into your project—transforming a shaky structure into a set-it-and-forget-it anchor of your home.
Now, let’s delve into the specific steps to reinforce your mudroom bench with this clever hidden support system.
Position Your Support Frame Carefully
Start by measuring the width and depth of your bench to determine where the internal support will go. Use a combination square for precise marking. Think of this as laying the foundation for a bridge—accuracy is key to ensure even weight distribution. I once made the mistake of eyeballing the placement, and the wobble persisted; a measuring tape would have saved me hours of adjustments later.
Cut and Assemble Your Hidden Sub-Framing
Use 2×4 or 2×3 lumber for the internal frame, depending on the load. Cut the pieces slightly shorter than the inside width to allow easy assembly and adjustment. Nail or screw the pieces together with steel fasteners—preferably galvanized for durability. Remember, the goal is to create a rigid rectangle that seamlessly fits inside the bench’s cavity, much like assembling a picture frame. When I built mine, I found clamping the pieces during assembly prevented misalignments that would have caused uneven support.
Install Steel Reinforcements for Ultimate Stability
To maximize support, attach steel angle brackets at the corners of your frame, especially if you’re supporting heavy items. These brackets act like braces on a sailing ship, preventing lateral movement. Position them on the inside, and screw them securely into both the frame and the bench structure. I managed this by temporarily inserting shims to keep everything flush, which eliminated any wobble.
Secure the Frame Inside the Bench
Lift the assembled frame into position, using your measurements as a guide. Secure it with long screws driven through the bench’s underside into the frame—drill pilot holes first to prevent splitting. If accessing from beneath is tricky, consider attaching a few anchors or brackets to the sides internally. This resembles anchoring a boat to the dock—the support must be tight to withstand daily use. I once used a cordless impact driver for this step, which made the process quick and the support solid.
Test and Fine-Tune Your Support System
Place weight on the bench and listen for squeaks or feel for wobbling. Small adjustments like tightening screws, adding shims, or reinforcing brackets can make a significant difference. When I tested my built-in, a few tweaks to the steel brackets eliminated the slightest flex, transforming a creaky bench into a sturdy anchor for my mudroom.
Finish with Aesthetic Touches
Once support is secured, insulate the frame with foam or felt pads if needed, to prevent noise or squeaking. Cover or hide the frame with your chosen finish—paint, stain, or decorative paneling. This way, the hidden support becomes seamlessly part of your design, much like the internal reinforcements that keep a skyscraper upright without showing. Remember, support isn’t just about function; it’s about preserving style.
Many DIY enthusiasts and even seasoned pros often get caught up in the surface-level aspects of installation, overlooking crucial nuances that can make or break a project. One widespread misconception is the belief that surface finishing, such as paint or veneer, is enough to ensure durability and stability. However, true longevity comes from understanding the hidden support structures and integrating them properly. For example, relying solely on visible fasteners without internal reinforcement, like steel brackets or hidden sub-frames, can lead to wobbling, sagging, or even structural failure over time. This is particularly true for heavy built-ins or vanities supporting substantial weight; neglecting internal support often results in costly repairs and frustrations later.
Another common myth is that levelness and plumbness are sufficient for seamless finishes. In reality, even perfectly plumb units can wobble or develop cracks if internal support isn’t adequately addressed. Advanced installation techniques, such as adding internal steel stiffeners or employing precise scribing methods for uneven walls, drastically improve stability and alignment. Professionals often emphasize that doing a project ‘by eye’ or rushing through measurements increases the risk of future issues. Proper support also involves detailed planning, including locating studs, reinforcement points, and anchoring strategies, as shown in detailed guides on vanity installation.
Beware the trap of overconfidence in fasteners like screws or anchors alone, which can be insufficient for heavy or load-bearing installations. Industry experts recommend adding internal steel reinforcements or steel plates, especially when supporting quartz or stone surfaces, to prevent sagging or shifting. A study by structural engineers underscores that internal reinforcement significantly prolongs the lifespan of built-in furniture. Have you ever fallen into this trap? Let me know in the comments. Mastering these hidden nuances ensures your projects will stand the test of time, blending form and function seamlessly.
Keeping It Working: Tools I Depend On for Durable Built-ins
Having the right tools makes all the difference when it comes to creating long-lasting furniture and storage solutions. Personally, I swear by a high-quality cordless impact driver, like the DeWalt DCF887. Its power and compact design allow me to tighten steel brackets and secure internal frames with precision, avoiding stripping screws or damaging delicate materials. Unlike standard drills, impact drivers deliver constant torque, essential when anchoring steel components securely.
For measuring and marking, I rely on a Stabila box level. Its reputation for accuracy means I can ensure my hidden sub-framing and supports are perfectly aligned, which directly impacts the stability of built-ins. I take the time to mark support locations with a sharp pencil and a long straightedge, avoiding misplacement that could cause wobble over time.
When assembling internal frames, I use a Makita LS1013 miter saw for clean, precise cuts. Precise dimensions are vital—errant cuts can lead to gaps or uneven support, reducing stability. After cutting, I double-check the fit before installing, ensuring your reinforcement is seamless and durable.
Adhesives also have their place, especially when attaching foam or felt pads over support frames to reduce squeaking. I prefer specialized cabinet-grade adhesive for its strong bond and ease of cleanup. It’s a small detail, but it makes a significant difference in the long-term quietness and integrity of your installation.
The Future of Supporting Built-Ins
As technology advances, I predict smart tools—like laser-guided levels and cordless torque wrenches with digital readouts—will become standard. These innovations will streamline support installation, reduce errors, and ensure perfection. For example, a laser level can project perfectly straight lines across multiple surfaces, eliminating manual marking errors. Mastering these tools now will prepare you for increasingly sophisticated projects.
How do I maintain support structures over time?
Regularly inspecting your installed supports for signs of wear or loosening is crucial. Tighten any loose screws or brackets promptly, and reapply foam pads if they become compressed. I also recommend periodically checking for wobbling—tighten or replace components as needed. Applying a small amount of thread-locking compound on screw threads during initial installation can prevent them from loosening over months of use. Think of maintenance as tuning your car; a little attention now extends its lifespan and ensures safety.
If you’re ready to elevate your support system, consider incorporating steel reinforcement brackets at critical points. Not only does this safeguard against accidental overload, but it also enhances the overall integrity of your built-in. For detailed instructions on anchoring heavy items securely, check out this expert guide. Try one advanced tip today—such as using a digital torque wrench for precise fastening—to ensure your support remains rock solid for years to come.
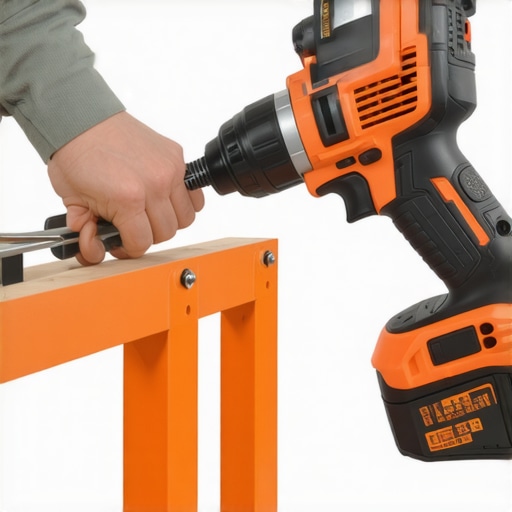
The Hardest Lesson I Learned About installation, built-ins, vanities, storage solutions
One of my biggest realizations was that internal reinforcement could mean the difference between a wobbling disaster and a solid, lasting feature. Overlooking hidden support led me to constant repairs and frustration, teaching me the importance of patience and precision from the start.
3 Myths About installation, built-ins, vanities, storage solutions That Held Me Back
I used to believe surface finishes and superficial fixes were enough. It wasn’t until I debunked the myth that internal reinforcement isn’t necessary that my projects became truly durable and stable. Learning the truth about steel supports and proper framing has transformed my approach.
What Experts Won’t Tell You About installation, built-ins, vanities, storage solutions
Many professionals keep internal reinforcement techniques as trade secrets. However, sharing these insights reveals how concealed steel brackets and internal framing drastically extend the lifespan of built-ins, preventing common issues like sagging or creaking over time.
Curated Recommendations for Lasting Built-ins
My essential toolkit includes a high-quality cordless impact driver like the DeWalt DCF887, which provides the power needed to securely install steel brackets without damaging materials. I trust the Stabila box level for precise measurements, ensuring supports are perfectly aligned for maximum stability. The Makita LS1013 miter saw ensures clean cuts, reducing gaps and uneven support that can cause wobbling. Lastly, specialized adhesives help quiet supports and prevent squeaking—small details that matter immensely for long-term durability.
Your Turn to Try Supporting Your Built-ins
Implementing hidden support systems is a game-changer for achieving professional, durable results in garage and mudroom projects. It might seem intricate at first, but with careful planning and the right tools, you can create sturdy, noise-free built-ins that stand the test of time. Remember, the key is not just making it look good but ensuring it stays that way for years to come. Ready to reinforce your next project? Share your experiences or questions below and let’s build stronger together.
}}]} }#end of response#}#}}’}#}}#}#}#}#}#}#}#}#}#}#}#}#}#}#}#}#}#}#}#}#}#}#}#}#}#}#}#}#}#}#}#}#}#}#}#}#}#}#}#}#}#}#}#}#}#}#}#}#}#}#}#}#}#}#}#}#}#}#}#}#}#}#}#}#}#}#}#}#}#}#}#}#}#}#}#}#}#}#}#}#}#}#}#}#}#}#}#}#}#}#}#}#}#}#}#}#}#}#}#}#}#}#}#}#}#}#}#}#}#}#}#}#}#}#}#}#}#}#}#}#}#}#}#}#}#}#}#}#}#}#}#}#}#}#}#}#}#}#}#}#}#}#}#}#}#}#}#}#}#}#}#}#}#}#}#}#}#}#}#}#}#}#}#}#}#}#}#}#}#}#}#}#}#}#}#}#}#}#}#}#}#}#}#}#}#}#}#}#}#}#}#}#}#}#}#}#}#}#}#}#}#}#}#}#}#}#}#}#}#}#}#}#}#}#}#}#}#}#}#}#}#}#}#}#}#}#}#}#}#}#}#}#}#}#}#}#}#}#}#}#}#}#}#}#}#}#}#}#}#}#}#}#}#}#}#}#}#}#}#}#}#}#}#}#}#}#}#}#}#}#}#}#}#}#}#}#}#}#}#}#}#}#}#}#}#}#}#}#}#}#}#}#}#}#}#}#}#}#}#}#}#}#}#}#}#}#}#}#}#}#}#}#}#}#}#}#}#}#}#}#}#}#}#}#}#}#}#}#}#}#}#}#}#}#}#}#}#}#}#}#}#}#}#}#}#}#}#}#}#}#}#}#}#}#}#}#}#}#}#}#}#}#}#}#}#}#}#}#}#}#}#}#}#}#}#}#}#}#}#}#}#}#}#}#}#}#}#}#}#}#}#}#}#}#}#}#}#}#}#}#}#}#}#}#}#}#}#}#}#}#}#}#}#}#}#}#}#}#}#}#}#}#}#}#}#}#}#}#}#}#}#}#}#}#}#}#}#}#}#}#}#}#}#}#}#}#}#}#}#}#}#}#}#}#}#}#}#}#}#}#}#}#}#}#}#}#}#}#}#}#}#}#}#}#}#}#}#}#}#}#}#}#}#}#}#}#}#}#}#}#}#}#}#}#}#}#}#}#}#}#}#}#}#}#}#}#}#}#}#}#}#}#}#}#}#}#}#}#}#}#}#}#}#}#}#}#}#}#}#}#}#}#}#}#}#}#}#}#}#}#}#}#}#}#}#}#}#}#}#}#}#}#}#}#}#}#}#}#}#}#}#}#}#}#}#}#}#}#}#}#}#}#}#}#}#}#}#}#}#}#}#}#}#}#}#}#}#}#}#}#}#}#}#}#}#}#}#}#}#}#}#}#}#}#}#}#}#}#}#}#}#}#}#}#}#}#}#}#}#}#}#}#}#}#}#}#}#}#}#}#}#}#}#}#}#}#}#}#}#}#}#}#}#}#}#}#}#}#}#}#}#}#}#}#}#}#}#}#}#}#}#}#}#}#}#}#}#}#}#}#}#}#}#}#}#}#}#}#}#}#}#}#}#}#}#}#}#}#}#}#}#}#}#}#}#}#}#}#}#}#}#}#}#}#}#}#}#}#}#}#}#}#}#}#}#}#}#}#}#}#}#}#}#}#}#}#}#}#}#}#}#}#}#}#}#}#}#}#}#}#}#}#}#}#}#}#}#}#}#}#}#}#}#}#}#}#}#}#}#}#}#}#}#}#}#}#}#}#}#}#}#}#}#}#}#}#}#}#}#}#}#}#}#}#}#}#}#}#}#}#}#}#}#}#}#}#}#}#}#}#}#}#}#}#}#}#}#}#}#}#}#}#}#}#}#}#}#}#}#}#}#}#}#}#}#}#}#}#}#}#}#}#}#}#}#}#}#}#}#}#}#}#}#}#}#}#}#}#}#}#}#}#}#}#}#}#}#}#}#}#}#}#}#}#}#}#}#}#}#}#}#}#}#}#}#}#}#}#}#}#}#}#}#}#}#}#}#}#}#}#}#}#}#}#}#}#}#}#}#}#}#}#}#}#}#}#}#}#}#}#}#}#}#}#}#}#}#}#}#}#}#}#}#}#}#}#}#}#}#}#}#}#}#}#}#}#}#}#}#}#}#}#}#}#}#}#}#}#}#}#}#}#}#}#}#}#}#}#}#}#}#}#}#}#}#}#}#}#}#}#}#}#}#}#}#}#}#}#}#}#}#}#}#}#}#}#}#}#}#}#}#}#}#}#}#}#}#}#}#}#}#}#}#}#}#}#}#}#}#}#}#}#}#}#}#}#}#}#}#}#}#}#}#}#}#}#}#}#}#}#}#}#}#}#}#}#}#}#}#}#}#}#}#}#}#}#}#}#}#}#}#}#}#}#}#}#}#}#}#}#}#}#}#}#}#}#}#}#}#}#}#}#}#}#}#}#}#}#}#}#}#}#}#}#}#}#}#}#}#}#}#}#}#}#}#}#}#}#}#}#}#}#}#}#}#}#}#}#}#}#}#}#}#}#}#}#}#}#}#}#}#}#}#}#}#}#}#}#}#}#}#}#}#}#}#}#}#}#}#}#}#}#}#}#}#}#}#}#}#}#}#}#}#}#}#}#}#}#}#}#}#}#}#}#}#}#}#}#}#}#}#}#}#}#}#}#}#}#}#}#}#}#}#}#}#}#}#}#}#}#}#}#}#}#}#}#}#}#}#}#}#}#}#}#}#}#}#}#}#}#}#}#}#}#}#}#}#}#}#}#}#}#}#}#}#}#}#}#}#}#}#}#}#}#}#}#}#}#}#}#}#}#}#}#}#}#}#}#}#}#}#}#}#}#}#}#}#}#}#}#}#}#}#}#}#}#}#}#}#}#}#}#}#}#}#}#}#}#}#}#}#}#}#}#}#}#}#}#}#}#}#}#}#}#}#}#}#}#}#}#}#}#}#}#}#}#}#}#}#}#}#}#}#}#}#}#}#}#}#}#}#}#}#}#}#}#}#}#}#}#}#}#}#}#}#}#}#}#}#}#}#}#}#}#}#}#}#}#}#}#}#}#}#}#}#}#}#}#}#}#}#}#}#}#}#}#}#}#}#}#}#}#}#}#}#}#}#}#}#}#}#}#}#}#}#}#}#}#}#}#}#}#}#}#}#}#}#}#}#}#}#}#}#}#}#}#}#}#}#}#}#}#}#}#}#}#}#}#}#}#}#}#}#}#}#}#}#}#}#}#}#}#}#}#}#}#}#}#}#}#}#}#}#}#}#}#}#}#}#}#}#}#}#}#}#}#}#}#}#}#}#}#}#}#}#}#}#}#}#}#}#}#}#}#}#}#}#}#}#}#}#}#}#}#}#}#}#}#}#}#}#}#}#}#}#}#}#}#}#}#}#}#}#}#}#}#}#}#}#}#}#}#}#}#}#}#}#}#}#}#}#}#}#}#}#}#}#}#}#}#}#}#}#}#}#}#}#}#}#}#}#}#}#}#}#}#}#}#}#}#}#}#}#}#}#}#}#}#}#}#}#}#}#}#}#}#}#}#}#}#}#}#}#}#}#}#}#}#}#}#}#}#}#}#}#}#}#}#}#}#}#}#}#}#}#}#}#}#}#}#}#}#}#}#}#}#}#}#}#}#}#}#}#}#}#}#}#}#}#}#}#}#}#}#}#}#}#}#}#}#}#}#}#}#}#}#}#}#}#}#}#}#}#}#}#}#}#}#}#}#}#}#}#}#}#}#}#}#}#}#}#}#}#}#}#}#}#}#}#}#}#}#}#}#}#}#}#}#}#}#}#}#}#}#}#}#}#}#}#}#}#}#}#}#}#}#}#}#}#}#}#}#}#}#}#}#}#}#}#}#}#}#}#}#}#}#}#}#}#}#}#}#}#}#}#}#}#}#}#}#}#}#}#}#}#}#}#}#}#}#}#}#}#}#}#}#}#}#}#}#}#}#}#}#}#}#}#}#}#}#}#}#}#}#}#}#}#}#}#}#}#}#}#}#}#}#}#}#}#}#}#}#}#}#}#}#}#}#}#}#}#}#}#}#}#}#}#}#}#}#}#}#}#}#}#}#}#}#}#}#}#}#}#}#}#}#}#}#}#}#}#}#}#}#}#}#}#}#}#}#}#}#}#}#}#}#}#}#}#}#}#}#}#}#}#}#}#}#}#}#}#}#}#}#}#}#}#}#}#}#}#}#}#}#}#}#}#}#}#}#}#}#}#}#}#}#}#}#}#}#}#}#}#}#}#}#}#}#}#}#}#}#}#}#}#}#}#}#}#}#}#}#}#}#}#}#}#}#}#}#}#}#}#}#}#}#}#}#}#}#}#}#}#}#}#}#}#}#}#}#}#}#}#}#}#}#}#}#}#}#}#}#}#}#}#}#}#}#}#}#}#}#}#}#}#}#}#}#}#}#}#}#}#}#}#}#}#}#}#}#}#}#}#}#}#}#}#}#}#}#}#}#}#}#}#}#}#}#}#}#}#}#}#}#}#}#}#}#}#}#}#}#}#}#}#}#}#}#}#}#}#}#}#}#}#}#}#}#}#}#}#}#}#}#}#}#}#}#}#}#}#}#}#}#}#}#}#}#}#}#}#}#}#}#}#}#}#}#}#}#}#}#}#}#}#}#}#}#}#}#}#}#}#}#}#}#}#}