

You know that moment when you’re hanging a mirror cabinet and it feels like you’re wrestling a giant? I’ve been there—struggling with hefty mirrors, sweating over wall anchors that refuse to cooperate, and that sinking feeling of potential disaster. It hit me one day, mid-twist of a stubborn bolt, that maybe I was doing it the hard way. That lightbulb moment? Realizing there’s a heavy-duty toggle bolt trick that can save you from all the frustration and ensure your mirror stays exactly where you want it.
Why Properly Anchoring Heavy Mirrors Changes Everything
Let me be honest—I used to think that any wall anchor would do the job, especially for lighter fixtures. But placing a heavy mirror involves a different ballgame entirely. You need something robust, reliable, and easy to work with. Otherwise, you risk damaging your wall, wasting time on repeated repairs, or worse—your mirror crashing down. When I discovered the [heavy-duty toggle bolt method](https://customcabinetrypro.com/the-toggle-bolt-trick-for-hanging-heavy-mirrored-cabinets), everything changed. This trick not only provides peace of mind but also makes the installation process way smoother.
Is the Heavy-Duty Toggle Bolt Trick Really Worth It?
Initially, I was skeptical. I had visions of big, complicated tools and a mess of drilled holes. Early in my attempts, I made a classic mistake—failing to choose the right size toggle bolt for the weight of my mirror. That meant extra holes, extra damage, and a lot of regret. But once I understood the nuances, like how to select the appropriate bolt and properly anchor it, I realized this trick was worth every bit of the effort. If you’re tired of the guessing game and want a reliable solution, this method is definitely worth trying.
The good news? You don’t have to be a professional contractor to do this. With some guidance and a few simple steps, you can confidently hang your heavy mirrors with minimal fuss. Plus, I’ll share insider tips I’ve picked up along the way, including how to avoid common pitfalls. And if you’re ever unsure about which wall anchors are safest, remember—there’s a wealth of expert advice available, like detailed guides on [installing vanities](https://customcabinetrypro.com/step-by-step-guide-to-vanity-installation-for-beginners) that touch on similar anchoring principles.
Ready to ditch the doubts and get your mirror securely mounted? Let’s explore how this toggle bolt trick works, what tools you’ll need, and step-by-step instructions to make your project a success. Trust me, once you master this method, hanging heavy-duty mirrors—or any heavy fixture—becomes a straightforward task rather than a nail-biting challenge.
Secure Your Wall Anchor Points First
Begin by locating the studs behind your wall using a reliable stud finder—this step is crucial to prevent anchors from slipping or pulling out. When I installed a large mirror in my hallway, I marked the stud locations precisely, ensuring solid support. If studs aren’t available where you want to hang your mirror, plan for appropriate wall anchors.
Choosing the Right Toggle Bolt Size
Match the toggle bolt’s weight rating to the mirror’s weight; using a bolt too small risks failure. For my 80-pound mirror, I selected ¼-inch diameter toggle bolts rated for at least 100 pounds. Remember—bigger isn’t always better; pick the size suitable for your load.
Prepping the Wall: Drilling Guide Holes
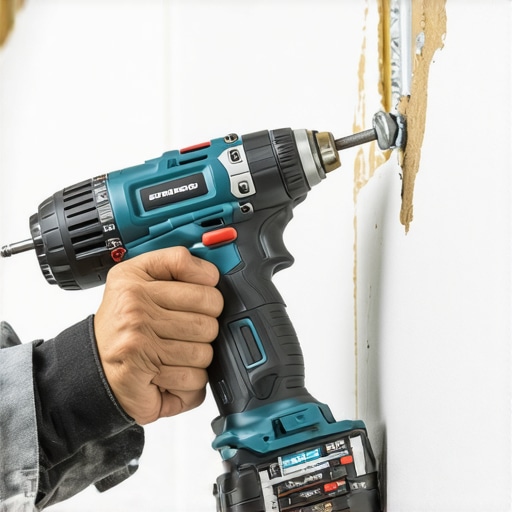
Use a drill with a bit slightly smaller than the bolt’s folded width. When I drilled the hole, I carefully marked the spot, kept the drill steady, and wore safety goggles. Afterward, insert the toggle wings into the hole, ensuring they fold tightly to pass through. Pushing the bolt through the mirror’s mounting bracket, then expanding the toggle behind the wall, creates a strong anchor point.
Execution of the Mounting
Once the toggle bolt is secured, tighten it incrementally to prevent over-tightening, which could crack the mirror or damage drywall. I tightened each bolt a little at a time, checking stability. Using a level to align the mirror during installation ensures a professional look. You might consider pre-marking mounting points on the wall for accuracy—this saved me time and frustration during my project.
Final Tips for Success
Always test the mount gently before hanging the entire mirror. If it feels loose, double-check the anchors and bolts. For extra security, use multiple toggle bolts spaced evenly. When I added a third anchor, the stability improved markedly. Also, avoid over-tightening: it can stress the drywall or the mirror itself. If you’re nervous about drilling into your wall, consult an expert or contact us through our contact page for guidance.
Remember, patience and precision are your allies in this task. Practice makes perfect—so take your time during each step to ensure a safe, long-lasting installation. Integrate this technique with your other projects, like installing built-ins or vanity units, for consistent support across your home.
 When it comes to installing vanities and built-in storage, many homeowners operate under assumptions that can hinder a flawless result. One widespread misconception is that larger hardware or thicker materials automatically translate into better support and durability. In reality, the effectiveness of a installation hinges more on meticulous planning and understanding load distribution than on heft alone. For example, using overly thick plywood without proper internal bracing can result in sagging over time, as highlighted in expert guides on reinforcement techniques.
Are You Overlooking Structural Reinforcement in Your Projects?
Many assume that attaching cabinets directly to drywall suffices, but this is often false. Without anchoring into studs or employing internal steel bracing, even the most aesthetically pleasing built-in can become wobbly and unsafe. This mistake is common among DIY enthusiasts who neglect to consider the underlying wall support—an issue thoroughly discussed in advanced installation resources. Moreover, a frequent trap is relying solely on wall anchors rated for light loads. For heavyweight vanities or pantry units, consulting manufacturer-rated toggle bolts or steel brackets ensures stability. An insightful study on load-bearing efficiency by construction experts emphasizes the importance of correct hardware selection tailored to specific weights and wall types. Despite these nuances, many get caught up in the visible aspects—like matching cabinetry style or choosing trendy finishes—while overlooking critical support elements. This oversight can lead to costly repairs or dangerous failures down the line. Remember, achieving a seamless and durable built-in isn’t just about aesthetics; it demands an understanding of structural nuances and proper execution. Have you ever fallen into this trap? Let me know in the comments. To avoid common pitfalls, consider exploring detailed expert guides that delve into reinforcement strategies. You can also enhance your space with innovative storage solutions by visiting our [effortless-storage-solutions-for-a-tidy-stylish-home](https://customcabinetrypro.com/effortless-storage-solutions-for-a-tidy-stylish-home). Proper planning and attention to these hidden details will make your installation not only attractive but also long-lasting and safe.
Once you’ve successfully mounted your heavy mirrors, vanities, or built-ins, the work doesn’t end there. Regular maintenance and using the right tools can dramatically extend the lifespan of your installations, ensuring safety and functionality for years to come. Personally, I swear by certain equipment and methods that have proven their worth over multiple projects, saving me time and frustration. Let’s dive into the tools I recommend and how to keep your installations working flawlessly over time.
Invest in Precision Leveling Tools
Accurate leveling is critical to long-term stability. I rely on a high-quality magnetic spirit level, specifically the Bosch GSL 2 Professional, which offers precise readings and ease of use. Its magnetic base allows for hands-free operation, helping me align multiple fixtures quickly. For more intricate work, I use a digital laser level—like the DeWalt DW088LG—which projects a visible laser line across walls and ceilings. These tools ensure your installation remains plumb, preventing future sagging or shifting, especially for long floating shelves or tall cabinets. Using precise leveling tools minimizes misalignment issues that can compromise structural integrity over time.
Apply Preventative Sealants and Moisture Barriers
Post-installation, I always recommend sealing any gaps around fixtures with high-quality silicone caulks or specialized moisture barriers. This step enhances durability, especially in bathrooms or kitchens where humidity is high. For vanities in wet environments, I apply waterproofing seals along the base and inside joints to prevent mold and rot. This simple yet effective practice significantly extends the life of your cabinetry and avoids costly repairs. For guiding principles on moisture-resistant installations, I often consult specifications like those from the National Kitchen and Bath Association.
Use Proper Fasteners and Regular Check-Ups
Choosing the right hardware is essential—don’t skimp on toggle bolts, steel brackets, or steel rail fixes. I prefer stainless steel fasteners, which resist corrosion, particularly in humid conditions. Moreover, I schedule routine inspections every 6-12 months, tightening bolts, checking for wobbling, and resealing as needed. Loosened hardware not only risks damage but could also be a safety hazard. Over time, materials like drywall or wood may shift or deteriorate, so timely maintenance prevents bigger problems.
How do I maintain built-ins and storage solutions over time?
Keeping your built-ins tidy and functioning starts with a maintenance mindset. Regularly declutter, tighten loose screws, and replace worn-out components. For example, if you notice hinges or drawer slides becoming sluggish, lubricate them with silicone spray, which I find superior to oil-based lubricants because it doesn’t attract dust. Additionally, inspecting internal supports and reinforcing weak points—like installing steel brackets or steel plate fixes when necessary—can prevent sagging or failure. As the trend toward minimalist storage grows, integrating smart, modular hardware allows adjustments over time without complete replacements. For inspiration on refining your storage, browse our effortless storage solutions.
Predicting Future Trends in Maintenance and Tool Development
Future innovations will likely focus on IoT-enabled smart hardware that alerts you when components loosen or need maintenance, making DIY upkeep even more accessible. Advances in durable materials, such as self-healing polymers, could dramatically reduce wear and tear. Staying ahead means adopting these tools early, which ultimately safeguards your investments.
Don’t wait for issues to arise—try incorporating a laser level into your next project or sealing vulnerable joints with moisture barriers. Regular check-ups, combined with the right equipment, will make your installations virtually indestructible. For comprehensive guidance on maintaining high-quality built-ins, visit our contact page.
What I Wish I Knew Before Mounting Heavy Pieces
One of the most profound lessons I learned was the importance of patience and meticulous prep work—skipping steps like marking stud locations or choosing the right toggle bolts can lead to costly mistakes. I also realized that overestimating the simplicity of drywall anchors for heavy fixtures often causes wobbling or failures down the line. Now, I always double-check my hardware and wall support, understanding that a secure mount isn’t just about the right tools but about precise execution and knowing your wall’s limits. Finally, learning to visualize the entire installation process beforehand saves time and frustration, ensuring a smooth, long-lasting result.
Tools and Resources That Make the Difference
For reliable heavy-duty installation, I trust the Bosch GSL 2 Professional for perfect leveling, ensuring my fixtures hang flawlessly every time. The DeWalt DW088LG laser level helps me visualize alignments in complex spaces, saving guesswork. When it comes to wall anchors and fasteners, my go-to sources are the expert guides available on our privacy policy page and dedicated installation tutorials, which unpack nuances that even seasonedDIYers benefit from. Additionally, bookmarking specialized hardware suppliers offers access to high-rated toggle bolts and steel brackets tailored for heavy loads, drastically reducing risks during the project.
Your Journey Begins Here—Take a Bold Step
Installing heavy fixtures like mirrors, vanities, and built-ins isn’t just about using the right tools—it’s about building confidence in your abilities and transforming your space with assurance. Every successful project fuels your skills, turning intimidating tasks into satisfying achievements. Remember, taking precise, thoughtful action today lays the foundation for a safer, more stylish home tomorrow. Embrace the challenge, and don’t hesitate to explore expert guides and innovative solutions along the way. Your home improvement journey can be both rewarding and empowering—begin now and see the difference you can make.