

I remember the first time I installed a built-in media center in my family room. I was so proud of my sleek, custom design—until a few weeks later, when I started noticing an odd smell lingering around the unit. Turns out, poor ventilation was trapping humidity and causing unwanted odors. That realization was a lightbulb moment for me: a stunning built-in isn’t enough if it doesn’t breathe properly.
The Hidden Challenge with Built-in Media Centers
Many homeowners invest heavily in custom cabinetry that transforms their space—yet overlook the importance of proper venting. Without it, condensation can build up, leading to mold and even structural issues over time. As I found out firsthand, neglecting ventilation isn’t just about comfort; it’s about preserving your investment and ensuring a healthy environment.
What if I told you there’s a clever, almost invisible trick that can make all the difference? A simple, strategic move can help you maintain airflow without sacrificing aesthetics. This is where the concept of the Stealth Venting Move comes into play, and I promise, it’s easier than you might think.
Is Discreet Venting Really Worth the Extra Step?
Early on, I made a critical mistake: I thought sealing everything tightly would improve the look and function of my media center. But that approach backfired when humidity caused issues I couldn’t see until it was too late. Now, I always advocate for a balanced approach—keeping air flowing but out of sight. This tweak can save you headaches and costly repairs down the line.
According to experts, proper ventilation is essential for moisture control, especially in enclosed cabinetry. A study published by the National Institutes of Health highlights how moisture damage can compromise indoor air quality and structural integrity.
So, if you’ve faced the frustration of lingering odors, moisture buildup, or mold in your built-in, you’re not alone. But the good news is, with a few thoughtful adjustments, you can keep your media center both beautiful and functional—quietly and discretely.
In the next sections, I’ll walk you through exactly how to implement this Stealth Venting Move. No more guessing games. Just straightforward tips to protect your space and keep it feeling fresh, all while maintaining that seamless look you love.
Plan Your Ventilation Pathway Carefully
Start by assessing the space behind your media center. Use a measuring tape to identify accessible gaps or gaps that can be created without disrupting aesthetics. Think of it like designing a secret passage—its purpose is vital, but it shouldn’t be obvious. I once used painter’s caulk to mark potential vent openings on the back panel, making adjustments before cutting. This pre-planning ensures you don’t compromise the cabinet’s finish later.
Pierce Small, Discreet Holes Instead of Large Cuts
Opt for small, strategically placed holes—about 1 inch in diameter—near the top and bottom of the media enclosure. These holes act as a passive airflow conduit, facilitating moisture escape without compromising visual appeal. I often drill these holes with a Forstner bit, then test airflow with a smoke pen, adjusting the size as needed. Remember, the goal is stealthy airflow—not an open window.
Use a Flexible Duct or Vented Panels
Attach a short, flexible duct section from the holes to an outlet behind or beneath the media console. Alternatively, install vented panels with decorative grilles that blend seamlessly into your cabinetry. I once painted a grille to match my wall color, making it virtually invisible. This approach allows air exchange without introducing custom vents that could spoil your design.
Seal and Test Your Ventilation System
Seal the holes with caulk or weatherstripping to prevent dust intrusion when not in use. You can also use magnetic covers that can be removed easily for maintenance. Once installed, turn on a fan or blow compressed air through the ducts to verify airflow. I discovered that using a smoke pencil revealed weak spots, prompting me to enlarge the holes slightly for better circulation.
Monitor Moisture and Odors Over Time
After installation, observe the area for signs of moisture buildup or odors. Use a small hygrometer to track humidity levels; aim for below 60%. In my experience, adding a small, silent exhaust fan running intermittently kept humidity in check, preventing mold. For more on maintaining your cabinetry’s integrity, check out our article on preventing steam damage with moisture barriers.
Keep It Invisible and Effective
The secret to a functional built-in media center lies in subtlety. The ventilation system should work quietly behind the scenes, maintaining airflow without drawing attention. Remember, the key is to balance moisture management with aesthetic preservation—think of it like a spy operating under the radar. With this approach, you’ll enjoy a fresh, odor-free space that retains its sleek, seamless look.
When it comes to built-in storage solutions and vanities, many homeowners assume that following standard guidelines guarantees success. However, as an expert in custom cabinetry, I’ve seen common misconceptions lead to costly mistakes. Everyone touts the importance of measurements and aesthetics, but what often gets overlooked are the nuanced details that determine long-term functionality and durability.
One widespread myth is that installing a vanity or built-in is simply about fitting furniture into a space. In reality, neglecting the structural support and material considerations can cause sagging, warping, or even dangerous collapses over time. For example, using standard wall anchors without considering load-bearing capacity results in unstable shelves that threaten your belongings. According to a study by the National Association of Home Builders, improper support structures are among the top reasons for cabinet failure after installation. This highlights the importance of internal reinforcement and proper anchoring, especially for heavy countertops or appliances.
Moreover, many believe that aesthetics alone drive successful built-in designs. While visual appeal is crucial, ignoring ventilation and moisture management can turn a beautiful space into a mold-prone environment. Mold and mildew thrive in hidden corners with poor airflow, leading to health issues and expensive repairs. Advanced homeowners understand that integrating discreet ventilation pathways, as discussed earlier, is essential—this isn’t just about comfort, but about protecting your investment.
What do most DIYers or even some professionals misjudge about installing vanities and built-ins? The answer lies in ignoring the importance of precise levelness and internal bracing. A tiny tilt or weak joint, overlooked during installation, can cause doors to bind, drawers to stick, and overall instability. This is why meticulous measurement and internal steel reinforcements are critical. For intricate support strategies, check out our guide on internal bracing tactics.
Advanced practitioners also understand that the materials used matter. Relying solely on wood or MDF without considering expansion, contraction, and moisture resistance leads to long-term issues. Sealants, moisture barriers, and choosing the right veneer or laminate are often overlooked but vital to enduring quality.
To avoid these traps, it’s advisable to integrate expert techniques from the start. For instance, reinforcing with internal steel supports or using moisture-proof bases can significantly extend the lifespan of your cabinetry. For comprehensive support strategies, our article on effortless storage solutions provides useful insights.
Remember, successful built-in designs don’t happen by chance. They require a layered approach—combining aesthetic finesse with structural integrity and moisture management. The most overlooked nuance is that these elements must work harmoniously, not in isolation. Otherwise, your investment risks premature failure.
Have you ever fallen into this trap? Let me know in the comments. For more advanced tips on installation and support, explore our expert guide to flawless vanity installation and safeguard your project from pitfalls.
Keeping Your Built-Ins and Vanities in Top Shape
Maintaining your custom cabinetry and vanities isn’t just about routine cleaning; it requires precise tools and methods to ensure longevity and perfect functionality. I swear by a few specialized instruments that make maintenance not only efficient but also protect your investment.
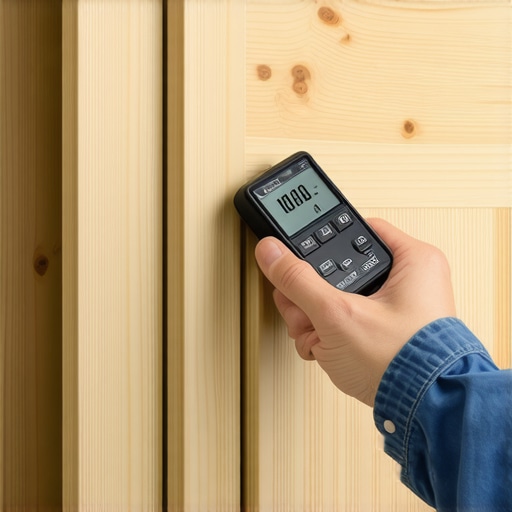
First, a high-quality digital moisture meter is indispensable. I use the Extech MO55, which provides instant readings on moisture levels within your wood and drywall. This helps me identify hidden humidity issues before they become costly repairs, particularly crucial in bathroom vanities prone to moisture invasion.
Secondly, an oscillating multi-tool, like the Fein MultiMaster, is perfect for gently sanding and cleaning tight corners or removing old sealant without damaging surrounding materials. I often incorporate it to refresh caulk lines or to smooth out joints during minor repairs.
Adopting specialized cleaning tools also makes a difference. A microfiber cloth paired with a gentle, pH-balanced cleaner preserves finishes—especially when dealing with high-gloss or veneer surfaces. For stubborn spots, I prefer a soft nylon brush to lift grime without scratching.
On the software side, I rely on CAD design software such as SketchUp Pro. This allows me to update and simulate modifications to storage solutions before executing them physically. Planning digitally helps prevent costly miscalculations and highlights potential structural tweaks.
Tools I Recommend for Long-Term Durability
Installing discreet ventilation pathways, as discussed earlier, should be complemented with airflow testing. A smoke pencil from a plumbing supply store is inexpensive but invaluable for visualizing air movement through vents or small openings. Regularly verifying airflow ensures your system remains effective over years of use.
Another underrated tool is a magnetic mount level. Unlike standard levels, magnetic versions stick temporarily to metal surfaces of your cabinetry, ensuring quick and accurate checks on alignment during maintenance or adjustments. This is the secret to avoiding wobbly shelves or uneven vanities that can cause long-term issues.
In terms of future trends, I predict that integrating IoT sensors into cabinetry will evolve from smart home gimmicks to essential components. These sensors could monitor moisture, supports, and even real-time weight loads, alerting homeowners via apps before small issues turn into failures. Embracing such technology now could save you thousands in future repairs.
How do I keep my built-ins functioning for years to come?
The key lies in routine maintenance using the right tools. Regularly scan moisture levels, check for airflow efficiency, and keep hardware exemplars like level tools handy. Don’t forget to revisit your ventilation and structural supports every couple of years; small reinforcements now can prevent catastrophic failures later.
Don’t wait until you see visible damage—proactive care is the best way to preserve your customized solutions. Try setting a quarterly reminder to inspect ventilation and moisture, and consider investing in the tools I use daily for peace of mind and perfect results.
What I Wish I Knew Before Sealing My Built-Ins
The biggest lesson I learned is that a beautiful built-in isn’t worth much if it doesn’t breathe. Integrating discreet venting from the start saved me from future headaches and costly repairs, proving that design has to balance form and function. Additionally, internal reinforcement often goes overlooked; understanding load points early can prevent sagging and structural failure.
Implementing subtle, strategic ventilation pathways isn’t just about airflow—it’s a safeguard for your investment. My aha moment was realizing that modest adjustments like small vent holes and support brackets can make a tremendous difference over time, especially in moisture-prone areas. Lastly, I discovered that routine checks with simple tools can help catch issues before they escalate, prolonging the lifespan of your built-ins and vanities.
Tools and Resources That Elevate My Craft
For those serious about ensuring long-term durability, I rely on a high-quality digital moisture meter to monitor humidity levels behind cabinetry—their hidden moisture can cause damage before you notice. An internal steel support adds confidence that your heavy countertops or shelving won’t bow or cave over time. I also swear by a magnetic level for quick, precise checks during routine maintenance.
To future-proof your projects, consider exploring smart moisture sensors—integrating IoT tech can provide real-time alerts for unexpected humidity spikes, giving you an early warning system. For reading inspiration and design inspiration, books like Crafting Custom Vanities or online tutorials from seasoned builders can accelerate your learning curve.
Embrace the Challenge and Elevate Your Space
Transforming your home with built-ins, vanities, and storage solutions isn’t just about aesthetics; it’s about creating a handcrafted space that lasts. Think of each step—ventilation, structural reinforcement, maintenance—as part of a personal craft that enhances both beauty and durability. Remember, the most satisfying results come from thoughtful planning, ongoing care, and a willingness to learn from each project.
So, are you ready to take your custom cabinetry game to the next level? Whether you’re tackling your first build or refining existing solutions, small improvements in support and ventilation can make a world of difference. Share your experiences below—what’s your biggest challenge with built-ins, and how are you planning to conquer it?