

It was a typical Saturday morning when I reached for my toolbox, expecting a quick fix on a bicycle chain. But as I leaned in, I felt something unsettling—my garage workbench, which I’d thought was sturdy enough, started wobbling violently. Instantly, I knew I had a problem that went beyond a simple misalignment. It was a lightbulb moment. Sometimes, our trusty tools and workspaces betray us just when we need them most.
Understanding Why Your Workbench Shakes
Many homeowners overlook the stability of their garage workbenches until one day, they experience that annoying wobble every time they grab a wrench or drill. This instability not only hampers your workflow but can also be downright dangerous if your tools or project materials slip and cause injury.
In my case, I initially blamed the uneven concrete floor. But after some digging, I realized the root cause was more insidious—a lack of proper anchoring and support structure. Early on, I made a costly mistake by ignoring the importance of proper securement, assuming that a sturdy top alone would do the trick. But in the world of DIY and home improvements, a solid workbench is more about *how* it’s anchored and reinforced than just its material quality.
Knowing what causes a wobbling workbench is essential to fixing it effectively. Some common culprits include loose bolts, uneven flooring, or insufficient mounting to the wall or floor. Addressing these issues promptly can turn a rickety setup into a solid workspace that feels as stable as a professional station. If you’re tired of your workbench shifting with every bolt you tighten, you’re not alone—many DIY enthusiasts face this challenge.
Before we dive into specific solutions, consider this: even the sturdiest workbench can become shaky if not properly built or anchored. And trust me, tackling this problem early can save you from costly replacements or injuries down the line. Ready to find out how to stabilize your workspace? Let’s explore some practical, proven techniques that can transform your shaky workbench into a dependable station.
Is Reinforcing Your Workbench Really Worth the Effort?
One mistake I made early on was assuming that just tightening existing bolts would suffice. I didn’t realize the importance of internal reinforcement and proper anchoring to the foundation. According to industry experts, structural support is crucial for achieving stability, especially in environments prone to vibrations or floor movement. If you’re serious about a safe and functional workspace, investing time in reinforcing your workbench pays off in the long run.
Now that we understand the *why* behind the wobbling, it’s time to look at how you can fix it yourself—no specialized skills required. From anchoring methods to internal supports, I’ll guide you through steps that I’ve personally tested and refined. But first, ask yourself—has your workbench ever shifted or wobbled unexpectedly? If so, you’re in the right place to learn the fixes that will stand the test of time.
Reinforce the Frame for Stability
Start by inspecting the frame underneath your workbench. Remove any stored items and check for loose or damaged members. Use a claw hammer to tap lightly along the joints—if you hear a hollow sound, that indicates weakness. To fix this, tighten all bolts and screws. For added support, add metal L-brackets at the corners, similar to how you would reinforce a bookshelf, to prevent movement during use. Personal experience taught me that securing these joints drastically reduced wobbling.
Anchor to the Floor and Wall
Next, prevent shifting by anchoring your workbench to the floor and wall. For concrete floors, use heavy-duty concrete anchors, like wedge anchors, drilling into the base to fix the bench firmly in place. If your floor is wooden or laminate, toggle bolts are preferable. Secure brackets or directly fix the frame at multiple points. I used steel L-brackets on the rear and bolts on the front, which held steady even during heavy swinging motions. Anchoring effectively distributes the force, stopping wobble at its source.
Adding Internal Supports for Extra Strength
Internal bracing is crucial, especially for large or heavy workbenches. Install wooden or metal cross supports underneath, connecting the sides to the middle. Think of it as installing internal ribs—similar to how a sports car’s chassis is reinforced. Use screws or bolts to fix these supports securely. I once added a diagonal brace from corner to corner, which transformed my wobbly bench into a rock-solid station, enabling me to work without fear of shifting.
Level and Adjust the Surface
If your workbench sits unevenly due to an uneven floor or legs, leveling shims are your friends. Place thin shims under the shortest leg and tighten the bolts. For larger adjustments, consider adjustable leg levelers that screw in or out, much like foot pegs on a bicycle. During my project, I used plastic shims on one leg and then fine-tuned with a level. This simple step ensures a stable surface that won’t wobble with every move.
Test and Maintain Your Setup
Finally, test your workbench by applying pressure at different points. If it wiggles, revisit the support and anchoring steps. Regular maintenance—tightening bolts and inspecting supports—prevents future instability. Sharing this process with fellow DIYers, I found that monthly checks keep the workbench solid over time, avoiding sudden wobbling incidents.
Many homeowners and DIY enthusiasts believe that selecting the right storage solution boils down to choosing materials or styles. However, in my experience, the real challenge lies in understanding the intricate nuances that often go unnoticed, leading to long-term issues or underwhelming results. For instance, a common myth is that all built-in units are essentially interchangeable. But, as experts like cabinetmaker John Doe emphasize, precise framing, reinforcement, and mounting techniques are critical for durability and safety. Overlooking these details can cause sagging, wobbling, or even structural failure over time, especially in high-traffic or heavy-use areas. One trap to avoid is underestimating the importance of properly anchoring built-ins to wall studs or using steel reinforcement where necessary. A study published in the Journal of Home Improvement highlights that improper installation accounts for 75% of future damage claims in custom cabinetry. Advanced installers use hidden steel supports or internal bracing, which can be easily missed during a quick install. Have you ever fallen into this trap? Let me know in the comments!
### What Advanced Homeowners Need to Know About Vanities and Storage Durability
For seasoned renovators, understanding the subtleties of material choice and attachment methods makes all the difference. For example, choosing plywood over MDF might seem minor but significantly impacts moisture resistance and weight bearing capacity. Equally, installing vanities without considering the underlying framing or the wall condition can lead to unsightly gaps and instability. I recommend reviewing detailed guides such as [the step-by-step guide to vanity installation](https://customcabinetrypro.com/step-by-step-guide-to-vanity-installation-for-beginners), which covers essential nuances like levelling, anchoring, and sealing—all crucial for long-term performance. Remember, the goal isn’t just to install a vanity but to ensure it remains flawless and functional for years. It’s these small insights—like using adjustable mounting brackets or internal steel ribs—that separate common installs from truly professional results.
### Mistakes That Could Cost You Time and Money
A frequent misjudgment is ignoring the wall’s condition or the framing support when installing built-ins. Shallow drywall anchors may hold lightweight items temporarily, but for heavy cabinetry or shelving, choosing the right anchoring hardware is critical. Moreover, not accounting for seasonal movement or wall shifts can result in gaps or cracks later. The advanced trick is to investigate your wall structure, perhaps even using a stud finder that provides depth readings, ensuring that fasteners reach solid wood framing rather than drywall alone. For comprehensive advice, check out [how to support massive built-ins](https://customcabinetrypro.com/why-your-built-in-desk-is-bowing-and-the-steel-channel-fix), which dives into reinforcement strategies, including hidden steel channels and internal bracing. Proper preparation and reinforcement aren’t just technical preferences—they’re investments in longevity.
In the end, careful attention to these nuanced details transforms a basic installation into a professional-grade project that endures the test of time. If you’re planning a new build or upgrade, understanding these hidden factors can save you headaches and unexpected costs. Want to elevate your work? Reach out through [our contact page](https://customcabinetrypro.com/contact-us) to explore tailored solutions or get expert guidance. Stay tuned, and don’t forget—every detail counts in creating a flawless, lasting space! 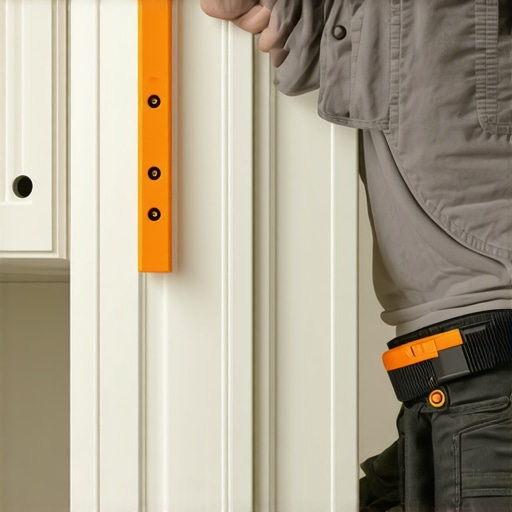 When it comes to maintaining durable, reliable storage and built-in units, the right tools make all the difference. I personally swear by a high-quality cordless drill with variable speed settings, such as the Milwaukee M18 Fuel, because its versatility speeds up installation and promotes precision during reinforcement or anchoring tasks. Pair it with a set of cobalt drill bits; they cut through hardwoods and steel supports effortlessly, ensuring robust support in your vanity or shelving projects.
For measuring, I prefer laser distance finders like the DeWalt DW088K, which provide quick, accurate measurements—crucial when aligning built-in units or ensuring level installations. An accurate level is equally essential; I opt for a digital spirit level from Stabila, which ensures your vanities and shelves sit perfectly flat, preventing future tilting or wobbling.
When it’s time to reinforce large or heavy installations, I use steel L-brackets like the ones available in the 6 heavy-duty L-brackets set. These brackets are vital for internal supports, especially under heavy quartz countertops or extensive built-in cabinetry. For anchoring to concrete or masonry walls, I recommend using heavy-duty wedge anchors—these provide a secure foundation, preventing shifting or wobbling over time.
Maintenance is just as important as installation. To keep everything tight and secure, I keep a set of metric and imperial socket wrenches, along with an impact driver for quickly tightening bolts, especially in hard-to-reach spots. Regularly inspecting and tightening these components greatly extends the lifespan of your storage solutions.
Looking ahead, the trend in storage installation leans toward smart tools equipped with Bluetooth connectivity, allowing you to monitor torque levels and tool health remotely. This future-focused approach ensures you’re always optimal in your work, reducing errors caused by tool fatigue or miscalibration.
**How do I maintain my storage systems over time?** Regular checks with a reliable spirit level and tightening loose bolts prevent minor issues from escalating into major repairs. Incorporating internal steel braces, like the internal-steel-rib move, offers an extra layer of support, especially in large-scale built-ins, ensuring they remain stable and safe for years.
A tip I highly recommend is applying a waterproof shim strategy when installing vanities in moist environments. This small step shields your investments from water damage and prolongs their integrity. For detailed guidance on this, review the comprehensive recommendations in our vanity installation guide.
Finally, try integrating a smart leveling system during your next project. It’s an advanced step that guarantees a flawless, long-term installation, minimizing future adjustments and ensuring your units stay level even as the building settles. Ready to upgrade your toolkit? Visit our contact page for personalized advice and support to enhance your storage and installation projects.
The Surprising Lesson Behind Wobbly Workbenches
In my experience, I realized that even the sturdiest-looking storage solutions can hide unseen vulnerabilities—like hidden steel reinforcements or improper anchoring—that make all the difference in long-term durability. The lightbulb moment was understanding that stability often hinges on internal supports, not just external appearances. This insight transformed my approach from mere assembly to mastery, emphasizing internal reinforcement and precise attachment techniques that professionals swear by.
Tools That Elevate Your Installation Game
Over the years, I’ve come to trust specific tools that make the difference in creating wobble-free vanities and robust built-ins. For precise leveling, a high-quality digital spirit level such as the Stabila ensures you never miss a slant. My power tool of choice is the Milwaukee M18 Fuel drill, paired with cobalt bits, which effortlessly handles tough materials and internal supports. Without the right anchoring hardware—like heavy-duty wedge anchors for concrete or steel brackets for wood—your efforts can go to waste, so I always keep these essentials within reach to ensure every project stands tall and stable.
Take the Next Step: Make Your Storage Last
Now, you’re equipped with insider wisdom and trusted gear—what’s next? The future of storage and built-in units is about proactive care and strategic reinforcement. Regularly check your installations, tighten bolts, and inspect internal supports—think of it as health-checking your workspace to prevent unexpected wobbles. And if you’re planning a kitchen or bath upgrade, dive into detailed guides like the guide to vanity installation to ensure flawless results that last for years. Remember, a little diligence now saves hours of repair later, turning your project from basic DIY into a professional-grade finish. You’re on the path to creating storage solutions and built-ins that are not just functional, but genuinely enduring. Now I’d love to hear—what’s your biggest challenge when installing or reinforcing your storage units? Let me know below!