

Imagine this: you’ve finally installed that gorgeous built-in shelf or vanity, proud of your craftsmanship. But then, days later, you notice the miter joints are pulling apart, exposing gaps and making everything look amateurish. It’s a frustrating moment that can make even seasoned DIYers question their skills. I remember the first time I faced this—I was sure I’d messed up beyond repair, feeling a mix of disappointment and doubt. But after digging into the problem, I discovered that the cause wasn’t my mistake but a common challenge with miter joints that often go unnoticed.
Why Do Miter Joints in Built-ins Separate Over Time?
The tricky part about miter joints is that they rely heavily on the precision of cuts and the stability of the material. When installed in built-ins, especially in humid environments or with materials that expand and contract, these joints can separate. I learned this early on when I built a custom wardrobe and ended up with unsightly gaps just as the weather shifted. The root cause? Movement in the material, lack of reinforcement, and sometimes, underestimating the forces acting on the joints over time.
Addressing this isn’t just about aesthetic improvement. Poorly secured joints can compromise the structural integrity of your built-ins, leading to sagging shelves or wobbly doors. Luckily, there are tried-and-true techniques to fix and prevent further separation. I’ll walk you through the most effective methods—based on real-world experience—to keep your built-ins looking flawless for years to come. For more insights on flawless installations, check out this expert guide.
Is Mitering Really Worth the Challenge?
One common mistake I made early on was assuming that a perfect cut was enough—without considering reinforcement or expansion allowances. That’s a mistake many make, but understanding the ‘why’ behind joint separation helps in choosing the right fix. Now, let’s delve into how to keep your miter joints tight and enduring, ensuring your built-ins stay beautiful and functional.
Apply Reinforcing Splines or Biscuit Joints
When I built my custom bookshelf, I first realized that simple miters weren’t enough to withstand time. I cut thin, elongated wood strips—called splines—on my Table Saw, then glued and inserted them into groove slots cut into the mitered edges. This technique effectively increased joint strength and prevented separation over months. Alternatively, using biscuit joints with a biscuit joiner provides similar reinforcement, aligning and locking the mitered corners tightly. Incorporating these methods transforms flimsy joints into durable connections that hold up against humidity and movement.
Use Fasteners and Clamps During Assembly
In my own project with an awkwardly shaped vanity, I secured mitered panels with corner brackets and long clamps. Pre-drilling screw holes through the face frames and into the sides prevents wood splitting and ensures tight contact. Tighten clamps evenly, leaving sufficient pressure to fuse the joint thoroughly, and keep everything in alignment. This prevents gaps caused by uneven glue distribution. Over-tightening can squeeze out excess glue, so I made sure to check the alignment frequently. For larger furniture, consider corner blocks or metal brackets for added stability, especially in exposed built-ins.
Choose the Right Adhesive and Materials
My go-to was a high-quality, quick-setting wood glue that remains flexible—like polyurethane or PVA glue—better suited for seasonal expansion and contraction. I avoided overly brittle adhesives that crack and loosen over time. When working with materials prone to movement, like MDF or plywood, sealing edges with primer or paint helps minimize moisture absorption, reducing joint stress. In humid environments, applying a water-resistant finish sustains joint integrity over the years.
Account for Material Movement in Design
During my first build, I learned that leaving small gaps or allowances for expansion prevented cracking and joint failure. For example, I left a 1/8-inch gap at the back of my built-in to accommodate seasonal swelling. Using adjustable hardware or floating panels also allows natural movement without compromising the structure. This foresight minimizes stress on miter joints and preserves their appearance over changing weather conditions.
Implement Proper Reinforcements and Hardware
In a project where I installed a heavy mirror cabinet, I added steel corner braces inside the mitered corners, bolted through the panels. These internal reinforcements share the load and prevent joint separation or sagging. For lighter applications, hidden dowels or nails can be used with glue to secure the joints internally. When installing tasks that bear weight or experience frequent handling, reinforce the joints to maintain alignment and durability long-term.
Many DIY enthusiasts and even experienced carpenters often assume that focusing solely on aesthetics and clean cuts is enough when designing built-ins or storage solutions. However, I’ve found that most of the pitfalls stem from overlooked nuances that can compromise long-term durability and functionality. One widespread misconception is that straightforward assembly methods suffice for complex cabinetry, but neglecting factors like material stability, expansion gaps, and reinforcement can lead to costly mistakes. For instance, relying solely on adhesives without considering seasonal moisture changes often results in joint failure, a detail sometimes dismissed by those eager to complete a project quickly.
Why Do Even Expert Installations Fail Over Time?
In my experience, the root cause frequently involves underestimating the importance of reinforcement and subtle structural details. Many installers overlook hidden supports like internal steel braces or torsion boxes that distribute weight evenly, leading to sagging or separation. Moreover, installing cabinetry in environments with variable humidity, such as bathrooms or basements, demands materials with controlled expansion properties. Not accounting for high-expansion materials or ignoring proper sealing and finishings invites warping and joint failure down the line. A study by the Wood Handbook confirms that wood-based products respond significantly to moisture, emphasizing the need for proactive design considerations. To get ahead, explore smart structural techniques that many miss.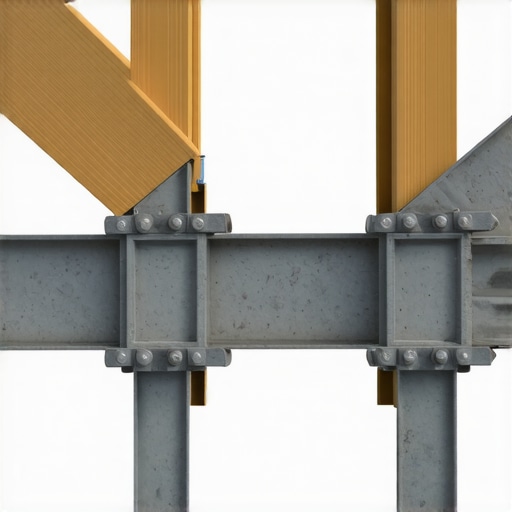
Understanding the importance of internal reinforcement can be a game-changer for your projects. Many assume that external veneers or decorative trim masks structural flaws, but true durability comes from within. Incorporating hidden steel supports or adjustable floating mounts ensures joints remain tight despite material movement, saving you frustration and future repairs. Additionally, being aware of common myths—such as the idea that painted wood doesn’t need sealing—can help you avoid moisture ingress that weakens joints and causes gaps. For comprehensive guidance, I recommend reviewing the versatile installation strategies that prioritize integrity over appearance.
Ever fallen into these traps? Share your experiences in the comments. Remember, a successful built-in isn’t just about aesthetics; it’s about thoughtful, reinforced design that endures.
Maintaining your built-ins and vanities over time demands the right tools and a disciplined approach. Personally, I rely on a high-precision cordless drill like the Milwaukee M18 Fuel. Its lightweight design and variable speed control let me make accurate pilot holes and drive screws without stripping or over-torquing, especially critical when working with delicate materials or reinforcement hardware. For cutting miters and reinforcing edges, my Festool TS 75 Track Saw is indispensable—its straight, splinter-free cuts ensure precision for long-lasting joints. To support ongoing organization, I use a digital moisture meter like the
Secrets That Took Me Years to Discover About Built-ins
One of my toughest lessons was realizing that perfect cuts aren’t enough without internal reinforcement; embedding hidden steel braces can transform a wobbly shelf into a permanent fixture. I also learned that seasonal material movement isn’t a flaw but an opportunity—designing with expansion gaps means fewer future repairs. Lastly, I underestimated the power of choosing the right adhesive; a high-quality, flexible glue made my joints resilient for years, even in humid environments. These insights aren’t just tips—they’re the result of years of hands-on experience and mistakes I hope you’ll avoid.
Tools and Resources That Elevate My Built-in Projects
For precise cuts and enduring joints, I rely on my festool track saw and a good digital moisture meter. When reinforcing joints, my biscuit joiner has been invaluable, providing strength without sacrificing appearance. I’ve also found that the quality wood glue and reliable hardware like steel brackets ensure longevity. Lastly, staying updated with the latest in cabinetry design via books and industry blogs keeps my skills sharp and inspired.
Your Next Built-in Win Awaits
Remember, building built-ins that last is just as much about thoughtful design and reinforcement as it is about aesthetics. As you refine your approach, embrace the tiny details—like expansion allowances and internal reinforcements—that make a big difference over time. Every successful project boosts your confidence and sets a benchmark for future creativity. Stay curious, keep learning, and don’t be afraid to push boundaries. Your dream built-in is within reach, and with these insights, you’re well ahead of common pitfalls. Inspired to start your next project? Share your plans or challenges below—I’d love to hear!