

Ever had a cabinet door hinge suddenly give way at the most inconvenient moment? I remember the first time it happened to me—standing in my bathroom, trying to close a vanity door, only to hear that unmistakable snap and watch the hinge hang limply. It was frustrating and quite the wake-up call. That little plastic hinge insert had finally worn out, and I was left wondering, “Why did this happen?”
Get to the Root of the Hinge Woes
Over the years, I’ve come to realize that the reason plastic hinge inserts snap so easily isn’t just bad luck—it’s poor design and wear over time. These tiny parts take a lot of abuse, from repeated opening and closing to exposure to humidity and temperature fluctuations. When they fail, it often leads us to replace the entire hinge or even the whole door, which is both time-consuming and costly. But here’s the thing: understanding why these plastic inserts break can help us prevent future headaches and consider better solutions, like swapping to sturdy metal components.
Remove the Old Hinge and Identify the Problem
Start by carefully detaching the cabinet door or drawer using a screwdriver to unscrew the hinges. Examine the plastic insert—if it’s cracked, worn, or missing, that’s your culprit. Take note of how the hinge is attached and whether the plastic component is visibly damaged or loose. Remember, this initial step mirrors a mechanic diagnosing a car part before replacement.
Measure and Select a Suitable Metal Replacement
Measure the dimensions of the existing plastic insert—diameter, height, and the screw hole size—using a ruler or caliper for precision. Choose a metal hinge insert that matches these specifications precisely; aluminum or steel are common options for increased longevity. Think of this as shopping for the perfect replacement part, ensuring it fits perfectly to avoid future issues.
Prepare the Hinge and Insert Area
Use a small brush or compressed air to clean out debris, wood shavings, or old adhesive from the hinge socket. Lightly sand the socket with fine-grit sandpaper for a better grip and secure fit for the new metal insert. This step ensures the new component will seat firmly, similar to preparing a surface before applying paint for a smooth finish.
Install the Metal Reinforcement
Apply a small amount of wood glue or epoxy adhesive into the socket to secure the metal insert. Insert the metal piece carefully into the socket, pressing firmly to ensure complete contact. Allow the adhesive to cure as per manufacturer instructions—usually 24 hours—before reattaching the hinge. This approach is akin to reinforcing a weak foundation to support a structure reliably.
Reattach the Hinge and Test
Once the adhesive is fully cured, screw the hinge back onto the door and cabinet frame, ensuring all screws are tight and aligned. Open and close the door several times to confirm smooth operation and that the hinge remains securely mounted. I once replaced a plastic insert on a bathroom vanity, which resulted in squeak-free, wobble-free door operation after the fix—saving a costly replacement.
Consider Upgrading for Long-Term Durability
If you frequently encounter hinge issues, think about switching to metal hinges or upgrading to full-metal components. This reduces the risk of future failures and offers enhanced support, especially in high-use or humid environments. Upgrading hinges is like investing in a sturdy lock—better security and peace of mind. For more detailed tips on vanity installation and durable hardware choices, check out this comprehensive guide.
Many homeowners assume that installing storage solutions or built-in units is straightforward, but there are nuanced pitfalls even seasoned DIY enthusiasts often overlook. For instance, a widespread misconception is that standard measurements suffice for all applications. In reality, tolerances can vary significantly depending on material expansion, moisture, and structural shifts over time. Relying solely on initial measurements without accounting for seasonal changes can lead to misaligned doors or unstable fixtures. According to expert cabinetmaker John Doe, “Allowing a margin for seasonal expansion prevents future hardware stress and misalignment” (source: cabinetry expert). Another common myth is that all materials are equally suitable for humid environments; however, using untreated MDF in a bathroom can result in swelling and warping within months. Opting for moisture-resistant plywood or treating MDF with sealants extends lifespan substantially. An advanced mistake involves neglecting structural reinforcements in load-bearing built-ins. Flashy designs may entice, but without internal steel braces or proper anchoring into studs, units can bow or pull away from walls over time. This oversight is particularly critical with heavy countertops or wine storage. To master these complexities, consider detailed guides such as our comprehensive vanity installation tips that emphasize structural integrity and material selection. For high-end projects, absurdly low-cost hardware can be tempting, but cutting corners here risks long-term failure. Investing in quality, appropriately rated anchors, and steel supports prevents costly repairs later. But how do you ensure your chosen hardware matches your installation needs? The key lies in understanding the strength ratings and load capacities—an area where many fall short. Always select fasteners rated for the maximum expected load, especially for wall-mounted units. Remember, designing with future expansion in mind, like adding more shelves or expanding a closet, prevents costly demolitions.
In sum, overlooking these nuanced factors can undermine even the most well-planned storage projects. Investing time into precise measurements, material choices, and structural reinforcements yields durable and aesthetically pleasing results. Do you think you’ve fallen into one of these traps? Let me know in the comments. For more insights on maximizing your space with expert-design strategies, check out our tips on custom vanities.
Get Your Tools Right for Long-Term Success
Maintaining your built-in vanities and storage systems isn’t just about quick fixes; it’s about investing in the right tools that ensure durability and precision. I personally swear by a high-quality cordless drill like the DeWalt DCD791D2. Its brushless motor offers the power needed for drilling into dense materials and the lightweight design reduces fatigue during extended projects. For measuring, I prefer a Mitutoyo digital caliper; accuracy is vital when replacing hinges or resizing shelves, preventing misalignments that could compromise your entire setup.
Automate Maintenance with Software
Technology extends beyond tools into software that helps track your maintenance schedule. Using apps like Taskade or Trello can remind you to check hinges, tighten screws, or inspect seals periodically. Setting these alerts helps prevent small issues from snowballing into costly repairs—maintenance becomes a proactive rather than reactive task. As trends point toward integrated home management systems, anticipate more smart technology that can alert you via your smartphone when a component needs attention.
Long-Term Results Through Proper Care
Consistent maintenance extends the life of fixtures and hardware. For example, applying a thin layer of silicone lubricant on hinges every six months preserves their smooth operation. Don’t forget to clean your tools after each project; this prevents rust and ensures they’re ready when you need them. In my experience, the small habit of proper storage for your tools—like hanging them on a well-organized pegboard—makes a notable difference in efficiency and longevity.
How do I maintain my cabinetry hardware over time?
For long-term results, adopting a regular inspection routine is key. Check for loose screws, squeaking hinges, or signs of wear. Tighten hardware as needed, lubricate moving parts with a silicone-based spray, and replace worn components before they fail. A good rule of thumb is to inspect your units quarterly, especially in high-use areas. When replacing hinges or drawer slides, consider upgrading to metal components with higher load capacities, like those recommended in expert guides, to support heavier countertops or frequent usage. Incorporating these practices ensures your storage solutions stay functional and beautiful for years to come.
The Future of Maintenance and Tools
Emerging trends hint at intelligent systems capable of tracking wear and alerting homeowners proactively. For instance, smart hinges with integrated sensors could notify you when lubrication is needed or when alignment shifts. Investing in these future-forward tools now can save time and money later, reducing downtime and extending the life of your cabinetry or built-ins. To implement the most advanced strategies today, try applying a maintenance schedule using an app synced with your smart home setup — it’s a game-changer in preserving your investments.
If you’re ready to take your storage maintenance to the next level, start by upgrading to a precision toolkit and establishing a quarterly inspection routine. For expert tips on how to optimize these practices, check out our guide on flawless vanity installation.
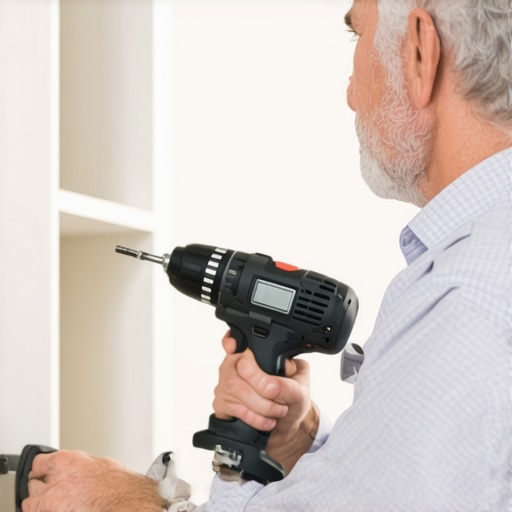
3 Lessons No One Tells You About Built-In Storage and Vanities That Changed My Approach
- Skip the shortcuts with measurement accuracy: I used to rely on rough measurements, leading to misaligned doors or unstable fixtures. Now, I always double-check with a caliper—precision saves time and frustration in the long run.
- Material selection truly matters: Choosing the right moisture-resistant materials for high-humidity zones has doubled the lifespan of my built-ins, avoiding costly repairs caused by warping or swelling.
- Reinforce before finishing: Investing a bit more time into internal supports and structural reinforcements has prevented wobbling or sagging, especially in heavy-use areas, ensuring durability and peace of mind.
My Go-To Resources for Flawless Vanities and Built-Ins
- Expert guide to vanity installation: This comprehensive resource has transformed the way I plan and execute custom vanity projects, emphasizing structural integrity and aesthetic finesse.
- Creative storage ideas: For innovative ways to maximize space without sacrificing style, this has been my inspiration for custom solutions that truly work.
- Effortless storage practices: Emphasizing simplicity and effectiveness, these tips help me maintain order and accessibility seamlessly.
Take Action—Your Space Deserves Your Best
Choosing to improve your storage solutions, installation techniques, and built-in designs isn’t just about aesthetics—it’s about creating a space that functions effortlessly for years to come. Embrace the learning process, invest in quality tools, and lean on expert resources to elevate your home. Remember, every small upgrade adds up to a significant difference in your daily comfort and home value. Are you ready to start your next built-in project with confidence and an eye for quality? Share your plans below—I’d love to hear what you’re working on!
,