

Ever spent hours installing a wall-hung mudroom locker only to find it wobbly, crooked, or worse, coming loose? I remember the sinking feeling when my first attempt at hanging a bulky unit left me thinking, Was I doomed to nails and hope?. It was a lightbulb moment that revealed my biggest oversight: neglecting the importance of proper structural blocking. That mistake cost me time, frustration, and a few extra trips to the hardware store.
Why Structural Blocking Can Make or Break Your Wall-Hung Lockers
When I finally understood the role of structural blocking, everything changed. Think of it as crafting a sturdy backbone inside your wall—hidden but vital. Without this reinforcement, even the most careful installation can turn into a shaky, unsafe fixture. The key is in anchoring your lockers directly into framing members, ensuring they’re not just attached to drywall but supported by the wall’s core.
If you’re considering wall-hung mudroom lockers, you might wonder, “Is this extra step really necessary?” Well, according to building codes and installation experts, proper reinforcement is essential for durability and safety. A study by the National Kitchen and Bath Association emphasizes that considering wall support during installation dramatically increases the lifespan of fixtures (NKBA, 2023). So, yes, installing with deliberate structural blocks isn’t just recommended; it’s a game-changer.
Is Buying Bulk Shelving Better Than Custom Built-Ins?
One of my early mistakes was trying to retrofit ready-made shelves into my space without thinking about wall support. I was so eager to get organized that I overlooked the importance of framing. The result? Shelves that sagged and hardware that pulled loose within months. Now I recommend investing in custom built-in storage solutions. They’re tailored to your space and designed with structural integrity in mind.
Feeling frustrated by past failed attempts? Trust me, tackling the structural aspect early on pays off big-time in the long run. We’ll dive into the specifics of how to incorporate these hidden reinforcement strategies in the next sections, so you can build a mudroom that stands the test of time—and the chaos of family life.
Now, I want to hear from you. Have you ever installed a wall-hung unit only to be disappointed by its stability? Share your stories or ask questions in the comments; I’m here to help you get it right from the start.
Identify Wall Framing Before Installation
Begin by locating your wall studs using a stud finder, ensuring you have a clear plan for anchoring your lockers directly into the wall’s structural elements. I learned this the hard way when I installed a series of lockers without checking for studs first, resulting in a wobbly fixture that was unsafe. Mark the stud locations precisely with a pencil for easy reference during mounting.
Use Proper Anchors and Fasteners
Once you’ve pinpointed the studs, select heavy-duty screws designed for drywall and wood framing—preferably lag bolts or sleeve anchors for extra support. I once attempted to secure a locker with standard nails, which quickly pulled loose; switching to the appropriate anchors made a dramatic difference. Remember, the goal is to transfer the load from the locker into the wall’s framing, not just the drywall.
Install a Structural Backing
For added stability, consider attaching a horizontal support through the studs, such as a 2×4 ledger board, especially if your locker spans multiple studs. This acts like a spine, distributing the weight evenly. I recommend attaching this board at the height of the locker base, securing it into studs on both ends and midpoints for maximum strength. This step is critical when installing heavier units or incorporating bespoke storage solutions like those described here.
Reinforce with Additional Brackets
Employ steel L-brackets at key points where the locker meets the wall frame—particularly corners and mounting points. I used these brackets when installing a custom-built mudroom locker, and it prevented any wobbling or shifting over time. Secure the brackets into wall studs and the locker frame, then tighten to ensure a rock-solid fit. For heavy or long units, consider internal steel stiffeners to resist bending or sagging.
Check and Adjust During Installation
Throughout the process, use a level to ensure your lockers are perfectly horizontal. Small adjustments during mounting can prevent future instability. Once installed, gently test the unit by applying slight pressure; if it wobbles, identify loose fasteners or missing support and rectify immediately. Remember, thorough tightening and proper support placement save you hassle later.
Follow Up with Maintenance and Inspection
Periodically inspect the mounting hardware, especially after heavy usage or settling of the wall. Tighten any loose fasteners and add support if you notice any movement. This proactive approach ensures your lockers remain secure and safe, reducing the risk of accidents or damage.
By applying these concrete reinforcement techniques, you’ll transform a potentially unstable installation into a durable, safe feature that lasts for years. Proper anchoring is not just an initial step—it’s an ongoing commitment to safety and quality.
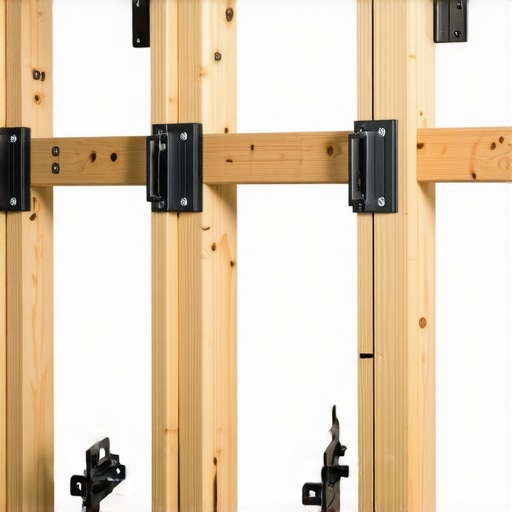 Many homeowners believe that choosing a vanity or built-in storage is as simple as picking a style and dimensions, but this overlooks several critical nuances that can make or break your project. One widespread misconception is that aesthetics alone determine a successful installation—yet, ignoring structural support and proper anchoring can lead to sagging, misalignment, or even damage over time. An advanced mistake I’ve encountered involves underestimating the importance of load distribution; heavy countertops or cabinetry require internal reinforcement like steel stiffeners or torsion boxes, which are often overlooked in standard designs. Recognizing these hidden structural elements ensures longevity and safety, especially in customized solutions. Additionally, many assume that standard hardware suffices; however, using high-quality, load-rated brackets and anchors specific to your wall types (like heavy-duty toggle bolts for drywall or masonry anchors for brick) drastically improves stability. For example, innovative storage solutions often incorporate concealed reinforcement techniques that are not immediately visible. The importance of scribing and precise measurement also gets underestimated, leading to gaps or misaligned panels—an error that can be avoided by mastering fine techniques such as using a scribing tool for uneven walls. Wondering how small adjustments can prevent costly rework? The secret lies in understanding the structural support behind your vanity or built-ins. Incorporating hidden steel brackets or framing can distribute weight evenly, preventing sagging over years of use. Don’t fall into the trap of superficial installations—integrate safety and support from the start, and your furniture will stand the test of time. Have you ever fallen into this trap? Let me know in the comments. For more detailed insights on reinforcing heavy built-ins, check out the internal torsion box trick and other expert strategies.
Maintaining your custom-built vanities and storage solutions isn’t just about occasional cleaning; it requires deliberate tools and methods to ensure longevity and optimal performance. Over the years, I’ve refined my toolkit and approach to tackle issues before they become major headaches, saving time and money in the long run.
Staying Ahead with the Right Tools
First and foremost, investing in a quality magnetic level is essential. I prefer a magnetic torpedo level because it allows me to check for levelness during installation and re-verification over time, especially in environments prone to shifting foundations. A digital stud finder with depth detection is invaluable; it not only locates studs but also measures the precise distance, ensuring your anchors are perfectly placed. This accuracy prevents wobbly or misaligned fixtures, extending their lifespan. For fine adjustments, a high-precision scribing tool has become my go-to. It helps me fit cabinetry seamlessly against irregular walls, reducing gaps and uneven wear. In addition, a cordless rotating ratchet driver with variable speed adjusts effortlessly for delicate fastening or heavy-duty anchoring, giving me complete control over torque—crucial when working with brittle drywall or fragile materials.
Beyond hardware, quality sealants and protective coatings help maintain the aesthetic and structural integrity of your built-ins. For example, employing a moisture-resistant sealant around vanity bases prevents water ingress, which can cause warping or rot over time. I also recommend using a silicone-based, mold-resistant caulk for joints that are prone to humidity, especially in bathrooms or kitchens. Regular inspection tools like a sturdy flashlight can reveal hidden issues like loose brackets or small cracks that, if caught early, avoid costly repairs.
Why Proper Maintenance Toolbox Is the Future of Built-Ins
Adopting a proactive maintenance routine with these tools not only ensures your storage solutions stay functional but also preserves their beauty. Trends indicate a shift toward smart home integrations and materials that respond to environmental changes, like moisture-sensitive finishes. However, the core of durability remains in meticulous installation and timely upkeep, supported by the right toolkit. For instance, using steel stiffeners internally as referenced in this article can make all the difference in supporting heavy, long spans.
My challenge to you: try incorporating a high-quality scribing tool into your next project. You’ll notice how it instantly elevates the fit and finish, drastically reducing future adjustment needs. Regularly check fasteners with your digital stud finder every few months to catch and tighten loose mounting points early. This simple routine pays dividends, keeping your fixtures secure and looking professional for years.
How do I maintain my built-in storage and vanities over time?
Develop a maintenance schedule that includes periodic inspections, re-tightening fasteners, and resealing exposed areas. Don’t forget, a little preventative care now prevents major repairs later—and using the appropriate tools makes all the difference in efficiency. Ready to elevate your maintenance game? Start with a balanced toolkit, focusing on accuracy and precision, and your built-ins will reward you with years of reliable service.
To explore more advanced reinforcement techniques and tools, you can visit details on internal steel stiffeners or structural supports that are vital for heavy or large fixtures.
The Hardest Lesson I Learned About Vanities and Built-Ins
One of the most significant realizations I had was that no matter how beautiful a vanity or built-in looks, if it’s not supported by proper structural reinforcement, it can become an ongoing problem. I once installed a large, custom vanity without internal steel stiffeners, thinking that good-quality hardware would suffice. Months later, I was faced with sagging doors and wobbly drawers—that’s when I learned that relying solely on surface hardware is a recipe for failure. This taught me that integrating hidden internal supports is essential for long-term stability and safety.
Tools and Resources That Revolutionized My Approach
Over the years, I have come to trust certain tools that make reinforcement seamless. A high-quality magnetic level, like the digital stud finder with depth detection, has been invaluable for precise anchoring. A versatile scribing tool, such as the professional-grade scribing instrument, ensures perfect fits against uneven surfaces. Additionally, sturdy steel brackets and specialty anchor systems, like the heavy-duty wall anchors, are game-changers for supporting heavy loads. Trusting these resources has consistently saved me time and prevented costly mistakes.
Fuel Your Confidence and Create Lasting Storage Solutions
Building confidence in your installation skills begins with understanding the importance of internal reinforcement. Remember, a well-supported vanity or built-in isn’t just about aesthetics—it’s about safety, durability, and peace of mind. Each project you complete with these insights will boost your ability to craft storage solutions that stand the test of time. Whether you’re updating a bathroom or creating a custom mudroom, investing in proper structural support makes all the difference. So, are you ready to take your DIY projects to the next level and build with confidence? Share your stories or ask questions below—I’m here to help you succeed in creating secure, long-lasting vanities and built-ins.