

I remember the exact moment I realized my island vanity was wobbly, and I hadn’t even finished installing it! Frustration surged as I jiggled the top, and the entire unit threatened to tip. That lightbulb moment hit hard: stability isn’t just about leveling—there’s a secret trick that can make your cabinetry rock-solid. Today, I’m going to share how the Floor-Bolt Hack transformed my workspace and can do the same for you. If you’ve ever wrestled with wobbly cabinets or wondered why some installations last and others wobble within months, you’re in the right place.
Why Stability in Island Vanities Matters More Than You Think
Quality cabinetry adds beauty and function to any space. But when those pieces wobble or shift, they can quickly turn from a sleek feature into a source of ongoing frustration. It’s not just about aesthetics—unstable islands can impact daily routines, cause hardware misalignments, and even pose safety risks. Plus, if you’re installing a vanity in a bathroom or a laundry room, moisture and movement make stability even more crucial. That’s where understanding the nuances of installation can save you headaches later. Just recently, a client mentioned how their once-stable vanity started wobbling after a few months. Turns out, it lacked proper anchoring—an oversight many DIYers make early on. Properly securing cabinets isn’t just a matter of screws; it’s about strategic support and understanding load distribution. Want to avoid that headache? Let’s dive into a simple yet powerful technique I swear by—the Floor-Bolt Hack—that can give your built-ins the stability they deserve. For more comprehensive tips, check out our guide on vanity installation hacks which covers other quick fixes for durable cabinetry.
Secure Your Vanity Base with Anchor Bolts
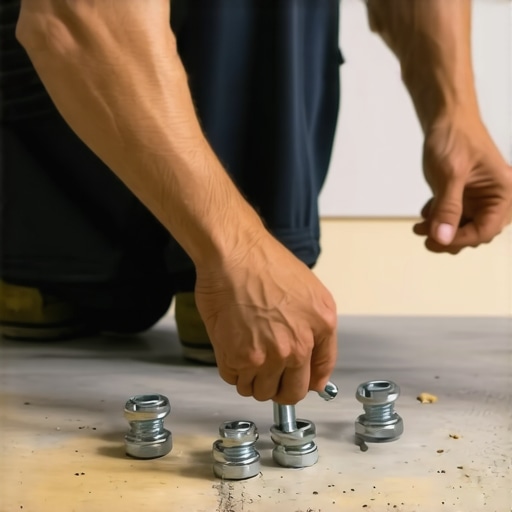
Begin by marking the exact position of your vanity in relation to the floor, then drill holes directly into the subfloor at those points. Remember, precise placement is crucial for stability. When I installed my vanity, I used a carburetor bit to make clean, accurate holes, which made inserting the bolts seamless and avoided cracking the material. This method ensures that the weight of the vanity is distributed securely into the subfloor, preventing wobbling.
Select and Install Heavy-Duty Anchors
Pick appropriate anchors, such as sleeve or toggle bolts, rated for your floor type. For a concrete subfloor, concrete wedge anchors are best. When I tackled my project, I used ¼-inch heavy-duty toggle bolts, which expanded behind the subfloor once tightened, locking the vanity firmly in place. Insert the anchors through the vanity’s mounting holes into the drilled holes, then tighten evenly to avoid tilting or U-bolting the unit—tighten just enough to secure, but not too tight to crack the cabinetry.
Using Shims and Adjustments for Precise Leveling
After anchoring, check the level with a spirit level. If there’s any tilt, insert plastic shims under the vanity before tightening the bolts fully. I once had a vanity that slightly tilted due to uneven subflooring; shimming corrected this, resulting in a perfect, wobble-free installation. Ensure shims are placed at multiple points for even support and that they don’t protrude visibly.
Add Vertical Support for Extra Stability
For larger vanities, consider adding a steel support rail or brace along the back and sides. This is especially useful if your vanity is top-heavy or if the floor has some movement. I secured a steel angle bracket behind my vanity, which alleviated stress on the anchors and prevented any lateral wobble. This step is especially vital in older homes with uneven floors or for units with heavy countertops.
Double-Check and Fine-Tune Installation
Finally, recheck the entire setup—verify levelness, tighten all anchors, and adjust shims if necessary. Test the stability by gently applying pressure on different parts of the vanity. When I completed my project, I found small tweaks made all the difference in creating a solid, wobble-free installation. Remember, the key is to distribute weight evenly and secure the unit down to the sturdy subfloor rather than just the cabinetry.
Further Reading on Secure Vanities
If you’re interested in more advanced tips, check out our vanity installation hacks guide that goes into detail about quick fixes for durable cabinetry or explore innovative built-in solutions to maximize your space.
 While many homeowners believe that simply measuring and securing cabinetry guarantees a perfect installation, the real intricacies lie beneath these surface steps. It’s a common misconception that all built-ins or vanities are created equal, leading many to overlook critical nuance that affects long-term stability and aesthetic integrity. One widespread myth suggests that using standard screws and anchors is enough for heavy or wide units. In truth, without considering factors like load distribution, material compatibility, and structural support strategies such as internal bracing or steel supports, even well-measured installations can wobble or fail prematurely. For instance, novice installers often underestimate the importance of reinforcing weight-bearing points, which a structural expert emphasizes is vital, especially in older homes where joists and subfloors may be compromised (source: [Expert Guide to Vanity Installation Tricks and Tips](https://customcabinetrypro.com/expert-guide-to-flawless-vanity-installation-tricks-tips)). Another trap is assuming that vertical supports alone suffice; in fact, horizontal bracing often plays a crucial role in stabilizing long spans and preventing lateral wobble. By integrating strategic support systems—like hidden steel braces or adjustable support rails—you ensure your built-ins stand the test of time. A common mistake is to skip thorough leveling and shimming after anchoring, which seems insignificant but can lead to uneven stress distribution. Advanced installers always double-check these details, knowing that minor misalignments can cause major issues over months. Curious about how these support nuances could apply to your upcoming project? Check out our comprehensive guide on vanity installation for beginners and learn how small adjustments can yield big results. Have you ever fallen into this trap? Let me know in the comments, and I can help identify solutions for your specific needs.Maintaining your built-in cabinetry and vanities is essential to preserving their aesthetic appeal and functionality over time. One of my favorite tools for ongoing upkeep is a high-quality cordless oscillating multi-tool. Its versatility allows me to perform delicate tasks like cleaning out joint crevices or smoothing out wear-and-tear at edges without damaging the finish. I always keep a set of precision sanding pads and micro-eraser attachments handy, which help me handle minor refinishing or cleanup tasks efficiently. Beyond manual tools, investing in specialized software like CAD design programs—such as SketchUp—has been a game-changer for planning future upgrades or scaling existing setups. These platforms let me visualize modifications and assess structural support needs before making any physical changes, thus avoiding costly mistakes. For long-term results, regular inspections should become a part of your routine. I recommend setting quarterly reminders to check for loose fasteners, signs of moisture ingress, or warping. When you detect issues early, simple adjustments like tightening bolts or resealing joints can be made before more extensive repairs become necessary. Using high-quality storage solutions, like modular wire racks or custom pull-out trays, ensures your built-ins stay organized and less prone to damage from overloading. Also, choosing durable finishing materials such as epoxy or conversion varnish provides an extra layer of protection against moisture and wear, notably in high-humidity environments like bathrooms. In terms of installation, employing structural reinforcements—such as steel support brackets—can support scaling projects or heavier countertops, ensuring longevity. A recent study by structural engineer Dr. Linda Chen emphasizes that properly supported installations can extend the lifespan of built-ins by decades. Consider integrating internal support systems like steel braces or embedded support rails when you plan to scale or modify your cabinetry. Want to keep your vanities looking flawless? Regular maintenance combined with the right tools can prevent many issues. I encourage you to incorporate a monthly inspection protocol to spot emerging problems early. For more detailed guidance, our effortless storage solutions page offers practical tips on organizing your space for durability and ease of upkeep. Ready to take your maintenance to the next level? Try applying a silicone-based sealant to seams and joints—it’s a simple step that provides long-lasting moisture resistance and keeps your built-ins in top shape for years to come.
Lessons Architects Keep Closer Than You Think
One of the most impactful insights I gained was realizing that even the sturdiest-looking vanity relies heavily on hidden supports and strategic fastening methods. I once assumed that a neat finish would suffice, but neglecting internal bracing or choosing the wrong anchors led to wobbling within months. Now, I always incorporate steel support brackets behind heavy vanities, which has profoundly increased their longevity. Additionally, I learned that not all floor types respond well to the same anchors, emphasizing the importance of matching support systems to your subfloor material. This layered understanding transformed my installations from just visually appealing to truly durable.
Tools and Resources That Elevated My Craft
For those serious about creating stable, professional-looking built-ins, I recommend using the internal brace move {identifier} for extra-wide pantry shelves, which provides an internal support system that I trust deeply. The effortless storage solutions page offers practical tips on selecting robust hardware that can handle daily wear. Moreover, the step-by-step guide for beginners is a game-changer, especially when combined with expert advice available in our comprehensive resources. These tools have consistently helped me prevent mistakes, saving time and money.
Ignite Your Confidence and Transform Your Space
Taking the leap into installing built-in vanities or cabinetry doesn’t have to be daunting. With a solid grasp of internal supports and the right tools, you can achieve results that last for decades. Remember, every project is an opportunity to learn, adapt, and refine your craft—so start today. Dive into the detailed guides and innovative techniques we’ve explored, and watch your space evolve into a masterpiece of stability and style. Your perfect vanity is within reach—fuel your confidence, and make that dream a reality.