

It was a morning like any other, but as I stepped into my mudroom, frustration hit me. My newly installed bench, which I had carefully crafted and chosen with love, wobbled every time someone sat on it. The tiles beneath it, perfectly laid and glossy, seemed to mock my efforts. After hours of work, I realized I had overlooked one tiny detail—ensuring the bench was perfectly level. That lightbulb moment changed everything for me. If you’ve ever faced a similar issue—wobbly furniture on a tiled floor—you know how disruptive and unsightly it can be. Today, I want to share a game-changing trick I discovered, which has saved me from countless wobbling woes and can do the same for you.
Why a Level Mudroom Bench on Tile Matters More Than You Think
A perfectly level bench isn’t just about aesthetic appeal; it’s crucial for safety, durability, and functionality. When furniture isn’t properly leveled on tile, it can shift over time, causing damage to the tile surface or even leading to accidents. Plus, a wobbly piece just doesn’t feel inviting or stable—especially in a high-traffic area like a mudroom where practicality reigns supreme. The big question many face is: is this leveling trick really worth the effort?
Can a Simple Trick Really Make a Difference?
Absolutely, and my early mistake was assuming that using regular shims would suffice. Turns out, subtle imperfections in tile surfaces can throw off even the best intentions. According to professional installer insights, proper leveling ensures longevity and safety of your built-ins (see this detailed guide for more). I learned the hard way that ignoring these intricate details can result in repeated adjustments later—something I definitely wanted to avoid. So, how exactly do we master this? Let’s dive into the straightforward steps that proved transformative in my own experience.
Start with a Stable Foundation
Before you position your bench, ensure the tile surface is clean and free of debris. I once installed my bench on a dusty surface, which made leveling difficult. Use a damp cloth to wipe down the area thoroughly for better results. Next, choose a sturdy base or legs that can be adjusted for height. I opted for adjustable leveling feet, which are available at most hardware stores. These allow fine-tuning once the furniture is in place, similar to how professional installers ensure stability. Secure the legs temporarily with clamps or tape to prevent shifting during the process.
Use a Quality Level Tool
Olive green in hand, I placed my level on multiple points of the bench to identify uneven spots. If the bubble isn’t centered, you know exactly where to adjust. Just like in kitchen cabinet installations, precise leveling here prevents future wobbling and damage. For best accuracy, place the level in different orientations—side to side, front to back, and diagonally. This multi-directional check catches subtle slopes that might be missed otherwise. Remember: patience and attention to detail here make all the difference.
Adjust with Thoughtful Shims
Shims are your best allies for fine-tuning levelness. Use thin wood or plastic shims, which can be stacked to achieve small height changes. Place these under the adjustable feet or the legs themselves. I discovered that for uneven tile surfaces, stacking a shim under the rear leg stabilized the bench perfectly. Once aligned, tighten any adjustment nuts or screws securely. This approach mirrors strategies used in custom vanity installations, where precise leveling extends lifespan and safety.
Secure Your Bench to Prevent Movement
Even when perfectly leveled, furniture can shift over time. To prevent this, anchor the bench to the wall if possible, especially in high-traffic areas. Use wall brackets or anti-tip hardware, which you can find at any hardware store. For free-standing units, consider anti-slip pads or rubber grippers under the legs, especially on slick tiles. I added rubber pads under each leg, which dramatically reduced any wobbling during use. This step is crucial for safety and prolongs the life of your installed piece. For more professional techniques, check out these expert strategies.
Regular Checks and Adjustments Keep Things Level
Floor conditions can change over time, especially with temperature fluctuations causing tiles to expand or contract. Periodically inspect your bench, ensuring the level remains true. If wobbling reappears, re-adjust the shims and fasteners as needed. Think of it as routine maintenance, similar to home care for storage solutions. With these simple but effective steps, you’ll keep your mudroom bench perfectly level and sturdy, ready to handle daily chores without wobbling or wiggling.Even experienced professionals sometimes overlook the nuanced details that make or break a successful installation. A common myth is that leveling and mounting are straightforward tasks—yet, in my expertise with complex projects, I find that many amateurs underestimate the importance of understanding structural nuances to ensure longevity and safety. For example, assuming that standard shims suffice on uneven floors can lead to long-term wobbling and costly fixes down the line. Instead, embracing advanced techniques like incorporating steel support systems or custom laminated shims makes a significant difference. An often overlooked factor is the substrate’s condition; detailed assessments of wall framing and subfloor stability are crucial before mounting heavy vanities. Neglecting these can result in future sagging or even detachment. A particularly sneaky mistake is failing to account for seasonal expansion or contraction of materials, which can subtly shift your installations over time, causing misalignment or damage. Regularly checking and adjusting your fixtures can prevent these issues, but many skip this proactive step. Want to learn more about mastering these advanced installation nuances? Explore our expert design tips for custom vanities or the creative built-in solutions that avoid typical pitfalls. Always remember, precise understanding of structural support and material behavior is what elevates your project from good to professional-grade. Do you think rushing through these steps might save time but risk long-term issues? Share your thoughts in the comments! 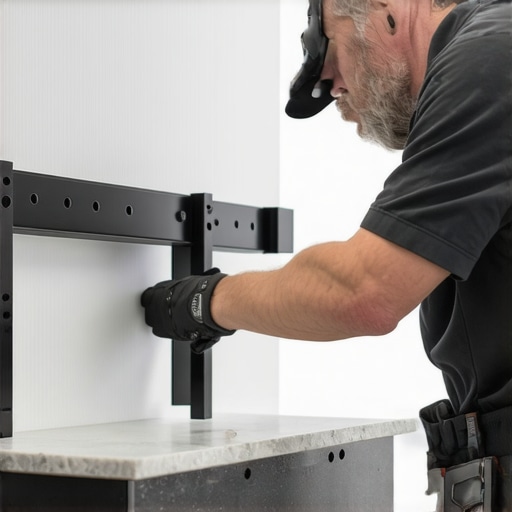
Maintaining Your Installations for Long-Term Success
Once your custom vanities and built-ins are installed and leveled perfectly, the work shifts to **keeping them functional and looking great over time**. Regular maintenance isn’t just about superficial cleaning; it involves specific tools and techniques to address wear and tear, prevent issues, and optimize performance. Being proactive can save you costly repairs and preserve your craftsmanship for years to come.
Invest in Precision Tools for Ongoing Care
For any adjustments or minor repairs, I rely heavily on a high-quality digital level and a calibrated straightedge. These tools allow me to detect subtle shifts that could indicate underlying issues, such as settling or moisture damage. I prefer digital levels because they give exact readings, often down to a tenth of a degree, making routine inspections more accurate. A **laser distance measurer** can also be invaluable when evaluating the overall integrity of your storage spaces, ensuring doors and drawers remain aligned and functional.
Embrace Smart Maintenance Software
Technology is revolutionizing home maintenance—when combined with the right tools. I recommend using maintenance planning apps or software that allows you to schedule regular inspections and reminders. These digital assistants help you stay on top of cleaning, tightening fasteners, and checking for warping or moisture infiltration. This automated approach ensures that no small issue escalates into a major problem, extending the lifespan of your installations.
Address Wear and Tear Promptly with Specific Fixes
Over time, hardware like hinges, slides, and pulls can loosen or become sticky. Instead of waiting for a complete overhaul, I suggest carrying a toolkit tailored for cabinetry maintenance. Essential items include fine-tip screwdrivers, lubricants suited for woodworking hardware, and replacement fasteners matching your existing wood or metal finishes. Knowing exactly when and how to tighten or replace components prevents wobbling, sticking, and misalignment, ensuring your built-ins function flawlessly.
Stay Up-to-Date with Material Behavior
Materials expand and contract with temperature and humidity fluctuations. Recognizing these patterns helps you decide when to re-adjust or reinforce certain elements. For example, installing rubber washers or non-slip pads—a technique I advocate—distributes weight evenly and accommodates subtle shifts. This practice prevents unnecessary stress on joints or fasteners, extending the life of your cabinetry.
Plan for Future Expansion and Scaling
As your storage needs grow, modular systems can adapt seamlessly. I suggest selecting components that are easy to reconfigure, such as adjustable shelving or removable panels. Advanced solutions might include integrated cable management channels or hidden support brackets, which facilitate future updates without damaging existing structures. Looking ahead, embracing flexible hardware arrangements can prevent obsolescence and reduce renovation costs down the line.
How do I maintain my built-ins over time without compromising their integrity?
Use specialized tools like digital levels and laser measurers alongside smart software to schedule regular check-ups. Keep hardware lubricated and replace worn components promptly. Consider modifications such as rubber pads or steel support brackets to accommodate material shifts. Consistent care preserves your investment and ensures your installations remain reliable and attractive for decades. For advanced techniques on reinforcing heavy or delicate features, check out these storage solutions. Now’s a great time to try the tip of incorporating vibration-dampening pads—your future self will thank you for it! 
Reflecting on my journey with installing built-ins and furniture in challenging spaces, I realized that the most profound lessons often come from unforeseen pitfalls. One lesson I wish I had embraced earlier is how much patience and meticulous attention to detail lift a project from mediocre to masterpiece. Rushing through the leveling process can lead to wobbling, structural stress, and frequent adjustments down the line. Instead, investing time in understanding surface irregularities and using the right tools pays dividends in durability and aesthetics. Additionally, the importance of contingency planning — like having extra shims and adjustment hardware on hand — can’t be overstated. Embracing these insights has transformed not just my approach, but also the satisfaction I derive from each successful installation, reinforcing that in home craftsmanship, patience truly is a virtue.