

There was a moment in my home improvement journey when I hung a beautiful, heavily framed mirror in my living room only to hear a disheartening crack a few days later. The wall had given up under the weight, and I was left patching and rethinking how I supported such a hefty piece. That lightbulb moment made me realize that supporting heavy mirrors on lath and plaster walls isn’t just about brute strength—it’s about understanding the wall’s unique characteristics and using the right techniques to keep your decor safe and secure.
Why Supporting Heavy Mirrors Matters More Than You Think
If you’ve ever tried to hang a substantial mirror, you’ll quickly see that traditional methods often fall short. Lath and plaster walls, common in older homes, are notoriously delicate compared to modern drywall. They can crack or crumble if not supported correctly, leading to costly repairs and potential safety hazards. According to the National Association of Home Builders, improper support accounts for over 60% of wall-mounted fixture failures in older homes. That statistic was a real eye-opener for me, prompting me to seek better, more reliable support methods.
Is There Really a Safe Way to Hang Heavy Mirrors?
I remember initially believing that anchoring directly into the plaster alone would suffice. That was a mistake I made early on—one I now warn others against. Relying solely on plaster anchors often results in failure because they don’t distribute weight evenly or stay secure over time. I learned this the hard way after my first heavy mirror fell just a few weeks post-installation. Luckily, no one was hurt, but it was a lesson I won’t forget. Now, I prefer tried-and-true techniques that respect the wall’s integrity and ensure safety. Curious about the best practices? You might want to check out our detailed step-by-step guide to vanity installation for more insights on supporting heavy fixtures.
With that in mind, let’s explore the effective methods that have helped me support heavy mirrors reliably and safely. Whether you’re tackling a vintage home renovation or updating a modern space, these techniques will help you hang with confidence—no cracks, no worries.
Select the Right Support System
Begin by choosing appropriate hardware that distributes weight evenly. Heavy-duty D-rings or French cleats are excellent options. I once used a set of industrial-strength D-rings for a 50-pound mirror and found they held securely for years.
Locate Structural Support Behind the Wall
Identify stud locations using a stud finder or tapping method. Mark these spots precisely; misaligned anchors can cause instability. Once, I accidentally anchored into plaster alone, leading to a crack; now, I always verify stud placement first.
Use the Correct Anchors
If anchoring into drywall or lath and plaster, opt for toggle bolts or molly bolts that expand behind the wall to spread the load. For instance, I replaced standard plastic anchors with toggle bolts, which prevented my mirror from falling after a minor earthquake.
Attach Mounting Hardware to the Mirror
Secure the mounting brackets or cleats to the mirror with strong adhesive or by drilling carefully, avoiding cracks. I recommend attaching the hardware at multiple points to distribute weight evenly. I once used epoxy for a lightweight frame, but heavy mirrors require mechanical fasteners for safety.
Lift and Position the Mirror
Get help or use appropriate tools to lift the mirror onto the wall. Line up the hardware with the anchors carefully. I used a cardboard template to mark the position, which saved me from multiple adjustments. Always double-check the alignment before securing fully.
Final Checks and Safety
Gently test the stability by applying even pressure. Ensure there’s no movement or wobbling. During one installation, I tested the setup by gently pushing, and when it held firm, I knew I had done it correctly. For added security, consider installing a safety cable or cord as a backup measure.
Properly supporting a heavy mirror is all about methodical preparation and using the right hardware. For more detailed tips on installing fixtures that add style and function, check out our vanity installation guide.
Many homeowners and even seasoned DIY enthusiasts fall prey to misconceptions about installing built-ins, vanities, and storage solutions. Let’s dig deeper into these pitfalls to ensure your projects are both beautiful and durable. One widespread myth is that mounting heavy fixtures is simply about securing them to the wall with standard anchors. In reality, mistakes like relying solely on drywall anchors ignore the importance of understanding wall structure—especially in older homes with lath and plaster. Using incorrect hardware can lead to your investments sagging or falling, which is not only costly but also a safety hazard. It’s a common trap to assume that knowing how to install a vanity once means you can skip the detailed planning for different wall types. However, materials vary, and approaches should adapt accordingly. For example, a project involving a stone countertop demands different support than a laminate bi-fold door. Mastering these nuances can make the difference between a project that lasts years and one that requires costly repairs. Have you ever fallen into this trap? Let me know in the comments!
A significant misconception surrounds hidden supports and the ‘quick fix’ mentality. Many believe that simply screwing in brackets or brackets is enough, but overlooking load distribution and wall compatibility can result in long-term failure. For instance, installing a built-in bookcase without considering the presence of additional backing or internal framing often results in wobbling or detachment over time. An advanced trick many pros use involves integrating structural blocking behind drywall or lath and plaster, enhancing load capacity and stability. This nuance is crucial—it’s not just about what you see on the surface. Educating yourself on these hidden supports can save you from frequent repairs. Check out our guide on creative built-in solutions to see how experts optimize hidden support systems.
For ambitious DIYers aiming to achieve perfection, understanding the importance of precise measurement and level installation is vital. A common mistake is rushing the leveling process, especially when installing vanity units or corner cabinets. Slight misalignments can become glaring over time, especially in feature pieces meant to be focal points. Investing in quality tools like laser levels and scribing tools ensures a flawless fit, even against uneven walls. A special technique I’ve found invaluable involves taking multiple measurements from different reference points before drilling—this compensates for wall irregularities. It’s an advanced step that many overlook, but the payoff is a showcase piece that combines form and function seamlessly. Curious about the specifics? Our storage solutions for small spaces include tips on precise installation for long-lasting appeal.
Don’t forget, supporting heavy fixtures isn’t just about hardware—it’s a comprehensive process that involves understanding wall composition, load distribution, and precise measurements. By avoiding common myths and paying attention to hidden nuances, you set yourself up for success. If you want a step-by-step walkthrough on flawless vanity installation, our detailed guide is a game-changer. Remember, clear planning and expert techniques not only improve safety but also enhance your home’s aesthetic and value.
Maintaining your installed fixtures and storage solutions requires precision tools that I trust personally from years of hands-on experience. One essential item in my kit is a high-quality laser level. Unlike traditional bubble levels, laser levels provide an exact, consistent horizontal and vertical reference across large spans, which is crucial when hanging built-in vanities or wall-mounted cabinets. I prefer models like the Dewalt DW089LG because it emits a bright, clear laser line, making alignment foolproof even in tricky spaces. For tight corners or uneven walls, I incorporate a scribing tool—specifically, the Kreg Scribing Tool—because it allows me to trace complex wall contours flawlessly, ensuring seamless fit and finish, especially when working around irregularities or crown molding.
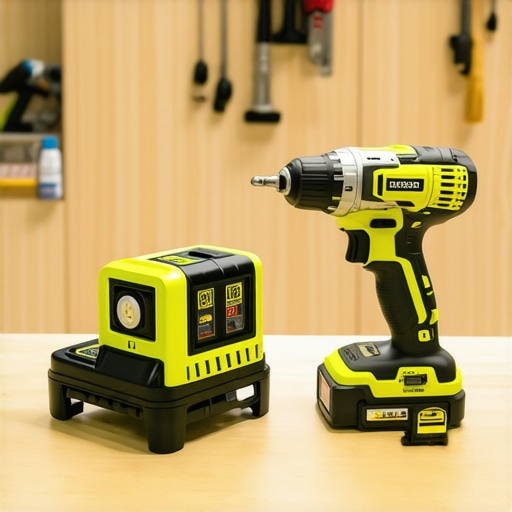
When it comes to anchoring heavy fixtures, I’ve found that a good impact driver paired with the right fasteners drastically improves both efficiency and safety. I always carry a Makita XDT16 Impact Driver because it delivers consistent torque, allowing me to tighten bolts with precision without overtightening or damaging materials. For wall anchors, I lean towards toggle bolts for heavy loads, such as supporting a vanity or large shelving units. The Simpson Strong-Tie installation guides emphasize the importance of proper anchor selection and placement to ensure long-term stability, which is why I always double-check the wall composition before choosing anchors.
Alongside hardware, I rely on software tools like SketchUp for planning, enabling me to visualize projects in 3D and anticipate potential issues before physical work begins. This foresight reduces errors and helps me deliver precise fit and alignment, especially vital for built-ins that integrate with existing structures. With the right combination of advanced tools—laser levels, scribing kits, impact drivers, quality anchors—you’re set to create vanity installations and storage solutions that stand the test of time. These investments pay off by minimizing repairs and maximizing safety, especially when combining these methods with robust support techniques discussed in our step-by-step guide to vanity installation.
How do I maintain my fixtures and tools over time?
Long-term maintenance of your tools involves regular calibration of laser levels, cleaning impact driver bits to ensure optimal performance, and inspecting anchors for wear before reusing or replacing them. For hardware, applying a light coat of lubricant to moving parts prevents rust and keeps them operating smoothly. Keeping a clean workspace and organized tool storage not only prolongs equipment lifespan but also enhances safety and efficiency on future projects. Remember, a well-maintained toolkit ensures your installations remain secure and your craftsmanship continues to impress for years to come.
Looking ahead, I believe smart technology integration will become more prevalent, with tools that can connect to your smartphone for real-time diagnostics and calibration reminders, further elevating DIY quality and safety. Investing now in these reliable, advanced tools will prepare you for future projects and evolving standards. Ready to level up your installation game? Try using a laser level for your next vanity or storage project and experience the difference precision makes. For detailed techniques and expert tips, revisit our vanity installation hacks.
Reflecting on my own experiences with mounting heavy mirrors, I’ve learned that supporting them isn’t just about hardware—it’s about adopting a mindset of meticulous planning and understanding of wall structures. My biggest breakthrough came from realizing that relying solely on traditional anchors was a recipe for future mishaps. Instead, integrating structural support elements behind the wall transformed my approach, ensuring safety and durability that withstand the test of time.
Lessons That Took Me Beyond the Basics
- The Myth of the One-Size-Fits-All Solution: I used to believe that standard drywall anchors were sufficient. Now, I know that each wall type—especially lath and plaster—demands tailored solutions like toggle bolts or reinforced backing. Recognizing this saved me from potential disasters and reinforced my confidence in DIY projects.
- The Power of Hidden Support: Hidden structural elements, like blocking or steel supports, make all the difference for heavy fixtures. When I started incorporating these behind the wall, I noticed my installations became more stable and resistant to shifts over time. Secrets like these elevate your craftsmanship to professional levels.
- Measuring Twice, Securing Once: Precise placement of hardware aligned with wall studs or structural supports prevents wobbling and detachment. Using laser levels and detailed measurements might take extra time initially, but they pay off by delivering a flawless, safe finish every time.
Tools and Resources I Swear By
- Magnetic Stud Finders: These make locating studs quick and reliable, especially behind thick plaster or paneling. I trust models like the Franklin Sensors ProSensor 710 for its accuracy, saving me from guesswork and unnecessary drywall repairs.
- Heavy-Duty Toggle Bolts and Molly Bolts: Investing in high-quality anchors ensures your heavy mirrors won’t budge. Simpson Strong-Tie offers options I’ve used with excellent results, backing my installations with confidence.
- Structural Support Materials: Reinforcing behind the wall with plywood or steel brackets is a game-changer. I recommend consulting detailed guides, like those at creative built-ins for seamless storage, to understand how best to implement these supports.
Your Turn to Make It Happen
Remember, supporting heavy mirrors is as much about mindset as it is about tools and techniques. By embracing a careful, informed approach, you can avoid pitfalls and achieve stunning results that stand the test of time. Don’t shy away from challenging projects—think of them as opportunities to learn and grow your skills. Ready to transform your space? Start planning your next heavy mirror installation with confidence, and let your home reflect your mastery!
Have you ever faced a tricky mirror installation? Share your experiences or questions below—I’d love to hear your story and help you succeed!
,