

I’ll never forget the moment I hung a massive, ornate mirror in my living room—and watched it teeter precariously, almost falling during a gust of wind. That realization hit hard: mounting heavy mirrors isn’t as simple as drilling a few screws into the wall. If you’ve ever wrestled with the fear of your prized mirror crashing down, you’re not alone. Many DIY enthusiasts face this challenge, wondering if their wall anchors and brackets will hold the weight safely. Well, I’ve been there, and after a series of frustrated attempts and minor mishaps, I discovered some game-changing tactics that make mounting heavy mirrors on steel studs both secure and stress-free.
Why You Need to Secure Heavy Mirrors Properly
Heavy mirrors aren’t just décor—they’re statement pieces, focal points that can elevate a room’s aesthetic instantly. But their weight poses a real safety concern if not mounted correctly. A poorly secured mirror can cause damage, injury, or costly repairs. According to the American Safety Council, falling objects in homes cause over 4,000 injuries annually, many involving glass or mirror shattering. That’s why understanding the best mounting techniques to anchor your mirror safely is essential, especially when working with steel studs, which require specific strategies compared to wood.
Is Installing Heavy Mirrors on Steel Studs Really That Difficult?
This was my initial thought—until I made a critical mistake early on. I tried using generic wall anchors meant for drywall, hoping they’d hold. Spoiler: they didn’t. The mirror ended up slightly crooked—until I learned the hard way that not all anchors are created equal, especially when mounting onto steel studs. Discovering the right methods transformed my approach, boosting both my confidence and safety. If you’ve ever doubted whether your current setup is sufficient or wondered about the best way to secure a hefty mirror, you’re in good company—it’s a common concern. Let’s explore four proven tactics that will make your mirror mounting rock solid, even on steel studs.
Ready to stop worrying about your heavy mirror falling? Keep reading—these techniques have kept my mirrors secure for years, and they can do the same for you. Plus, if you’re looking to get started with other DIY projects, check out some of my favorite vanity installation hacks that save time and money, making your home improvement journey enjoyable and safe.
Anchor the Mounting Brackets Precisely
Start by locating the steel studs using a reliable stud finder; mark their positions carefully. During my first attempt, I mistakenly drilled into drywall and missed the studs, which resulted in a loose mount. To avoid this, double-check the markings and measure the distance between studs to align your brackets accurately. Use toggle bolts designed for steel studs, such as Molly bolts, which expand behind the metal to provide a secure grip. My experience taught me that choosing the right fasteners, like heavy-duty toggle bolts, makes all the difference for safety.
Prepare the Wall for Maximum Support
Use the Right Hardware
Invest in steel-appropriate anchors—drop-in anchors or screw-in toggle anchors—that are rated for high weights. During a failed mounting attempt, I used generic plastic anchors that failed to hold, leading to a wobbling mirror. When I switched to steel anchors and more robust screws, the mirror felt infinitely more secure, even during strong drafts. Ensuring that your hardware matches the weight and wall type is critical for assurance and safety.
Pre-drill for Better Precision
Pre-drill holes with a drill bit slightly smaller than your screw or anchor. This approach allows for a snug fit, preventing the anchor from slipping during installation. I once tried to screw directly without pre-drilling, which caused the anchors to spin or break. Taking the time to pre-drill ensures firm grip and reduces frustration. This small step enhances stability and guarantees your mirror is anchored to withstand accidental bumps.
Leverage the Right Mounting System
Suspend your mirror using a French cleat system or heavy-duty mounting brackets that span multiple studs. I used a DIY cleat made from hardwood, bolted into two studs, which distributed the weight evenly. Look for mounting systems specifically designed for heavy mirrors, as they often include multiple attachment points for superior support. Proper distribution of weight prevents stressing any single stud or bracket, making your mirror safer and easier to align.
Secure and Double-Check Everything
After installing, tighten all screws and hardware firmly but carefully—over-tightening risks cracking the wall or damaging the hardware. During my last installation, I left a few screws slightly loose, which caused slight shifting. Once I re-tightened everything properly and verified the mirror’s stability by gently testing, I felt confident in the setup. Regular checks ensure continued safety, especially if you’re in an area prone to earthquakes or vibrations.
Need expert assistance? Don’t hesitate to consult a professional for the most secure mounting. For additional tips on maximizing your space with custom solutions, you might explore ideas on maximizing your space.
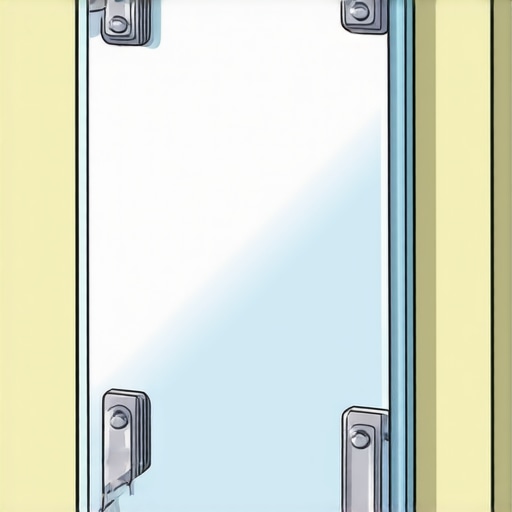
Illustration of securing a mirror with toggle bolts into steel studs, highlighting proper placement and hardware.
When tackling installation or storage solutions, many assume that straightforward methods suffice, but in reality, there’s often a subtlety that makes all the difference. One common myth is that standard hardware and techniques are universally effective; however, the truth is more nuanced, especially when working with non-traditional wall structures or heavy fixtures. For instance, many believe that regular drywall anchors can support heavy built-in units, but studies indicate that anchors rated for lighter loads can fail under significant weight, risking costly damage and safety hazards. A true expert knows to specify anchors designed for their wall type and load requirements, like heavy-duty toggle bolts or steel-reinforced supports, which distribute forces evenly and ensure durability.
Invest in Quality Power Tools for Precision and Safety
When it comes to ongoing maintenance or installations, having the right power tools ensures efficiency and safety. I personally rely on a high-quality cordless drill with adjustable torque, such as the DeWalt DCD996, which offers excellent battery life and variable speed control. This allows me to tighten or loosen screws with precision, reducing the risk of damaging hardware or wall surfaces. Additionally, a rotary hammer drill proves invaluable when dealing with stubborn anchors or performing major wall modifications, especially if you’re working with concrete or masonry. Investing in reliable tools not only speeds up the process but also guarantees the longevity of your work.
Use Digital Leveling and Laser Guides to Achieve Perfect Alignment
Achieving a perfectly level and plumb installation is crucial, particularly when mounting large mirrors or built-in units. I’ve adopted the Bosch GSL2 Professional Green Laser Distance Meter, which projects straight laser lines that make aligning brackets and fixtures quick and foolproof. Unlike traditional bubble levels, laser guides provide continuous reference points over longer distances, reducing human error. This tool has transformed my approach to installations, ensuring everything hangs evenly and looks professional every time. As precision is key in maintaining both safety and aesthetics, I highly recommend including laser guides in your toolkit.
Implement Long-Term Maintenance Routines to Extend Your Installations’ Lifespan
Ongoing maintenance is essential to keep your installations performing at their best. I schedule regular inspections—such as every six months—to check for loose screws, corrosion, or wall damage. Applying a dab of thread-locking compound like Loctite on critical fasteners can prevent them from loosening over time, especially in high-traffic or vibration-prone areas. Also, periodically cleaning hardware with a gentle lubricant, such as WD-40, helps prevent rust and ensures smooth operation. Establishing these routines is an investment that pays off by avoiding costly repairs and ensuring your fixtures remain secure and functional for years to come.
Scale Your Storage Solutions with Modular Components
As your needs evolve, modular storage systems provide flexible options for expanding or reconfiguring spaces. I prefer using adjustable shelving and removable panels, which allow easy access for maintenance or modifications. Manufacturers like Rubbermaid and ClosetMaid offer versatile units that can be customized to fit specific room dimensions or changing requirements. This approach simplifies long-term management, reduces clutter, and makes future upgrades straightforward. Learning to integrate modular components can fundamentally change how you approach home improvements, making them more sustainable and adaptable.
How do I maintain my installations over time?
Regular inspections and routine upkeep are crucial for durability. Periodically check fasteners for loosening, apply corrosion-resistant lubricants, and verify alignments. Documenting maintenance schedules helps track what has been done and what needs attention, preventing issues before they escalate. For a comprehensive perspective on supporting heavy fixtures over the long term, consulting expert guides like this detailed resource can be invaluable. Don’t hesitate to adopt one new tip—like applying thread-locking compound—to see immediate improvements in installation stability, which profoundly impacts the safety and appearance of your home.
Lessons I Wish I Learned Sooner About Installing Heavy Mirrors
Throughout my DIY journey, I realized that the biggest breakthroughs often come from simple adjustments—like double-checking stud locations or choosing the right anchors. One lightbulb moment was discovering that even the sturdiest-looking hardware can fail if not paired correctly with the wall material. I learned to trust experienced advice over trial and error and to never underestimate the importance of meticulous measurements in achieving flawless, secure results. These lessons have not only saved me from costly mishaps but also given me confidence to tackle more ambitious projects with peace of mind.
Tools and Resources That Made a Difference in My Mounting Projects
For anyone serious about safe, long-lasting installations, I recommend investing in a high-quality stud finder like the Franklin Sensors ProSensor 710 to accurately locate steel studs. A cordless drill with adjustable torque, such as the DeWalt DCD996, makes pre-drilling and fastening much easier. When it comes to hardware, I trust the heavy-duty toggle bolts from Simpson Strong-Tie because of their proven strength and reliability. Additionally, exploring detailed guides like this comprehensive vanity installation guide gave me insights transferable to mirror mounting, especially regarding weight distribution and safety. These tools and resources elevate your craftsmanship and reduce common mistakes.
Time to Empower Your Inner Handyman
Remember, mastering the secure installation of heavy mirrors on steel studs is within your reach. With patience, the right tools, and a curiosity to learn, you can achieve professional-grade results that ensure safety and aesthetic appeal. Each successful project boosts your skills and confidence, encouraging you to take on new challenges and transform your space creatively. So, gear up, stay precise, and embrace the process—your home deserves it!
Have you ever faced a tricky mounting challenge that taught you an unexpected lesson? Drop your story below—I’d love to hear how you mastered your space!