

I remember the first time I installed a set of particle board shelves in my closet. They looked sturdy, and I was thrilled—until I loaded them with my favorite books and suddenly watched them bow under the weight. That lightbulb moment made me realize just how fragile particle board can be when it comes to supporting everyday storage. Have you ever experienced that sinking feeling when your beautifully installed shelves start sagging or even collapsing after a few months?
Say Goodbye to Sagging Shelves: The Real Solution
Today, I want to share a solution rooted in personal experience that can save you from future frustration. It’s about switching from particle board to a more reliable material—plywood. Not only does plywood resist sagging better, but it also adds a touch of durability and aesthetic appeal to your built-ins and shelving units. If you’re tired of constantly adjusting, reinforcing, or replacing sagging shelves, keep reading. I’ll walk you through the reasons particle board fails and why plywood is your best bet for a long-lasting, stylish storage solution.
Question Everything: Is Particle Board Shelves Actually Worth the Hype?
When I first started DIY projects, I bought into the hype that particle board was a budget-friendly miracle material. I made the mistake early on of assuming that a quick, cheap fix would serve my needs. Turns out, I underestimated how significantly particle board’s weakness could impact my projects, especially when it came to supporting weight over time. An important tip—always remember that initial savings can lead to long-term headaches. For a more comprehensive look at upgrade ideas, you might want to explore top storage ideas for 2025 to optimize your space with better materials.
Preparing for the Upgrade
Start by removing the existing particle board shelves carefully, unscrewing any brackets or supports. Use a stud finder to locate wall studs if you’re installing new shelving anchors—secure mounting depends on these. Gather high-quality plywood sheets cut to your desired shelf dimensions; for extra strength, opt for ¾-inch plywood. Have your drill, screws, level, and safety gear ready to ensure precise and safe installation.
Installing the Support Frame
Before placing the shelves, build a sturdy support frame or cleats along the wall, anchored directly into studs using lag bolts for maximum stability. Think of this as laying a foundation for a building—it must be solid to support heavy loads. If your wall has uneven surfaces, use shims to create a flush, level support line. For example, in a recent project, I used Pressure-treated plywood strips, secured tightly, to serve as a base for the shelves above a bathroom vanity.
Ensuring Perfect Alignment
Use a level to draw a straight, horizontal line across the wall where the shelves will sit. Mark the stud locations with a pencil. Attach the support cleats along this line, anchoring them into the studs with 3-inch lag screws. Double-check with your level before fully tightening the screws—proper alignment is key to avoiding sagging or bowing later. Remember, a small investment in precise setup avoids bigger problems down the road.
Securing the Plywood Shelves
Place your cut plywood shelves onto the support cleats, ensuring they are flush and evenly supported. Drill pilot holes through the shelves into the cleats to prevent splitting. Then, using screws suitable for wood and drywall anchors if needed, attach the shelves securely from underneath. For added durability, apply a water-resistant sealant or finish, especially in humid environments. I once failed to seal my shelves, leading to warping, but sealing corrected that issue instantly.
Reinforcing for Heavy Loads
If your shelves will bear significant weight, add vertical braces or L-brackets at the ends, secured directly into studs. As a practical tip, use metal corner brackets at the joints for extra rigidity. This approach transforms lightweight shelves into robust storage solutions, capable of supporting heavy items like books or kitchenware. In constructing a spice rack, I used hidden steel brackets to maximize interior aesthetics while ensuring stability.
Final Touches and Adjustments
Check the stability of your shelving units by applying gentle pressure across different points. Adjust supports or add additional brackets if any wobbling occurs. Finally, consider adding edge banding or trim for a polished look, making your plywood shelves both functional and stylish. Remember, each step influences the longevity and safety of your storage; precision and care pay off.
For more ideas on optimizing your storage spaces, explore built-in storage solutions that marry durability with design.
Many homeowners assume that selecting standard shelving or built-in units is a straightforward task, but this overlooks nuanced pitfalls that can undermine long-term functionality and aesthetic appeal. One common myth is that ‘more support equals better support,’ leading to over-reliance on excessive brackets or overly complex framing, which can complicate installation and maintenance. Instead, understanding load distribution and proper placement of support points is crucial—much like expert carpenters emphasize, support should be strategically placed at wall studs and balanced across the span—see how precise stud placement improves stability for [custom built-ins](https://customcabinetrypro.com/creative-built-ins-for-seamless-storage-and-home-aesthetics).”}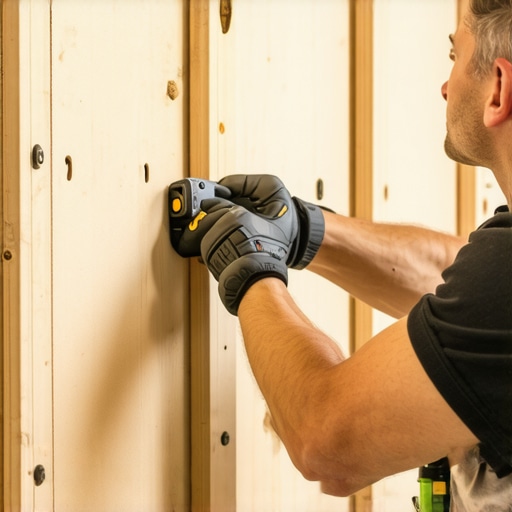 },{
},{
Keep Your Storage Systems in Peak Condition
Maintaining your built-in shelves, vanities, and storage units is essential to ensure they stay functional and attractive over the years. Regular inspection, cleaning, and minor adjustments can prevent minor issues from escalating into costly repairs. I personally prefer scheduling quarterly check-ins, where I tighten loose screws, clean dust and debris, and verify the levelness of surfaces. This proactive approach extends the lifespan of my storage solutions and keeps them looking pristine.
Essential Tools for Maintenance
Having the right equipment makes routine maintenance straightforward. I rely on a digital stud finder to locate wall studs accurately, especially when reattaching support brackets or adding new shelving. A cordless drill with assorted screwdriver bits is indispensable for tightening loose screws without damaging materials. For cleaning, a microfiber cloth combined with a gentle all-purpose cleaner helps remove dust and smudges without scratching surfaces. Additionally, a small level ensures shelves remain perfectly aligned—vital for preventing sagging over time.
The Power of Correct Sealants and Finishes
Applying appropriate finishes and sealants is a game-changer, especially for high-humidity areas like bathrooms or kitchens. I recommend using a water-resistant polyurethane or a silicone-based sealant around edges and seams. Not only does this protect the material from moisture damage, but it also maintains the appearance of your built-ins. For example, sealing plywood shelves prevented warping and staining, ensuring they remained as sturdy and attractive as on installation day. Incorporating these protective layers during initial setup is an often-overlooked step that pays dividends later.
How do I maintain storage solutions over time?
Consistent inspection and cleaning are key. Checking support brackets, hinges, and joints regularly can catch issues early, avoiding structural failure. Using specialized tools like a stud sensor and level ensures your units stay aligned and securely anchored. I also advocate for reapplying finishes or sealants periodically to combat moisture and wear. Remember, a little preventive maintenance goes a long way in extending the longevity and aesthetics of your storage investments. For more ideas on maximizing your space with durable, stylish designs, explore built-in storage ideas. Do try re-sealing your plywood shelves with a high-quality water-resistant finish this month for a noticeable boost in durability.
Looking ahead, innovations in smart materials and maintenance-friendly finishes promise to make upkeep even easier. I predict we’ll see more self-healing surfaces and long-lasting sealants that require minimal intervention. Embracing these advancements now can set your storage solutions up for decades of reliable service.
What I Wish I Knew Before Starting My Storage Projects
- Supporting heavy loads with particle board was a mistake I won’t repeat. Transitioning to plywood made a dramatic difference in durability and peace of mind.
- Misjudging wall stud placements led to weak support and sagging shelves. Accurate stud locating and proper anchoring are game changers.
- Skimping on sealants and finishes compromised my storage’s longevity, especially in humid areas. Proper sealing is essential for lasting beauty and function.
- Overcomplicating support structures often introduces more problems. Sometimes, simplicity combined with strategic reinforcement is the best approach.
- Regular maintenance and inspection can prevent minor issues from escalating. Consistent upkeep extends the life of your storage systems beyond expectations.
My Essential Toolkit for Storage Success
- A reliable digital stud finder helps me avoid guesswork and ensures anchor points are always solid.
- A quality level keeps my shelves perfectly aligned, preventing future sagging.
- High-grade fasteners, like lag bolts and heavy-duty screws, make all the difference when supporting weight.
- A good quality water-resistant sealant protects plywood shelves from moisture damage.
- An ergonomic drill with a variety of bits speeds up installation and ensures precision.
Your Next Step in Storage Dreams
Designing and installing durable storage solutions is both an art and a science. Embracing the right materials and techniques can turn ordinary spaces into long-lasting, stylish integrations. Don’t wait to upgrade; your home deserves smarter, stronger storage. For ideas on integrating custom features seamlessly, explore top storage concepts for 2025 that marry function with design excellence. Remember, every well-planned shelf supports more than just your belongings—it supports your home’s style and your peace of mind. What’s the biggest storage challenge you’re facing right now? Share your story below—let’s solve it together!