

Ever opened your garage door and winced at that sagging ceiling rack, with tools and boxes threatening to tumble down? I know the feeling all too well. I remember the day I was retrieving my old paint cans and heard that unsettling creak from above—that sinking, unstable sag took me by surprise. It clicked then: my garage storage solution wasn’t just a matter of convenience; it was a safety concern.
Why Fixing Sagging Garage Racks Is More Than Just Aesthetic
Garage ceilings are often overlooked—until they start to fail. A sagging rack isn’t just unsightly; it signals compromised structural integrity, risking heavy items crashing down on you or your loved ones. Plus, those racks become less reliable, making it a chore to access your stored gear without worry. An unsafe garage can even affect your home’s value, as potential buyers see neglected spaces.
Could the Costly Fix Be Simpler Than You Think?
Early on, I underestimated the importance of proper reinforcement, thinking a few screws would do. But I learned the hard way—improper fixes can lead to more damage and higher costs. The real game-changer was understanding the specific structural fix for sagging ceiling racks, which involves strategic reinforcement methods that ensure safety and longevity. Interestingly, according to a safety report, garage injuries related to unstable storage are more common than you might imagine, emphasizing the need for a reliable fix (source: National Safety Council).
If your garage ceiling racks have seen better days, don’t resign yourself to a wobbly, dangerous setup. Today, I’ll walk you through methods that have saved my shelves—reliable solutions that can be done by a DIY enthusiast or with a professional touch. Ready to restore safety and order? Let’s start with the core issue and build a sturdy, lasting fix from the ground up.
Assess the Damage and Plan Your Reinforcement
Start by removing all items from the sagging rack, then inspect the support beams and mounting points. I once found a few cracked joists hidden behind clutter, which was eye-opening. Document any damage and sketch a simple diagram of your garage ceiling to plan your fix effectively. This step ensures targeted reinforcement and saves time during installation.
Gather Materials and Tools Needed for Reinforcement
You’ll require steel braces or gussets, heavy-duty lag bolts, washer plates, a drill, stud finder, level, and safety gear. I recommend using steel gussets similar to those described in this guide for added strength. Having all materials ready before starting prevents interruptions and ensures a smoother process.
Locate Structural Joists and Anchor Points
Identify the Support Beams
Use a stud finder to locate ceiling joists and support beams. Mark their positions clearly with painter’s tape. I once missed a support beam and had to drill extra holes, which caused delay. Properly locating these points is crucial for secure anchoring of your reinforcement brackets.
Install Steel Support Braces
Position steel braces perpendicular to the joists, aligning with the sagging areas. Drill pilot holes into the studs, then affix the braces using heavy-duty lag bolts with washers. Ensure the braces are level; a quick trick is to use a bubble level to avoid misalignment that can weaken the support.

The image shows a steel gusset being positioned between ceiling joists for maximum stability.
Secure the Rack to Reinforced Support
Attach the existing ceiling rack to the newly installed braces or gussets using appropriate fasteners. Use a level to confirm the rack is evenly supported. Tighten all bolts securely, double-checking for wobble or movement. I once fixed my rack this way and immediately felt safer, knowing the structure was reinforced against future sagging.
Test and Finalize the Installation
Gently load your rack with lighter items first, then gradually add heavier gear. Observe for any movement or noise. If everything holds steady, you’ve successfully reinforced your garage ceiling support. Remember, proper reinforcement not only restores safety but also extends the lifespan of your storage solutions. For more advanced techniques, consider consulting professional structural strategies.
When it comes to installing vanities, built-ins, or storage solutions, many assume that following the manufacturer’s instructions is enough for a flawless result. However, even seasoned DIYers can overlook subtle nuances that impact the durability and functionality of their projects. One widespread myth is that precise measurements alone guarantee a perfect fit; in reality, minor shifts during installation can lead to misalignments that are difficult to correct later. Understanding the importance of environmental factors—like humidity causing wood expansion—is crucial for long-lasting installations. Experts suggest accounting for seasonal changes, especially in bathroom or garage environments, by leaving slight gaps or using adjustable hardware, as outlined in detailed guides on [vanity installation hacks](https://customcabinetrypro.com/vanity-installation-hacks-that-save-time-and-money).
Another common mistake is over-relying on standard fasteners without considering load distribution. For instance, in heavy built-in shelves, using only screws into drywall can cause sagging or failure. Instead, anchoring into wall studs or adding reinforcements like steel brackets significantly enhances stability. This oversight often results from neglecting to locate stud positions carefully, which can be mitigated with a reliable [stud finder](https://customcabinetrypro.com/step-by-step-guide-to-vanity-installation-for-beginners). Remember, fixing these issues later is far more laborious and costly than doing it right from the start.
Advanced installers also emphasize the importance of understanding the behavior of materials over time. For example, particle board, a common substrate for affordable cabinetry, tends to sag or bow as it absorbs moisture. A typical homeowner might replace sagging shelves only to install new particle board, unaware that a plywood alternative offers higher resistance and longevity. This subtle knowledge can prevent recurrent problems and save money in the long run. For those interested in high-end, durable solutions, exploring [custom-built-in storage ideas](https://customcabinetrypro.com/built-in-storage-ideas-to-declutter-and-enhance-your-home) provides insight into how professional craftsmanship addresses these challenges.
Why do so many installation attempts fail to stand the test of time? Often, it’s because installers overlook the importance of proper support systems—like steel reinforcements or cross-bracing—that distribute weight evenly and prevent wobbling or warping. For example, in large vanities or wall-mounted units, neglecting internal supports can cause the structure to sag or become misaligned, especially when carrying heavy items. Incorporating these hidden supports, as detailed in [professional installation tips](https://customcabinetrypro.com/effortless-storage-solutions-for-a-tidy-stylish-home), ensures safety and durability.
Curious about how to recognize subtle signs of installation issues early? Look out for uneven surfaces, unsteady fixtures, or persistent squeaks. These are often symptoms of overlooked support points or material movement. Regular inspections and understanding material behavior, supported by expert resources, can help you maintain your investments over years.
Have you ever fallen into this trap? Let me know in the comments. Remember, the right attention to hidden details and nuanced techniques makes all the difference between a temporary fix and a lasting solution.
Essential Tools for Reliable Maintenance
To keep your installed storage solutions and vanities in top shape, investing in the right tools is crucial. I personally rely on a high-quality cordless drill with adjustable torque settings, enabling precise fastening without damaging materials. A digital caliper helps measure gaps accurately, especially when adjusting built-ins against uneven walls or ceilings. Additionally, a stud finder with deep scanning capabilities ensures you locate strong support points for future mounting or reinforcement tasks. I also recommend a pneumatic brad nailer for quick, clean attaching of finishing trim or backing panels, and a level with a magnetic edge to keep your installations perfectly aligned during ongoing adjustments.
Software and Resources to Streamline Maintenance
While physical tools are vital, software resources can facilitate long-term planning. I use design apps like SketchUp for visualizing modifications or expansions, helping me anticipate support needs or scaling options. Maintaining a detailed digital inventory of your storage components, including installation dates and repair notes, can prevent unexpected failures and streamline troubleshooting. Websites offering comprehensive guides, such as vanity installation hacks, provide valuable insights into proactive upkeep. Regularly reviewing these resources ensures your solutions stay functional and safe over the years.
Long-Term Results Through Consistent Upkeep
Consistency is key. Schedule routine inspections, ideally every six months, to check for loose fasteners, signs of material wear, or structural shifts. For built-ins, applying a fresh coat of protective sealant or touch-up paint helps prevent moisture damage, especially in humid environments like bathrooms or basements. When it comes to storage, rotating items to not overload shelves or racks prevents unnecessary stress on supporting structures. Over time, small adjustments—tightening bolts, realigning panels—collectively extend the lifespan of your installations, saving money and enhancing safety. Remember, maintenance isn’t just reactive; proactive measures can catch issues before they become costly repairs.
Scaling Up and Future Trends
Looking ahead, modular and adjustable storage systems are gaining popularity, offering flexibility for evolving needs. Integrating smart features, such as sensor-based lighting or climate control within built-ins, can further improve functionality and longevity. As materials continue to advance, expect more durable composites and corrosion-resistant finishes to dominate the market, reducing upkeep requirements. Staying informed on these trends through expert guides and industry updates will help you adapt your storage solutions to last longer and serve better as your space requirements grow. If you’re considering a significant expansion or upgrade, explore detailed techniques like creative built-in designs that combine aesthetics with durability.
How do I maintain my storage and vanity setups over time?
Establish a regular maintenance routine using the right tools—such as a cordless drill, digital caliper, and sturdy level—and leverage online resources for guidance. Schedule periodic inspections, apply protective finishes, and adjust components as needed to ensure long-lasting performance. Embrace new technology and materials as they emerge to future-proof your investments, making your storage solutions both functional and enduring for years to come.
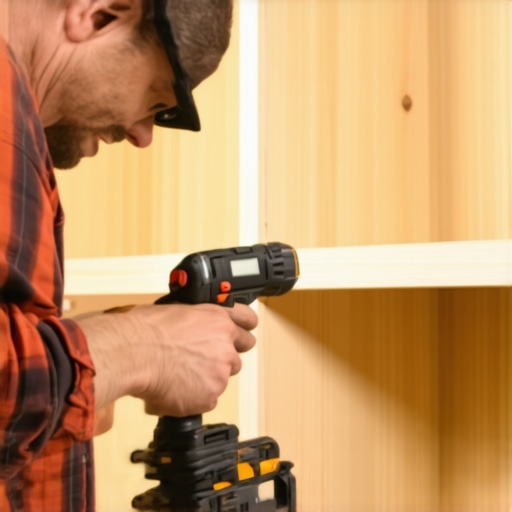
Image illustrating a well-organized workshop with tools like a cordless drill, caliper, and level, emphasizing maintenance readiness.
The Hardest Lesson I Learned About Reinforcing Storage Racks
One of the most eye-opening realizations was that relying solely on surface fixes like screws or brackets isn’t enough against the weight and time-induced stress on ceiling racks. The importance of internal support systems became clear when I watched a small fail into a big safety concern. Proper reinforcement requires embedding steel supports and strategizing weight distribution to prevent future sagging or collapse.
Tools and Techniques I Trust for Lasting Fixes
Using high-quality steel gussets, heavy-duty lag bolts, and a precise level made the biggest difference in my projects. I also rely on a stud finder with deep scanning to locate optimal anchoring points. My go-to resources include industry guides on https://customcabinetrypro.com/the-steel-gusset-strategy-for-overwide-built-in-desks, which offers detailed reinforcement methods that stand the test of time. These tools and insights have helped me avoid costly rehabbing and ensure safety in my garage.
Don’t Let Safety Slip Away—Take Action Now
Reinforcing your garage ceiling storage isn’t just about appearance; it’s about protecting what matters most. Embrace strategic support solutions and leverage trusted tools to create a space that’s as safe as it is functional. Your future self will thank you for building a sturdy, reliable storage system that endures seasonal shifts and daily use. Start today—your garage’s safety and your peace of mind depend on it.