I remember the first time I tried installing a built-in cabinet myself. It was a mess—shelves crooked, doors misaligned, and a sinking feeling that I might have bitten off more than I could chew. That frustrating experience was a real eye-opener. It made me realize that even small mistakes can turn a sleek, custom look into a warped eyesore. If you’ve ever faced similar setbacks, you’re not alone. But here’s the truth: with the right knowledge and a few expert tricks, you can avoid these pitfalls and achieve a flawless installation. Today, I’ll share my tried-and-true tips for making your built-in cabinet project in 2025 a smooth, successful venture.
Why Getting It Right Matters More Than Ever
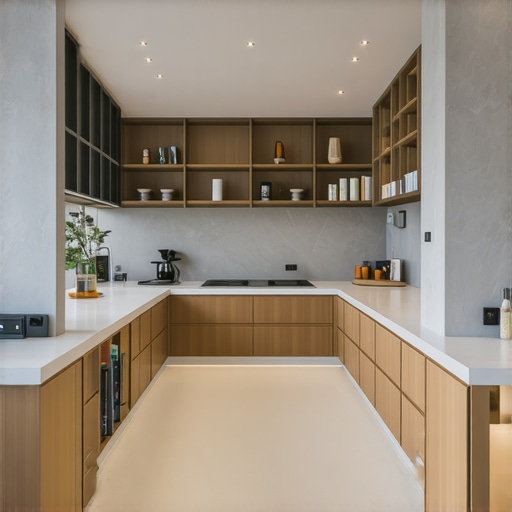
In 2025, the trend toward seamless, integrated storage solutions is more popular than ever. Built-in cabinets aren’t just for aesthetics—they’re about maximizing space, reducing clutter, and elevating your home’s style. But the difference between a stunning feature and a frustrating eyesore often boils down to installation. A sloppy job can ruin the entire look, decrease functionality, and even cause costly repairs down the road. According to recent industry insights, improper installation is one of the leading reasons why many custom cabinetry projects fall short of expectations. That’s why investing in proper techniques isn’t just wise; it’s essential.
Have You Faced This Problem? I Know I Have
Early on, I made a critical mistake: I skipped the preliminary measurements and planning stage. I figured I could wing it, but that resulted in crooked panels and misaligned doors. It’s a common mistake, but one that’s easily avoidable with a bit of preparation. If you’re ready to learn how to sidestep common errors and ensure your built-in cabinets look perfect from every angle, you’re in the right place. For more detailed guidance, check out expert installation tips for 2025 which covers every step to make your project a success. Now, let’s dive into the key steps to get your built-in cabinets installed flawlessly this year and beyond.
Measure Twice, Cut Once
Start by meticulously measuring the space where your built-in cabinet will sit. I once skipped this step and ended up with a cabinet that was slightly too wide, forcing me to cut and reassemble on the fly—an error that cost me hours. Use a reliable tape measure, and double-check your measurements from multiple angles. Mark your cut lines clearly with a pencil before proceeding.
Prepare Your Tools and Materials
Gather all necessary tools: a level, drill, screwdriver, stud finder, and clamps. Ensure your materials are on hand—plywood, screws, shims, and brackets. Having everything ready prevents frustrating interruptions mid-project. For tips on efficient tool use, check out vanity installation hacks.
Find and Secure the Studs
Using a stud finder, locate the wall studs where your cabinet will attach. Mark their positions carefully. My experience shows that screwing into studs ensures maximum stability. If studs are spaced irregularly, use adjustable brackets or additional blocking to anchor your cabinet securely. Remember, a sturdy foundation is key to a flawless finish.
Level and Frame Your Space
Set a level guide along the wall to ensure your cabinet will sit perfectly horizontal. Use shims to correct any unevenness in the wall surface. I once skipped this, and the cabinet doors wouldn’t close properly—an eyesore. Take your time to establish a true horizontal line before attaching the frame or base.
Build and Attach the Frame
Construct the frame using your measured dimensions, ensuring the sides are square with a carpenter’s square. Secure the frame to the wall using screws driven into the studs. Use clamps to hold pieces in place during assembly for added precision. If you’re unsure about framing, consult effortless storage solutions for more guidance.
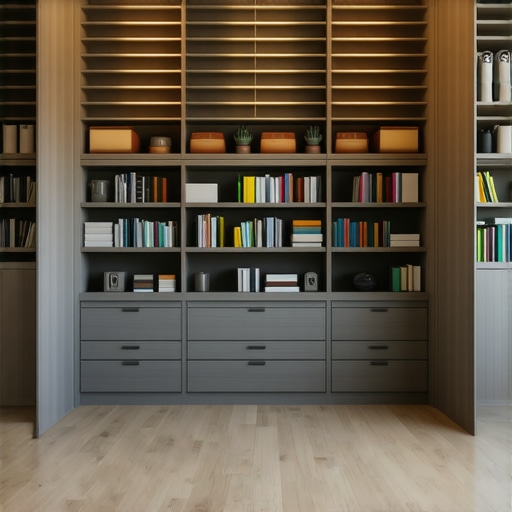
Install Shelves and Doors
Once the frame is secure, install your shelves, ensuring they are level. When attaching doors, double-check alignments with a level and shim as necessary. I once misaligned a door, which required uninstalling and re-hanging—wasted time. Use a spacer to ensure even gaps for a professional look. For expert tips, see expert installation tips.
Final Adjustments and Finishing Touches
After installation, check all doors and shelves for proper alignment. Adjust hinges and hardware for smooth operation. Finish with a coat of paint or stain if desired. My last project looked polished because I took the time to fine-tune each component. Remember, patience is key to a seamless, professional finish.
Many DIY enthusiasts believe that precise measurements and correctly securing the frame are the only critical factors in a successful built-in cabinet installation. However, the real nuance lies in understanding the complexities of wall structures and the common myths surrounding them. One widespread misconception is that all walls are equally capable of supporting heavy cabinetry. This is far from true. Modern homes often feature drywall, which can be surprisingly fragile when it comes to mounting heavy fixtures. Relying solely on drywall anchors without locating and anchoring into wall studs can lead to sagging or even complete failure over time. Experts recommend always using a stud finder to identify supporting beams and securing your cabinets directly into these sturdy points for maximum stability. For detailed guidance, check out expert installation tips for 2025.
Another advanced mistake to watch out for involves neglecting the wall’s electrical wiring and plumbing. Many assume walls are empty spaces, but hidden pipes or wires can cause costly damage if drilled into inadvertently. A common myth is that if a wall seems clear, it’s safe to proceed. In reality, using a multifunctional stud finder that also detects live wires and pipes can prevent accidents. Taking the extra step to consult your home’s blueprints or hiring a professional for a pre-installation scan can save you from dangerous surprises. This nuanced understanding is often overlooked by DIYers eager to complete projects quickly, but it is critical for safety and durability.
Why Does Wall Material Matter for Your Built-In Cabinets?
Many assume that all wall materials are interchangeable when mounting cabinetry, but the choice of wall material directly influences the installation approach and long-term stability. For example, concrete or brick walls require different anchors and drilling techniques compared to drywall or wood paneling. Using inappropriate fasteners not only jeopardizes the cabinet’s security but also risks damaging your wall irreparably. Advanced DIYers understand that investing in specialized tools and fasteners tailored to your wall type can make a significant difference in the durability of your installation. Properly understanding these nuances ensures your cabinets will stand the test of time and maintain a sleek appearance.
Furthermore, the importance of precision in leveling and alignment cannot be overstated. An often-overlooked mistake is assuming that a wall is perfectly square, which rarely happens in older homes. Small deviations can cause misaligned doors and shelves that look unprofessional. Using laser levels and shims, along with meticulous measurements, helps mitigate these issues. Remember, a flawless finish isn’t just about aesthetics — it’s about structural integrity and user experience. For more insights, consider exploring creative built-ins for seamless storage.
Have you ever fallen into this trap? Let me know in the comments. Making these subtle but critical adjustments can transform your project from amateurish to professional-grade, ensuring your investment looks great and lasts for years to come.
Keeping your built-in cabinets in top shape requires the right tools and a proactive maintenance routine. Over the years, I’ve found that using specific, high-quality equipment makes a significant difference in the longevity and appearance of your cabinetry. For instance, I personally rely on a digital angle finder to ensure precise alignments during installation. This tool helps me maintain perfect levels and angles, preventing crooked doors or shelves that can compromise both function and aesthetics. For those looking to streamline their projects, investing in a laser level, such as the Bosch GLL3-330CG, offers rapid, accurate leveling over large surfaces, saving time and reducing errors.
Another essential tool I recommend is a cordless screwdriver with a variable speed setting. It provides control when tightening screws into delicate materials like plywood or MDF, reducing the risk of splitting or damaging the wood. My go-to is the Makita XFD07Z because of its durability and adjustable torque settings. Additionally, a quality stud finder with deep scanning capabilities is crucial, especially when mounting heavy built-ins. I prefer models like the Zircon MultiScanner because it reliably locates framing studs behind drywall, ensuring your cabinets are anchored into the strongest points.
Maintaining your cabinets isn’t just about tools—regular cleaning and inspection are equally important. Use a soft microfiber cloth and a mild cleaner, like a mixture of warm water and a few drops of dish soap, to wipe down surfaces. This prevents dust buildup and preserves the finish. For hardware, I suggest applying a small amount of WD-40 or a similar lubricant to hinges and drawer slides every few months. This keeps everything operating smoothly and prevents squeaking or sticking. If you notice any loose screws or hardware, tighten them promptly to avoid further damage or misalignment.
Looking ahead, I believe the trend toward smart home integration will influence cabinet maintenance. Emerging tools, such as app-controlled sensors that monitor humidity or detect leaks, could help homeowners catch issues early, preventing costly repairs. Similarly, new finishes with self-healing properties are on the horizon, which will make damage less noticeable and easier to repair over time.
How do I maintain my built-in cabinets over time?
To keep your cabinets working flawlessly for years, establish a regular maintenance schedule. Check hardware and hinges quarterly, clean surfaces monthly, and inspect for any signs of moisture or structural shifts. Using a multi-tool like the Dremel 8220 with appropriate attachments allows for precise repairs or adjustments without needing to replace entire sections. Remember, early intervention is key—addressing issues promptly prevents minor problems from escalating into major repairs. For detailed guidance on professional maintenance routines, visit these vanity installation hacks.
Finally, consider scheduling annual professional inspections, especially if your cabinetry is heavily used or exposed to environmental changes. A skilled carpenter can identify hidden issues before they become visible, ensuring your built-in cabinets remain beautiful and functional for decades. Incorporate these tools and habits into your routine, and you’ll enjoy lasting results that keep your space looking polished and organized.
What I Wish I Knew Before Starting
- One of the biggest lessons I learned was the importance of detailed planning. Rushing into measurements without double-checking can lead to crooked installations that ruin the entire look. Take the time to measure multiple times and mark clearly. This little step saves hours of frustration later.
- Understanding wall materials was a game-changer for me. Not all walls are created equal, and using the wrong anchors or fasteners can jeopardize your project’s stability. Always identify your wall type—drywall, brick, or concrete—and choose your hardware accordingly.
- My third insight is about precision. Using a laser level instead of a bubble one made a huge difference. It helped me ensure perfect horizontals and verticals, preventing misaligned doors and shelves. This small investment pays off in a big way.
- Finally, I realized that safety should never be overlooked. Hidden wiring and plumbing are common surprises. Always use a stud finder with live wire detection and review blueprints if available. It’s better to be cautious than to cause costly damage or danger.
Tools and Resources I Trust for Built-In Cabinets
- Bosch GLL3-330CG Laser Level: Reliable, easy to use, and essential for ensuring perfect alignment in large spaces. I trust it for its accuracy and durability.
- Makita XFD07Z Cordless Screwdriver: Its variable speed and power control help prevent damage to delicate materials. It’s my go-to for assembling and fastening.
- Zircon MultiScanner: Detects studs, wires, and pipes behind walls, preventing accidents. I’ve used it countless times to avoid surprises.
- Expert Installation Guides: The expert tips for 2025 offer step-by-step insights that have helped me refine my process and avoid common pitfalls.
Your Next Step in Built-In Cabinet Mastery
Embarking on your built-in cabinet project in 2025 can be incredibly rewarding with the right approach. Remember, meticulous planning, understanding wall materials, and using the best tools will set you apart from the amateurs. Confidence comes from preparation, so take your time, double-check everything, and don’t shy away from seeking expert guidance. Your perfect built-in is just a few careful steps away — so go ahead, start your project today and transform your space!
Have you ever faced a surprise wall condition or mismeasured a space? Share your story below and let’s learn together!
3 Replies to “Effective Storage Solutions & Built-in Cabinets: Installation Tips 2025”
Leave a Reply
Related Posts
Top Storage Solutions & Built-ins for Seamless Organization in 2025
I remember the moment vividly: I was desperately digging through…
Top Storage Solutions & Built-ins for Efficient Space Use in 2025
My Journey to Finding the Ideal Storage SolutionsWhen I first…

Top Storage Solutions & Built-ins for Seamless Organization in 2025
I remember the exact moment I realized my home was…
I really appreciate how this post emphasizes the importance of detailed planning and choosing the right tools for built-in cabinet installation. In my recent project, I overlooked the wall material and initially used standard drywall anchors on brick, which wasn’t ideal and caused some instability. After switching to proper masonry anchors, everything felt much more secure. It’s a reminder that understanding your specific wall type can save a lot of headaches later. I also found that investing in a good laser level made a huge difference—corner misalignments are so subtle but stand out once doors aren’t flush. Have others found certain tools or techniques especially helpful when working with irregular wall surfaces or older homes? Would love to hear tips on adapting installation processes to more challenging conditions.
I’ve recently finished installing built-in cabinets in an older home, and I can totally relate to the challenges with wall irregularities and unexpected wiring. One tip that made a huge difference for me was using a high-quality multi-tool with different attachments; it really helped me smooth out uneven surfaces before mounting. Also, I always double-check for electrical wires with a live wire sensor to avoid accidents—better safe than sorry! I wonder, what are some effective ways others have adapted their hardware or techniques to tackle walls that aren’t perfectly level or have complex wiring? It’d be great to hear some success stories or recommended tools that help keep installations both safe and aligned, especially in tricky old structures.