

I remember the sound like it was yesterday. A low, ominous groan followed by the terrifying crash of my favorite set of Japanese chisels and a heavy drill press rack hitting the cold concrete. I was standing there with a half-finished cup of coffee, paralyzed, as my ‘heavy-duty’ storage system literally peeled off the wall. It was a classic rookie mistake. I had trusted individual plastic anchors and a handful of wood screws to hold up fifty pounds of steel. It turns out, hope is not a structural strategy. If you have ever walked into your garage and noticed that tiny, nagging gap between your cabinet and the wall, you are already living on borrowed time. I have been there, and I have learned the hard way why your garage tool wall is pulling away from the studs. Today, we are going to fix that forever using the hidden plywood cleat. This is not just a piece of wood; it is a structural insurance policy for your most valuable tools.
The Day My Tool Wall Decided to Give Up
My early workshop setups were a mess of mismatched brackets and ‘good enough’ solutions. I thought as long as I hit a stud once or twice, gravity would play nice. I was wrong. The problem is not just the weight; it is the constant vibration of the shop and the way humidity changes how wood grips a fastener. I once spent an entire Saturday morning mounting a beautiful cherry wood cabinet, only to see it tilting by Sunday evening. It was embarrassing. That failure taught me that a localized point of contact is a point of failure. According to data from the American Wood Council, cross-laminated panels like plywood offer significantly higher shear strength and dimensional stability than standard lumber when subjected to vertical loads. This is exactly why the hidden cleat works so well—it transforms a few points of failure into a continuous line of support. Have you ever heard a mysterious ‘pop’ in the garage at 2:00 AM and wondered if your storage was finally succumbing to gravity?
Can a Simple Plywood Strip Outperform Expensive Metal Racks?
You might be skeptical. We have been conditioned to think that expensive steel rails from the big-box stores are the only way to go. But here is the secret: a well-made plywood cleat (often called a French Cleat) creates a mechanical interlock that steel simply cannot match without significantly more invasive drilling. When I finally switched to this method, I realized I could stop garage tool walls from bowing the drywall because the cleat distributes the weight across the entire length of the wall, not just on three or four stressed screws. It is cheaper, it is stronger, and honestly, it looks a whole lot more professional when you can hide the mounting hardware entirely.
Stop Trusting Plastic Anchors with Your Expensive Power Tools
If you are still using those little yellow or blue plastic plugs to hold up anything heavier than a picture frame, we need to talk. I made that mistake early on when trying to anchor tool cabinets to wood stud walls, and I still have the gouge in my floor to prove it. The hidden plywood cleat strategy relies on a 45-degree mitered edge that ‘hooks’ the cabinet to the wall. It is a centuries-old cabinetmaker’s trick that I have adapted for the modern heavy-duty workshop. By the time we are done today, you will have a mounting system that allows you to literally hang from your tool wall without a single creak. We are moving away from flimsy hardware and moving toward real, structural integrity.
Why Your Tool Wall Needs 3/4 Inch Plywood Instead of Scrap
The foundation of a hidden cleat system isn’t the screws; it is the substrate. If you use cheap particle board or thin MDF, the ‘hook’ will eventually delaminate under the weight of your hammers and drills. I always reach for 3/4-inch Baltic Birch or a high-quality cabinet-grade plywood. This isn’t just about aesthetics; it is about the density of the layers. When I first started, I used some old OSB scraps I found under my workbench. Two weeks later, the humidity in my garage spiked, the OSB swelled like a sponge, and my entire wrench rack sagged an inch. I learned that why your plywood shelves are bowing and the edging fix applies just as much to your wall supports. Use the good stuff, and you won’t have to do the job twice.
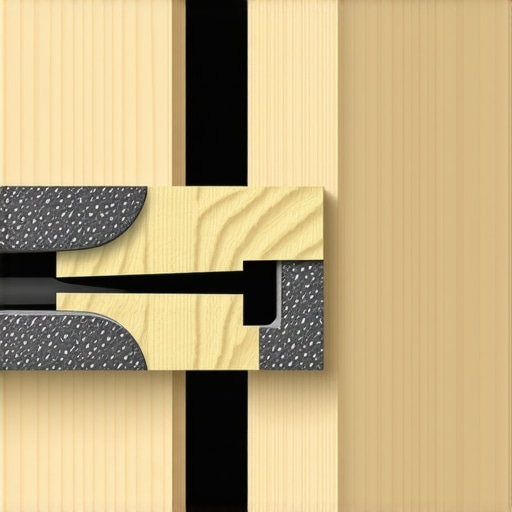
Perfecting the 45-Degree Miter for a Rock-Solid Grip
The magic happens at the table saw. You are going to rip a 6-inch wide strip of plywood down the middle with the blade tilted to a 45-degree angle. This creates two identical pieces with complementary ‘beaks.’ One piece becomes the wall receiver, and the other becomes the cabinet hook. This is essentially a variation of the same structural wall cleat for heavy floating desks that professionals use to hang massive furniture without visible legs. When you cut these, ensure your fence is locked tight. Any wobble in the cut means the tool wall won’t sit flush, and a gap is the first step toward a failure. I keep my off-cuts to use as spacers later on; consistency is your best friend here.
Secure the Wall Receiver Like Your Workshop Depends on It
Now, you need to find your studs. Forget about tapping on the drywall with your knuckles—use a high-quality magnetic stud finder and mark the centers. You aren’t just looking for one stud; you need to span as many as possible to distribute the load. This is the exact moment where people get lazy and reach for the plastic. Don’t do it. We’ve seen why plastic wall anchors fail for heavy shelving, especially in a garage where the temperature swings 40 degrees in a day. Use 3-inch GRK structural screws or lag bolts. I once tried to mount a heavy chisel rack using just two studs on a long span. The drywall actually compressed under the pressure, causing the cleat to tilt forward. Now, I drive a screw into every single stud that the cleat crosses. It’s like building a bridge; the more piers you have, the more weight it carries.
The Final Marriage of Tool Board and Wall
Once your wall cleat is level—and I mean ‘machinist-level’ precise—it is time to attach the sister cleat to the back of your tool board. This is where the ‘hidden’ part comes in. By mounting the cleat a few inches down from the top edge, the tool board itself covers the mounting hardware completely. It’s a trick I picked up from an expert guide to flawless vanity installation tricks and tips. When you lift the board into place, it should drop onto the wall cleat with a satisfying ‘thud.’ Gravity does the work for you, pulling the 45-degree miters together into a mechanical lock. If you can’t hang your own body weight from the board after it’s seated, you haven’t followed the steps. I always give mine a ‘pull test’—if the wall doesn’t move, your tools are safe.
The Level Lies When Your Walls Aren’t Flat
Everyone tells you to grab a four-foot level and draw a line, but here is the contrarian truth: level doesn’t mean stable. Most garage and home walls are ‘wavy’ due to hurried framing or settling. If you screw a perfectly straight 3/4-inch plywood cleat into a bowed wall, you are introducing internal tension into the wood before you even hang a single tool. This tension works against your fasteners 24/7. Professionals know that the scribing trick for installing vanities against out-of-square walls is actually the secret to a rock-solid tool wall too. You have to shim the gaps between the cleat and the drywall to ensure the wood stays ‘relaxed.’ If you don’t, the cleat will eventually pull the screws right out of the studs as it tries to return to its straight shape.
Can your drywall handle the crushing force of a 300-pound cabinet?
The biggest ‘oops’ factor I see in DIY storage is the assumption that drywall has structural integrity. It doesn’t. Drywall is essentially compressed chalk. When you tighten a heavy-duty lag bolt, you are often crushing the gypsum core. Over time, the vibration of your workshop causes that crushed core to turn to powder, creating a microscopic wiggle. This wiggle is why why your garage tool wall is pulling away from the studs even if you hit the center of every timber. According to research from the USDA Forest Products Laboratory, the lateral load-bearing capacity of a fastener is significantly compromised if the substrate it passes through, like drywall, allows for any initial deflection. You must aim for a ‘solid-to-solid’ connection, which often means using specific shims or spacers to bridge the gap and prevent the gypsum from failing under compression.
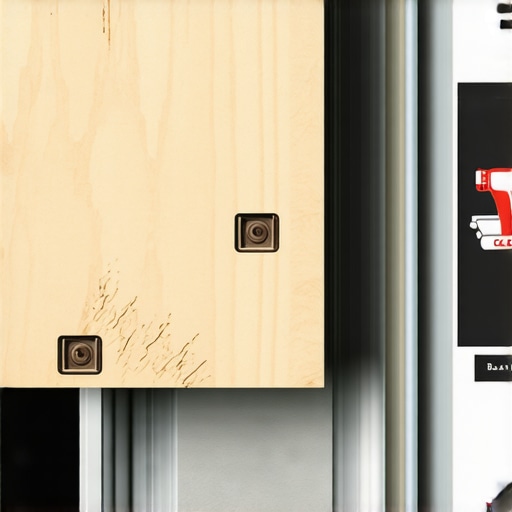
In high-moisture environments like a garage or a bathroom, the rules change again. I’ve seen people use the same tactics for a garage tool wall that they use for smart storage solutions to optimize small bathroom spaces, but they forget about the expansion coefficient. Plywood is stable, but your studs are not. If you don’t leave a tiny expansion gap at the ends of your long runs, the house’s seasonal movement will buck your cleat right off the wall. I once ignored this and watched a 12-foot run of cabinetry literally ‘pop’ off the wall during a humid July afternoon. It’s the same reason why most floor-to-ceiling cabinets gap at the top over time—the house is breathing, and your rigid installation is fighting it. Have you ever fallen into this trap of over-tightening or ignoring wall waves? Let me know in the comments. We need to move toward installations that respect the physics of the home, such as using expert guide to flawless vanity installation tricks and tips to ensure every mounting point is shimmed and secured without stress.
Your Tool Wall Needs a Checkup Every Season
Even the best-engineered system isn’t ‘set it and forget it.’ I make it a habit to do a ‘wrench check’ every six months, usually when the seasons shift and the humidity in my garage swings. Wood is a living material; it expands and contracts, and that can loosen the bite of your fasteners. If you notice even a hair-width gap between your cleat and the drywall, it is time to tighten things up. Sometimes, you might even need to stop garage tool walls from sagging with horizontal steel bracing if you’ve significantly increased your tool load. I once added a heavy cast-iron lathe onto a wall section I’d originally built for hand tools, and I could actually see the plywood start to complain. Adding a steel stiffener saved me from a total rebuild.
The Specific Gear that Actually Holds the Weight
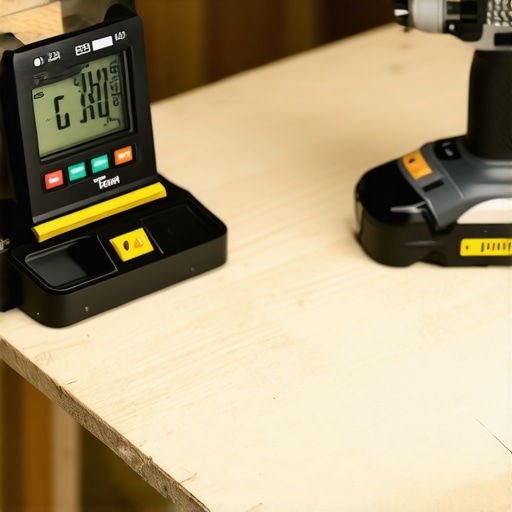
If you want professional results, you have to stop using the ‘free’ bits and screws that come in the box with your mounting brackets. I personally swear by GRK R4 Multi-Purpose screws. They have a self-tapping head that won’t split your plywood and a sheer strength that puts standard gold screws to shame. The APA – The Engineered Wood Association notes in their ‘Plywood Design Specification’ that the fastener withdrawal strength in plywood is highly dependent on the density of the inner plys, which is why choosing a high-grade veneer core is non-negotiable for vertical shear loads. I also recommend using a digital level for the initial install. A bubble level is fine for a picture frame, but when you are trying to level garage cabinets on sloped concrete floors, a digital readout to the tenth of a degree ensures your cleats are perfectly parallel, preventing the ‘climb’ that happens when your tools slowly shift to one side of the rack.
How do I keep my cleat system from sagging after years of use?
Maintenance is mostly about weight management and fastener integrity. Every year, I take a 1/4-inch socket and check the lag bolts that go into the studs. If a bolt turns too easily, the wood fibers in the stud might be stripped, and it’s time to relocate that specific mounting point or move to a larger diameter lag. You can also look into the lag bolt pattern for heavy tool chest anchoring for inspiration on how to stagger your fasteners to distribute stress across more wood grain. For larger installations, I often integrate built-in storage ideas to declutter and enhance your home by turning the cleat system into a full-wall feature that supports everything from the lawnmower to the shop vac.
The Next Era of Modular Shop Storage
Looking ahead, I see the DIY world moving toward a ‘hybrid’ cleat system. We are already seeing people combine the 45-degree plywood cleat with 3D-printed tool holders and CNC-machined rails. This allows for the structural strength of the structural wall cleat for heavy floating desks while adding the hyper-organization of custom-molded plastic. It’s the ultimate way to create effortless storage solutions for a tidy stylish home, even in the middle of a sawdust-filled workshop. I predict we will soon see ‘smart cleats’ with integrated LED lighting or power strips built right into the plywood receiver. If you are feeling adventurous, try adding a small 1/8-inch shim behind the bottom of your wall cleat; it creates a slight inward tilt that makes the connection even tighter under heavy loads. Give it a shot on your next small rack—you’ll feel the difference the moment you hang your first drill.
The Hard-Won Secrets of a Wall That Never Moves
After decades in the shop, I realized that the best mounting systems are invisible. One ‘lightbulb moment’ for me was discovering that even the most expensive built-in storage ideas to declutter and enhance your home only work if you respect the grain of the wood. Here is what I wish I’d understood sooner: first, a single long cleat is always superior to ten individual brackets because it distributes the stress. Second, humidity is a silent killer; always use a moisture barrier if your garage wall is concrete. Finally, do not be afraid to over-engineer. When I stopped worrying about ‘wasting’ plywood and started building for maximum shear strength, my shop stress disappeared. I no longer check the wall every time I hear a temperature-related pop in the night.
My Go-To Kit for a Lifetime of Shop Support
You do not need a massive budget, but you do need the right hardware. I swear by 3/4-inch Baltic Birch because it has no internal voids—unlike the stuff that causes why particle board shelves sag and the plywood solution-2. For fasteners, I only use GRK R4 structural screws; they provide a mechanical bite that standard wood screws lack. #IMAGE_PLACEHOLDER_E# I also recommend keeping a digital level handy to ensure your wall receiver is perfectly plumb, which is the same logic used for how to level garage cabinets on sloped concrete floors-2. These tools turn a guessing game into a structural certainty.
Stop Worrying and Start Building
Building a hidden plywood cleat system is more than just a weekend project; it is about reclaiming your peace of mind. When your tools are secure, you can focus on the craft instead of the equipment. Whether you are looking for effortless storage solutions for a tidy stylish home or just a way to keep your chisels off the concrete, this method is the gold standard. Grab your saw, tilt that blade to 45 degrees, and build something that will outlast the house itself. What is the heaviest tool you are planning to hang on your new cleat system? Let me know in the comments below.