

It was 2:00 AM on a Tuesday when a sound like a gunshot echoed through my master bedroom. I stumbled into the walk-in, heart racing, and found a scene of total wardrobe carnage: a mountain of blazers, winter coats, and formal dresses had staged a collective floor-ward coup. The middle bracket of my “heavy-duty” rod hadn’t just bent; it had physically departed the wall, taking a fist-sized chunk of drywall with it. We’ve all been there, haven’t we? Standing in the doorway, staring at a bowed rod and praying that adding one more sweater won’t be the final straw. The truth is, most standard closet setups are destined for this kind of heartbreak because they rely on the flimsiest part of your home to do the heaviest lifting. [image1]
The Real Reason Your Closet Rod Keeps Bowing
I used to think that the solution was simply buying a thicker piece of hardware. I even tried upgrading to a heavy-gauge steel pipe, thinking brute force would win. But I quickly realized the rod wasn’t the weak link—the wall was. When you have a wide span, the sheer leverage of forty or fifty pounds of clothing acts like a pry bar, slowly but surely yanking your screws out of the gypsum. Early in my DIY journey, I made the classic mistake of trusting those little plastic butterfly anchors that promise “50-pound weight limits.” Spoiler alert: those ratings don’t account for the constant vibration of sliding hangers or the sudden weight of a damp winter coat. If you’ve ever wondered why your closet rod bracket is pulling out, it’s because it’s fighting a battle against physics without any structural backup. According to the USDA Forest Products Laboratory, the load-bearing capacity of a fastener is only as good as the substrate it’s biting into, and 1/2-inch drywall is basically compressed chalk. We need to stop patching the holes and start reinforcing the bones of the closet itself. Today, I’m going to show you how a hidden plywood header—a trick I perfected after my third expensive drywall repair—can make your closet feel like it was built by a structural engineer.
Is a Plywood Header Actually Worth the Effort?
You might be thinking that ripping into your wall for a few shirts seems like total overkill. I totally get the skepticism. But consider how much time and money you’ve already spent on smart storage solutions or fancy organizers only to have the foundation crumble beneath them. This hidden header isn’t just about raw strength; it’s about eliminating that dreaded “closet anxiety” every time you reach for a coat. It’s the same logic professional installers use when fixing wide closet openings or preventing particle board shelves from sagging in high-end builds. Have you ever noticed that subtle, sagging “smile” in the middle of your hanging space? That’s your warning sign. Tell me, have you ever had a shelf or rod collapse on you in the middle of the night, or am I the only one who has lived through that mini-earthquake? I’ll be honest: my first attempt at this was a bit of a disaster. I didn’t account for the thickness of the plywood and ended up with a rod that sat way too far forward, making the doors hard to close. But those failures taught me the “stealth” method I’m sharing now. We aren’t just slapping wood on a wall; we’re creating a structural bridge that transfers every ounce of weight directly into the studs, hidden perfectly behind your trim. By the time we’re done, you’ll be able to hang your entire winter wardrobe—and maybe even do a pull-up on the rod—without a single creak or groan from the walls. If you are tired of wobbly setups, you might also want to check out how we fix wobbly entryway lockers using similar structural reinforcement.
Find Every Stud Before You Start
To begin this reinforcement, you have to look past the surface of the wall. We are building a bridge, and every stud is a support pier. If you miss even one, you are leaving a weak point in the center of your span. I once tried to ‘eyeball’ the stud locations on a quick job for a friend, only to have the entire header pull away from the wall a month later because I’d only hit the edges. Use a high-quality stud finder to mark the center of every 2×4 along the path where your rod will sit. This is the only way to ensure the load is transferred to the home’s framing. This process is similar to the structural header trick for wide closet openings where the goal is to create a solid mounting surface where none exists naturally.
The 3/4-Inch Plywood Bridge Strategy
The secret weapon in this build is a strip of 3/4-inch ACX plywood. I prefer plywood over solid lumber because the cross-grain layers are significantly less likely to split when you drive large screws near the edges. Cut a strip about 4 inches wide that spans the entire length of your closet wall. This strip acts as a ‘structural cleat.’ It’s the same logic I use when implementing the hidden plywood cleat for mounting heavy tool walls in high-traffic garages. You are going to screw this strip horizontally into every single stud you marked earlier using 3-inch cabinet screws. I remember a project where I used 1/2-inch plywood to save a few dollars, and the bracket screws actually poked through the back and hit the drywall, preventing them from tightening fully. Stick with the 3/4-inch stock; it gives the hardware enough ‘meat’ to bite into without compromising the wall behind it. #IMAGE_PLACE_HOLDER_B#
Mount Brackets into Solid Wood Not Drywall
Once your plywood header is secured to the studs, you’ve essentially turned your entire wall into a mounting surface. You are no longer tethered to the 16-inch spacing of the studs for your bracket placement. You can now place your rod brackets exactly where the load is heaviest. If you have ever wondered why plastic wall anchors fail for heavy shelving, it is because they rely on the tension of the drywall to stay in place. By mounting your brackets directly into the plywood header, you are using mechanical shear strength instead. For extra-wide spans, I always recommend adding a center support bracket fastened to this same header. If you are dealing with deep shelves above the rod, you might also look into the heavy-duty plywood gusset for wide closet shelves to prevent the shelf itself from bowing down and putting extra pressure on your rod assembly. This tiered approach to reinforcement ensures that the weight of your winter coats is distributed across the entire wall frame rather than localized on a few failing screws.
Now, here is where most DIYers—and even some pros who are rushing—hit a wall. There is a common belief that as long as your bubble level says you’re good, the job is done. But I’m going to tell you something controversial: a level is only half the battle. If your floor has a slight slope or your walls have a ‘belly’ in the middle, a perfectly level closet rod or vanity will actually look crooked to the naked eye. This is what we call the ‘visual level’ versus ‘mechanical level.’ One of the biggest ‘oops’ factors I see in bathroom projects is ignoring how moisture interacts with these heavy-duty mounting points. People spend thousands on expertly designed custom vanities, only to mount them with standard zinc screws that corrode over five years of shower steam. If you aren’t using stainless or high-quality coated fasteners in a humid closet or bath, you’re building a ticking time bomb. I’ve seen beautiful sleek built-in vanities literally sag off the wall because the installers didn’t account for the weight of the stone top combined with the softening of the wood from moisture.
Why Your Bubble Level Might Be Lying to You
In my experience, the ‘straightest’ level reading often highlights how crooked your house actually is. When you are performing flawless vanity installation, you have to prioritize the gaps over the bubble. If you level the vanity but leave a huge, tapering gap against the side wall, it looks like a mistake. This is why pros use a process called scribing to shave the wood to the exact contour of the wall. It’s an advanced move, but it’s the difference between a high-end built-in and something that looks like it was thrown together from a box.
What happens when your closet walls aren’t actually square?
This is the advanced problem no one talks about. In 90% of homes, the corner where your closet rod meets the side wall is not a perfect 90-degree angle. If you force a rod or a shelf into a tight, out-of-square corner, you are creating lateral tension that wants to pop your brackets right out of the wall. To fix this, you need to use the scribing trick for installing vanities or shelves. You aren’t just cutting a straight line; you’re tracing the unique ‘signature’ of your home’s imperfections into the wood. 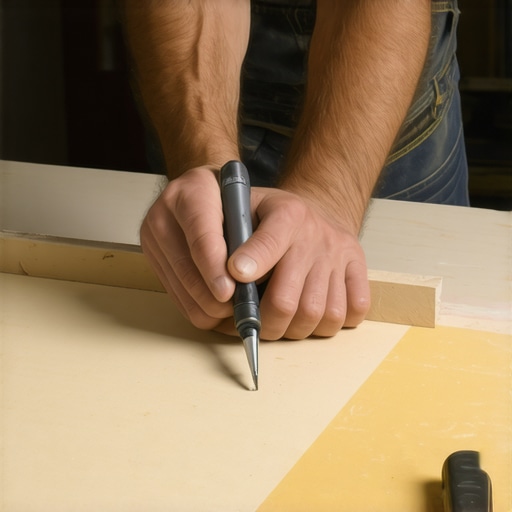 According to the Architectural Woodwork Institute (AWI) Quality Standards, the structural integrity of any built-in depends heavily on the ‘shim-to-load’ ratio. If you have a gap between your plywood header and a bowed wall and you just crank the screw down, you’ve already failed. You are putting the screw in ‘tension’ rather than ‘shear.’ You must shim that gap so the wood remains flat while the screw pulls it tight. This is the same reason why cabinet doors sag even when the hinges are ‘heavy duty’—the frame itself is under invisible stress.
I also want to warn you about the ‘over-tightening’ trap. We think more torque means more safety. In reality, over-driving a screw into a stud can strip the wood fibers, turning your solid anchor into a loose peg. It’s better to use a stealth ledger or a cleat to distribute that weight. Have you ever fallen into this trap where you thought more force was better, only to hear that sickening ‘pop’ of a stripped screw? Let me know in the comments. If you’re struggling with movement, you might also find that your drawer slides bind because the whole unit shifted a fraction of an inch during that final, over-zealous tightening.
To avoid that sickening ‘pop’ I mentioned earlier, you need to upgrade your toolkit. I never walk into a closet or bathroom project without an impact driver specifically for those 3-inch cabinet screws. Unlike a traditional drill, the ‘tap-tap-tap’ action of an impact driver prevents the bit from camming out and stripping the head, which is essential when driving into a dense plywood header. I also swear by Star-drive (Torx) screws. If you are still using Phillips head screws for structural headers, you are essentially gambling with your drywall. When you are following a step-by-step guide to vanity installation, having a dedicated scribing tool—not just a compass from a middle school math kit—will save you hours of frustration and gaps. If your alignment is off by even a millimeter, you’ll find that your drawer slides bind or your doors won’t shut flush against the frame.
How do I keep my heavy-duty closet from failing years later?
Maintenance is the part of DIY no one puts on Instagram, but it’s the most important for longevity. Every six months, especially during the transition from humid summers to dry winters, I do a ‘stress check.’ I literally grab the closet rod and give it a firm tug. If there is any movement, it means the wood fibers in your studs have compressed or the fasteners have loosened due to thermal expansion. If you’ve built your system in a bathroom, you need to stop cabinet doors from warping in humid bathrooms by checking the seal on your plywood edges and hardware regularly. Moisture is the silent killer of structural integrity. According to the National Kitchen & Bath Association (NKBA) Planning Guidelines, vanity installations should account for a minimum static load of 200 lbs, but I always aim for 400 lbs to compensate for the weight of heavy stone tops and the inevitable ‘lean’ of a person. 
Where the Custom Storage World is Heading Next
In the next few years, I predict we’re going to see a massive shift toward ‘smart’ structural monitoring in residential built-ins. Imagine a closet rod with an integrated strain gauge that pings your phone if the weight exceeds the safe limit of your structural header. For now, we still rely on the internal support move for heavy stone vanities to keep things safe and stationary. If you’re looking to scale your storage, don’t just add more rods; think about maximizing space with innovative built-in solutions. This might mean replacing those flimsy old particle board units with a plywood replacement for sagging shelves. My big tip for you this week: go out and buy a box of high-quality structural screws and replace the two center screws in your closet rod brackets today. It is a five-minute fix that could save you a 2:00 AM disaster and keep your wardrobe exactly where it belongs—off the floor.
My Most Painful Lessons in Storage Engineering
After years of fixing collapsed rods and sagging shelves, I’ve realized that the difference between a amateur job and a professional installation isn’t just the tools—it’s the mindset. Here are the lightbulb moments that changed everything for me:
- Drywall is never your friend: No matter what the packaging says, drywall is a cosmetic surface, not a structural one. If you aren’t biting into wood or a reinforced header, you’re just waiting for gravity to win.
- Moisture is a silent structural thief: In bathrooms, steam can soften wood fibers over time. I always recommend using the moisture barrier trick for vanities against cold walls to prevent the back panel from delaminating and losing its grip on the fasteners.
- The leverage of a 12-inch shelf is massive: We often forget that a shelf isn’t just sitting there; it’s acting as a lever against your wall. This is why I switched to replacing particle board with plywood for any span over 24 inches.
- Shims are not optional: Cranking a screw into a gap between the wall and your cabinet doesn’t make it tight; it just stresses the cabinet frame until it cracks.
The Gear That Makes Structural Work Easier
If you want to stop the cycle of repairs, you need to stop using the hardware that comes in the box. Here is what I keep in my bag for every stylish storage project.
First, throw away your Phillips head screws and switch to Torx (Star-drive) structural screws. They won’t strip, and they pull the wood together with incredible force. Second, invest in a dedicated scribing tool. This allows you to perform the scribing trick for installing vanities perfectly against wonky walls, which ensures the weight is distributed evenly. Finally, always keep a stash of 3/4-inch ACX plywood off-cuts. These are the building blocks of the ‘hidden headers’ we discussed, providing a much more stable base than any plastic anchor ever could.
Your Path to a Rock-Solid Home
Building high-quality storage solutions isn’t about being a master carpenter; it’s about respecting the physics of your home. When you take the extra twenty minutes to find the studs, install a plywood header, and shim your gaps, you aren’t just hanging a rod—you’re building peace of mind. You’re ensuring that your morning routine won’t be interrupted by the sound of crashing wood and torn drywall. Whether you are looking for smart storage solutions for small bathrooms or a massive walk-in closet, the foundation is the same: transfer the load to the frame, and your work will stand for decades.
Have you ever had a closet rod or a heavy shelf collapse on you in the middle of the night? Let me know about your DIY horror stories—or your success stories—in the comments below!