

I will never forget the sinking feeling in my gut when I realized my beautiful, custom-built library unit looked like it belonged in a funhouse. I had spent weeks in the workshop crafting these massive walnut bookcases, only to bring them into a modern living room with those trendy bullnose, rounded drywall corners. I tried to just push the unit against the wall, thinking I could hide the massive gap with a thick bead of caulk. It was a disaster. It looked messy, unprofessional, and quite frankly, it broke my heart. I almost quit right there. But that failure taught me the most valuable lesson in carpentry: the wall is never your friend, especially when it is rounded. Today, I am going to share the exact technique I use to make built-ins look like they grew directly out of the wall, no matter how many curves your drywall throws at you. We are going to turn that awkward gap into a seamless transition that will make your neighbors think you hired a master craftsman.
Bullnose Corners are a Cabinetmaker’s Nightmare
Believe me, I know the frustration. You want creative built-ins for seamless storage, but those rounded edges make it feel impossible to get a tight fit. Most DIYers try to ignore the curve or use trim to cover the mistake, but that always looks like an afterthought. When I was first starting out, I tried to freehand the cut with a jigsaw, thinking my eye was steady enough. I was wrong. The result was a jagged, wavy mess that I ended up throwing in the scrap pile. The secret is not in your steady hand; it is in a simple tool and a bit of patience. Learning how to fit built-ins into out-of-square alcoves is one thing, but mastering the scribe against a bullnose corner is the true test of a pro.
Will This Technique Actually Save Your Sanity?
You might be thinking that scribing sounds like a lot of extra work for a tiny detail. Is it really worth the hassle? Let me tell you: yes. According to the Forest Products Laboratory, wood naturally expands and contracts with the seasons, and a poorly fitted cabinet will only show those gaps more prominently over time. A proper scribe allows the piece to sit flush, providing better structural support and a finish that stays beautiful for decades. If you have ever struggled with why most floor-to-ceiling cabinets gap at the top, you know that the devil is in the details. Have you ever stared at a gap in your home and wondered if there was a better way to hide it? I promise there is, and it starts with a simple compass and a sharp pencil. By the time we are done, you will stop fearing those rounded corners and start seeing them as an opportunity to show off your skills. Let’s get your tools ready and dive into the first step of the process.
Forget the Tape Measure and Grab a Compass
To start, you need to think of your scribe piece as a sacrificial lamb. It is the bridge between your perfectly square cabinet and the imperfectly rounded wall. I remember working on a project where I was trying to implement custom vanities expert design tips in a cramped bathroom with those aggressive bullnose corners. I thought I could just measure the widest point and the narrowest point and connect the dots. I ended up with a gap big enough to swallow a pencil. The lesson? You cannot measure a curve; you have to trace it. A compass is not just for geometry class; in carpentry, it is the tool that mirrors reality onto your material. By setting the compass to the exact width of your largest gap, you create a physical ‘copy’ of the wall’s profile.
Set Your Compass for a True Trace
Position your built-in exactly where you want it to live permanently. Ensure it is plumb and level, even if that means the gap at the wall looks horrifying. If you move the cabinet after you scribe, the line becomes useless. Place the metal point of the compass against the bullnose corner and the pencil point on your filler strip. As you drag the compass down, the metal tip follows the curve of the drywall, while the pencil replicates that exact wiggle and arc onto the wood. This technique is similar to the scribing hack for fitting built-ins against stone fireplaces, where the surface is even more erratic.
Angle Your Cut to Avoid Heartbreak
Once you have your line, the temptation is to cut it straight at a 90-degree angle. Resist that urge. If you cut straight, the back of the wood might hit a bump in the drywall before the front edge does, leaving a visible seam. Instead, use a jigsaw and tilt the base plate about 5 or 10 degrees. This creates a ‘back bevel.’ By removing more material from the rear of the board, you ensure that only the crisp, finished front edge makes contact with the wall. It is a trick I use constantly when performing a step-by-step guide to vanity installation because it allows the wood to ‘bite’ into the drywall for a seamless look.
Refine the Edge with a Sanding Block
No matter how steady your hand is with a jigsaw, the cut will have tiny vibrations. Take a 100-grit sanding block and gently work the edge down to your pencil line. This is where you ‘sneak up’ on the fit. On that walnut library project I mentioned earlier, I spent nearly forty minutes just sanding the bevel on one single strip. It felt tedious, but when I finally pushed the unit into place, the gap disappeared. It looked like the wood had been poured into the shape of the wall. This level of detail is what separates built-in storage ideas to declutter a space from professional-grade installations that actually add value to your home. If the wood is still hitting the peak of the bullnose, simply sand more off the back bevel until the front edge sits flush against the curve.
The Myth of the Zero-Gap Fit
Most carpenters will tell you that the goal of scribing is an airtight, zero-tolerance fit. In my experience, that is actually a recipe for disaster. While a tight fit looks incredible on day one, wood is a living material that reacts to its environment. I have seen high-end built-in storage ideas to declutter actually buckle and crack because the installer didn’t account for seasonal expansion. The Architectural Woodwork Institute (AWI) notes in their Quality Standards that even premium-grade installations must account for environmental shifts. If you scribe a walnut filler in a humid workshop and then install it in a bone-dry, climate-controlled living room, that ‘perfect’ fit will eventually pull away or, worse, put so much pressure on the wall that it pops the drywall nails. True expertise lies in knowing where to leave a ‘hair’ of space and where to be tight.
Why Your Perfectly Scribed Unit Still Pulls Away
Even with a master-level trace, you might find your unit shifting weeks later. If you have ever wondered why most floor-to-ceiling cabinets gap at the top, it is rarely due to a bad cut. It is usually because the weight of the cabinet is settling into the subfloor while the ceiling stays put. This is a common issue when people transition from basic effortless storage solutions to massive, floor-to-ceiling libraries. Similarly, understanding why custom closets pull away from ceiling joists is vital; if you aren’t anchoring into the primary structure with the right hardware, no amount of scribing will save the look.
Stop the Screw Before You Crack the Frame
Here is the ‘oops’ factor that ruins more professional projects than I care to admit: the Lever Effect. When you drive a structural screw through your scribed filler into a wall stud, you are applying immense pressure. If there is a hollow pocket behind that filler strip—which happens constantly with bullnose corners—the screw will pull the wood into that void. I have seen beautiful face frames snap right at the joint because the installer didn’t place a shim directly behind the screw. Following an expert guide to flawless vanity installation means learning that shims aren’t just for leveling; they are for providing a solid backing for every single fastener. 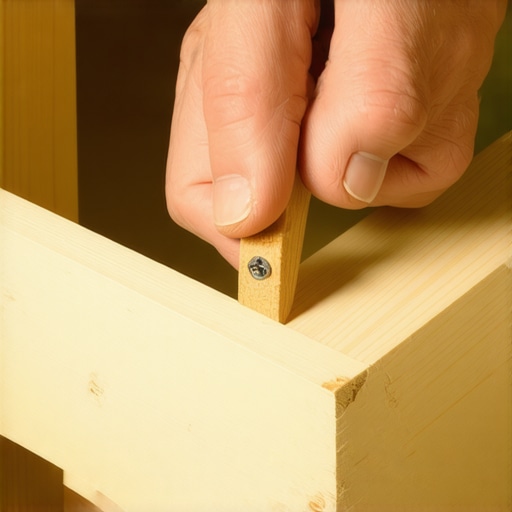 Have you ever fallen into this trap where you tightened a screw and heard that heart-sinking ‘crack’ as the wood gave way? Let me know in the comments. Mastering these hidden nuances is what separates a weekend project from step-by-step guide to vanity installation success that stands the test of time.
Upgrade Your Toolkit Beyond the Basic Compass
If you are still using that silver compass from your 5th-grade geometry kit, please, for the sake of your sanity, throw it away. I struggled for years with pencil points that flexed or pivot points that slipped mid-trace. Today, I never walk onto a job site without a dedicated scribing tool like the FastCap AccuScribe Pro. It has a flat base that stays perpendicular to the wall, which is the only way to get an accurate read on those tricky bullnose corners. Using the right gear is one of those vanity installation hacks that save time and money because it prevents the ‘cut-and-hope’ cycle that wastes expensive lumber. When I scaled my business from small repairs to full-room libraries, this tool was the single biggest factor in speeding up my workflow.
How Do I Keep My Built-ins Looking Flush Years Later?
The work doesn’t end the moment you drive the last screw. Because homes breathe, that perfect scribe might show a tiny hairline gap during the dry winter months. I always recommend using a high-quality, elastomeric caulk that mimics the color of your wood or wall. Unlike standard painters’ caulk, elastomeric versions can stretch up to 200% of their original size. This ensures your creative storage solutions for vanities or bookcases don’t develop ugly cracks when the humidity drops. If you notice structural shifts, you might need to investigate why cabinet doors sag and the three-hinge solution to keep the weight balanced properly.
Precision Sanding is Your Secret Weapon
After the jigsaw does the heavy lifting, the final fit happens with a sanding block. I personally use a rigid cork block because it doesn’t round over the crisp edge of my back-bevel like a soft sponge would. According to technical data from Wood Magazine, even premium kiln-dried hardwoods can shift significantly; they note that a 12-inch wide board can expand or contract by as much as 1/8th of an inch depending on seasonal humidity. This is why that back-bevel I mentioned earlier is so vital—it gives the wood a tiny bit of ‘room’ to move without pushing itself off the wall. This attention to detail is how you achieve effortless storage solutions for a tidy, stylish home that look original to the architecture.
The Future of Scribing is Digital
I am starting to see more pros move toward Lidar-based scanning apps on their phones to create digital templates. While it is an incredible piece of tech for maximizing space with innovative built-in solutions in complex rooms, I still believe a physical scribe is more reliable for the average DIYer. There is something about the tactile feedback of a pencil on wood that Lidar just hasn’t perfected for 1/16th-inch accuracy yet. My advice? Stick to the manual method for now but keep an eye on those apps as the sensors improve. If you really want to level up your game today, try this advanced tip: apply a strip of blue painter’s tape to your filler piece before you scribe. The dark pencil line will pop against the blue tape, making it much easier to follow with your jigsaw blade in a dimly lit corner.
Hard-Won Secrets from the Dusty Side of the Shop
Looking back at that walnut library project, I realized that the hardest lesson wasn’t the cut itself; it was the prep work. First, always scribe with the lighting in the room where the piece will live. Shadows play tricks on your eyes, and a line that looks perfect in the workshop might be invisible in a dimly lit hallway. Second, never trust a ‘straight’ factory edge. Even new lumber can have a slight bow, so check your filler strip against a level before you ever touch it to the wall. Finally, remember that your scribe is a one-shot deal. If you cut too much, you can’t put the wood back. I’ve learned to leave the line when I cut and then sand down to it. This patience is what ensures creative built-ins for seamless storage look like they were built into the foundation of the house.
My Go-To Gear for a Perfect Fit
If you want to move from ‘good enough’ to ‘master class,’ you need the right support. I personally rely on the FastCap AccuScribe Pro because its articulating head handles the radius of a bullnose corner better than anything else on the market. For the finish work, I keep a stack of rigid cork sanding blocks; their grip prevents hand fatigue during those long sessions of ‘sneaking up’ on the fit. I also highly recommend the ‘Architectural Woodwork Standards’ by the AWI. It is essentially the bible of our industry and helps you understand the technical tolerances for professional-grade built-in storage ideas to declutter projects. Finally, don’t overlook a good headlamp. Scribing is all about seeing the gap, and localized light is your best friend. #IMAGE_PLACEHOLDER_E#
The Satisfaction of a Gap-Free Home
There is a specific kind of quiet confidence that comes from looking at a cabinet and seeing zero daylight between the wood and the wall. It transforms a house into a custom home. While the process of scribing against bullnose corners is meticulous and sometimes frustrating, it is the highest form of respect you can show your craft. Whether you are following a step-by-step guide to vanity installation or maximizing space with innovative built-in solutions, these techniques will elevate your work from a DIY project to a legacy piece. Don’t be afraid of the curves; they are just an opportunity to prove how good you really are. Have you ever tried to hide a massive gap with a thick bead of caulk only to have it crack a month later? Let me know your best (or worst) scribing stories in the comments below!