

I remember the sound of fifty cans of tomato soup shifting all at once. It wasn’t a simple clink; it was a low, structural groan that made my stomach drop. I had just finished installing this massive, floor-to-ceiling pull-out pantry for a client. It looked like a million bucks—sleek, hidden, and perfectly flush. Then, I pulled the handle. The whole unit lurched forward like a drunk sailor on a rolling deck. For a split second, I genuinely thought the entire cabinet was going to face-plant into the kitchen island. That was my first real lesson in the terrifying power of leverage and the absolute necessity of anchoring things properly. [image placeholder]
The physics of a loaded pantry will surprise you
When you extend a slide-out unit packed with flour bags, heavy cans, and glass jars, you aren’t just moving weight; you are creating a massive lever. Without the right hardware, you’re basically asking your subfloor to hold onto a giant pry bar. I’ve spent years helping folks figure out [how to fix loose pull-out pantry tracks](https://customcabinetrypro.com/how-to-fix-loose-pull-out-pantry-tracks-2), but often the track isn’t the primary failure point—it’s the anchor itself ripping right out of the wood. It’s a common disaster I see when people try to use standard #8 wood screws for a job that requires serious steel. I made that exact mistake early in my career, trusting a few thin screws into a 3/4-inch plywood subfloor. By the six-month mark, the holes were wallowed out and the unit was a safety hazard. If you’ve ever dealt with [why your kitchen pantry door is drooping](https://customcabinetrypro.com/why-your-kitchen-pantry-door-is-drooping-2), you already know that weight eventually wins if the foundation is weak.
Is this extra hardware actually worth the effort?
People ask me this all the time. They want to know if they can just ‘wing it’ with whatever screws they have in the junk drawer. The short answer is no. According to structural load data from the National Kitchen & Bath Association, a fully extended pantry can exert a dynamic force nearly three times its static weight. That is a lot of torque pulling on your floor. Today, I’m going to show you exactly how to stop that movement before it starts. We are diving into the world of [4 heavy-duty floor anchors for sliding pantry systems](https://customcabinetrypro.com/4-heavy-duty-floor-anchors-for-sliding-pantry-systems) that I trust in my own home and my clients’ projects. Have you ever felt that terrifying ‘tip’ when opening a heavy drawer or cabinet too far? It’s a wake-up call that your storage solutions need a more permanent connection to the house itself. Let’s make sure your pantry stays exactly where it belongs.
Go Beyond the Standard Wood Screw
To stop a pantry from tipping, you have to think like a ship’s captain anchoring in a storm. A standard screw into a bit of plywood is just a suggestion to the wood; a heavy-duty anchor is a command. When you pull that pantry handle, the bottom track wants to skid across the floor while the top wants to dive forward. I once worked on a kitchen in a 1920s farmhouse where the homeowner had used drywall anchors for a pull-out spice rack. By the time I arrived, the wall looked like it had been hit by a hammer. We had to pivot and use [the floor bolt hack for stable island cabinetry](https://customcabinetrypro.com/the-floor-bolt-hack-for-stable-island-cabinetry-3) to give the base the structural integrity it lacked. The secret is to bypass the decorative flooring and bite directly into the subfloor or the joists below. If you are working with a wooden subfloor, you aren’t just looking for wood; you are looking for mass. 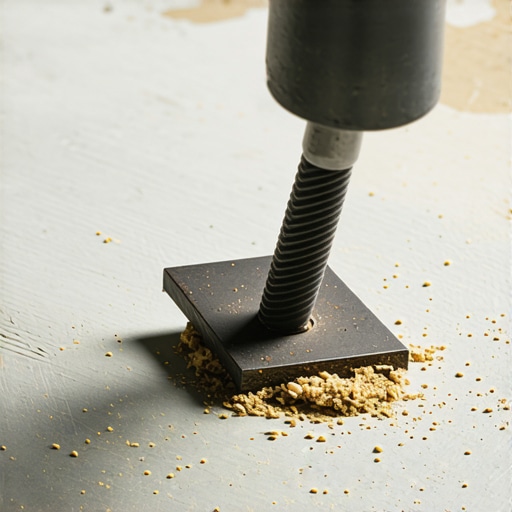
Find the Structural Joist or Hit the Slab
You cannot trust a 3/4-inch piece of OSB to hold 200 pounds of shifting weight. It is like trying to nail a tent to a pile of leaves. You need to locate the floor joists using a deep-scan stud finder or by checking the nail patterns in the subfloor. Once you find that solid timber, you should be using heavy-duty lags. This is the same principle I use when I show clients [how to anchor mudroom benches to subfloors](https://customcabinetrypro.com/how-to-anchor-mudroom-benches-to-subfloors) to prevent them from rocking. If you miss the joist, you are just spinning metal in soft air. I remember a job in a high-rise where we hit a steel plate—I had to swap my entire strategy on the fly because my standard bits were melting. It taught me to always have a backup plan for the floor’s hidden surprises.
The Wedge Anchor Secret for Concrete Floors
If your kitchen is on a slab, wood screws are useless. You need to step up to concrete wedge anchors or Tapcons. Think of a wedge anchor as a mechanical root that expands as you tighten it. It creates a permanent bond that won’t wiggle loose over time. I use [the concrete wedge anchor move for heavy garage racks](https://customcabinetrypro.com/the-concrete-wedge-anchor-move-for-heavy-garage-racks-2) when the pantry system is exceptionally tall or deep. You drill your pilot hole, vacuum out the dust—and this part is crucial because dust acts like a lubricant that helps the anchor slip—and then hammer the sleeve home.
Use a Staggered Lag Bolt Pattern for Grip
Don’t just drive three screws in a straight line. That creates a perforated line in the wood, making it easier for the wood to split and the whole track to rip out. Instead, use a staggered pattern. This distributes the tension across more wood fibers, significantly increasing the ‘pull-out’ resistance. I learned this while researching [the lag bolt pattern for heavy tool chest anchoring](https://customcabinetrypro.com/the-lag-bolt-pattern-for-heavy-tool-chest-anchoring) in my own workshop. By offsetting the bolts by just half an inch, you create a much wider footprint of stability. For systems that run floor-to-ceiling, you might also need to consider [the heavy-duty rail move for sliding pantry walls](https://customcabinetrypro.com/the-heavy-duty-rail-move-for-sliding-pantry-walls) to ensure the top and bottom are working in perfect synchronization.A common misconception I hear in the workshop is that if a cabinet is ‘level,’ the job is done. In my experience, leveling is only half the battle, and honestly, it is the easier half. You can have a perfectly level pantry or vanity that still fails within a year because it wasn’t ‘square’ or ‘plumb.’ When you force a cabinet to sit level on a wonky floor without properly shimming the carcass, you are essentially twisting the box. This internal torque is the silent killer of high-end hardware. It is the reason [why your soft-close hinges are snapping](https://customcabinetrypro.com/why-your-soft-close-hinges-are-snapping-2) and why those expensive drawers start to stick. If the box is twisted, the hardware has to fight against the frame every time it moves.
Can your wall studs actually handle the weight of a floating vanity?
This is the question that keeps professional installers up at night. Most DIYers assume that two or three wood screws into a stud are enough to hold a modern bathroom setup. However, when you add a heavy stone top and a basin full of water, you are looking at hundreds of pounds of cantilevered pressure. According to the American Institute of Building Design, the sheer force exerted on those fasteners can easily exceed the withdrawal capacity of standard framing if not reinforced. This is exactly why I advocate for [the steel plate move for drywall mounted floating vanities](https://customcabinetrypro.com/the-steel-plate-move-for-drywall-mounted-floating-vanities) to distribute that load across a much wider surface area. Without that hidden support, you aren’t just risking a tilted sink; you’re risking a catastrophic wall failure. 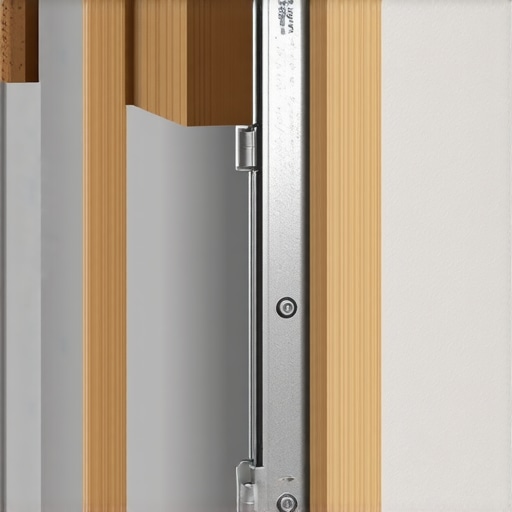
The Hidden Moisture Trap Behind Your Built-ins
One ‘oops’ factor that even seasoned contractors miss is the ‘dew point’ trap. When you install [creative built-ins for seamless storage and home aesthetics](https://customcabinetrypro.com/creative-built-ins-for-seamless-storage-and-home-aesthetics) directly against an uninsulated exterior wall, you’re creating a micro-climate. The gap between the cold wall and the warm cabinet back becomes a breeding ground for condensation. I’ve seen beautiful [custom vanities and top storage ideas for 2025](https://customcabinetrypro.com/transform-your-bedroom-with-custom-vanities-top-storage-ideas-for-2025) ruined by mold because nobody followed [the moisture barrier rule for cabinets on cold outer walls](https://customcabinetrypro.com/the-moisture-barrier-rule-for-cabinets-on-cold-outer-walls). It’s a nuance that separates a ‘pretty’ installation from a ‘permanent’ one. For bathrooms, this is even more critical. If you are aiming for a [flawless vanity installation](https://customcabinetrypro.com/expert-guide-to-flawless-vanity-installation-tricks-tips), you must ensure there’s a thermal break or adequate airflow behind the unit.
Why ‘More Screws’ is Often the Wrong Answer
Many people try to overcompensate for a shaky unit by driving twenty screws into the frame. This is a mistake. Wood is a natural material that needs to breathe, expand, and contract. If you pin a large built-in too rigidly to both the floor and the wall without allowing for seasonal movement, the wood will eventually crack or the joints will pull apart. This is especially true for [innovative built-in solutions for small rooms](https://customcabinetrypro.com/maximizing-space-innovative-built-in-solutions-for-small-rooms) where tolerances are tight. Instead of more screws, focus on strategic anchoring. For instance, using [the hidden sub-frame move for supporting massive quartz top vanities 4](https://customcabinetrypro.com/the-hidden-sub-frame-move-for-supporting-massive-quartz-top-vanities-4) provides the necessary rigidity without suffocating the cabinetry. Have you ever fallen into the trap of over-fastening only to see a seam pop six months later? Let me know in the comments below, and let’s troubleshoot those structural headaches together.I’ve learned the hard way that a job isn’t done when the last screw goes in. It’s done when you’ve set yourself—or your client—up for a decade of silence. You know that silence: the absence of scraping, clicking, or groaning from a heavy drawer. To get there, you need to transition from the ‘rough-in’ mindset to the ‘precision’ mindset. One tool I never walk onto a job site without is a self-centering drill bit, often called a Vix bit. If your hinge screws are even a millimeter off-center, they will pull the entire door out of alignment as they tighten. I’ve seen people waste hours on why your drawer slides bind and the simple realignment when the root cause was just a slightly tilted screw head in the runner.
The Three Tools I Never Leave the Shop Without
For anything involving built-ins or vanities, a standard bubble level is just a starting point. I rely heavily on a 360-degree green-beam laser level. It allows me to see the ‘run’ of the entire room at once, catching floor slopes that would make a pantry lean long before I start drilling. This is one of those vanity installation hacks that save time and money because it eliminates the guesswork of shimming. Secondly, I always keep a bottle of high-grade PTFE-based lubricant. Modern soft-close hardware is amazing, but it hates construction dust. A quick wipe-down and a tiny drop of lubricant on the tracks after the project is finished ensures the mechanics don’t grind themselves to death in the first month. 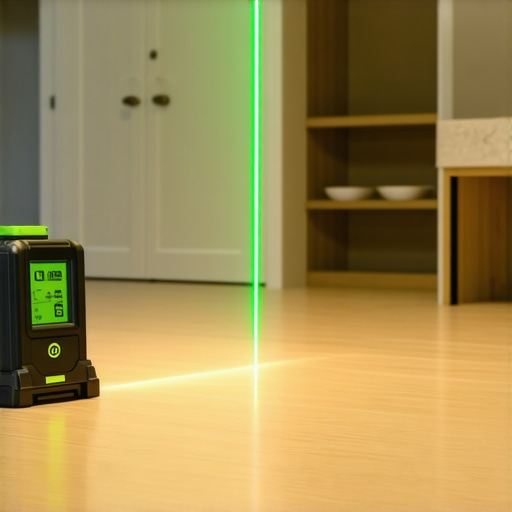
How do I keep my custom built-ins looking new for decades?
The secret is the ‘six-month tune-up.’ Houses breathe; they settle in the winter and swell in the summer. According to Blum’s technical specifications, their high-end hinges are tested for 200,000 opening and closing cycles, but that rating assumes a perfectly square installation. I always tell my clients to check their door gaps after the first change of seasons. A half-turn on a hinge adjustment screw can prevent the finish from rubbing off the face frame. This proactive approach is a cornerstone of top trends in vanity designs you need to know in 2025, where durability is becoming just as trendy as the aesthetic itself.
Where Heavy Storage is Heading Next
Looking ahead, I see a massive shift toward modularity within fixed built-ins. We are moving away from static shelves and toward internal ‘skeleton’ systems that allow you to swap a hanging rod for a bank of drawers without re-drilling the carcass. This is especially vital for maximizing space with innovative built-in solutions for small rooms. If you’re currently struggling with a unit that feels like it’s fighting you every time you open it, I highly recommend performing a ‘load test’ to see if your tracks are actually rated for what you’re storing. Don’t wait for a failure to happen. If you’re unsure about your hardware’s capacity, reach out through our contact us page, and let’s get those shelves reinforced properly.
The Lessons I Learned While Cleaning Up Cabinet Disasters
I’ve spent decades in workshops, and if there is one thing I’ve realized, it’s that the most expensive wood in the world won’t save a poorly anchored cabinet. I used to think I could out-engineer gravity with just ‘extra’ fasteners, but gravity is patient and persistent. These days, I approach every project—from a simple shelf to complex built-in storage ideas to declutter and enhance your home—with the knowledge that the house is a living, moving thing. One big ‘aha’ moment for me was realizing that weight ratings are usually based on a perfect world, not a real kitchen where kids might hang from a drawer handle or a heavy mixer is slammed onto a pull-out tray. Always over-spec your hardware by at least 50% if you want true peace of mind. I’ve also learned that ‘good enough’ screws in the subfloor usually lead to a service call in eighteen months; spending the extra five dollars on structural lags is the cheapest insurance you can buy.
Gear That Actually Makes These Projects Last
When I’m planning out effortless storage solutions for a tidy stylish home, I never start without a 360-degree green laser level. It catches the subtle floor dips and wall bows that a standard bubble level misses entirely, allowing you to shim perfectly before the first anchor is driven. I also swear by self-centering Vix bits; they are the only way to ensure your hinge screws don’t pull your doors crooked during the final tighten. For those working on smart storage solutions to optimize small bathroom spaces, I highly recommend keeping a high-grade PTFE lubricant on hand for the slides. Most modern hardware comes with a factory coating, but a tiny extra bit of protection against bathroom humidity ensures the mechanics never grind or seize up over time.
Build Something That Doesn’t Squeak for a Decade
Getting the structural foundation right today means you won’t be back here with a screwdriver and a wood-filler kit in two years. Whether you are choosing the perfect vanity style for your bedroom or bath or bracing a massive floor-to-ceiling pantry, take that extra twenty minutes to hit the joists or prep your concrete anchors properly. Your future self will thank you for the silence of a perfectly functioning home and the security of knowing your cabinetry is a permanent part of the architecture, not just a guest in the room. Have you ever had a cabinet or heavy drawer start to lean or sag after you thought it was perfectly installed? Let me know in the comments below, and let’s figure out how to lock it down for good.